
WooCommerce Plugin
Accept gasless, non-custodial stablecoin payments in your WooCommerce store with the official SoloPay for WooCommerce plugin. No code is required, funds settle directly to your own wallet, and customers pay no gas fees.
What You Get
- Accept ERC-20 stablecoin payments at WooCommerce checkout
- Zero gas fees for customers (sponsored by SoloPay)
- Instant, non-custodial settlement straight to your merchant wallet
- Works on desktop (popup) and mobile (redirect)
- Server-side payment verification and automatic order completion
- Compatible with WooCommerce Blocks and the classic checkout
Requirements
- WordPress 6.0 or later
- WooCommerce 7.0 or later
- PHP 8.1 or later
- A SoloPay merchant account with issued credentials
Step 1: Get Your Credentials
From the SoloPay Merchant Dashboard, collect the four values you will paste into the plugin:
| Credential | Format | Where it is used |
|---|---|---|
| Public Key | pk_live_xxx | Initializes the widget on the payment page |
| Webhook Secret | whsec_xxx | Verifies the HMAC signature of incoming webhooks |
| Merchant API Key | x-api-key | Server-side verification of the paid amount and status |
| Token Address | 0x... | The ERC-20 token contract you accept (e.g. USDC) |
Keep secrets private
The Webhook Secret and Merchant API Key are secrets. Only enter them in the plugin settings, never expose them in client-side code or public repositories.
Step 2: Install the Plugin
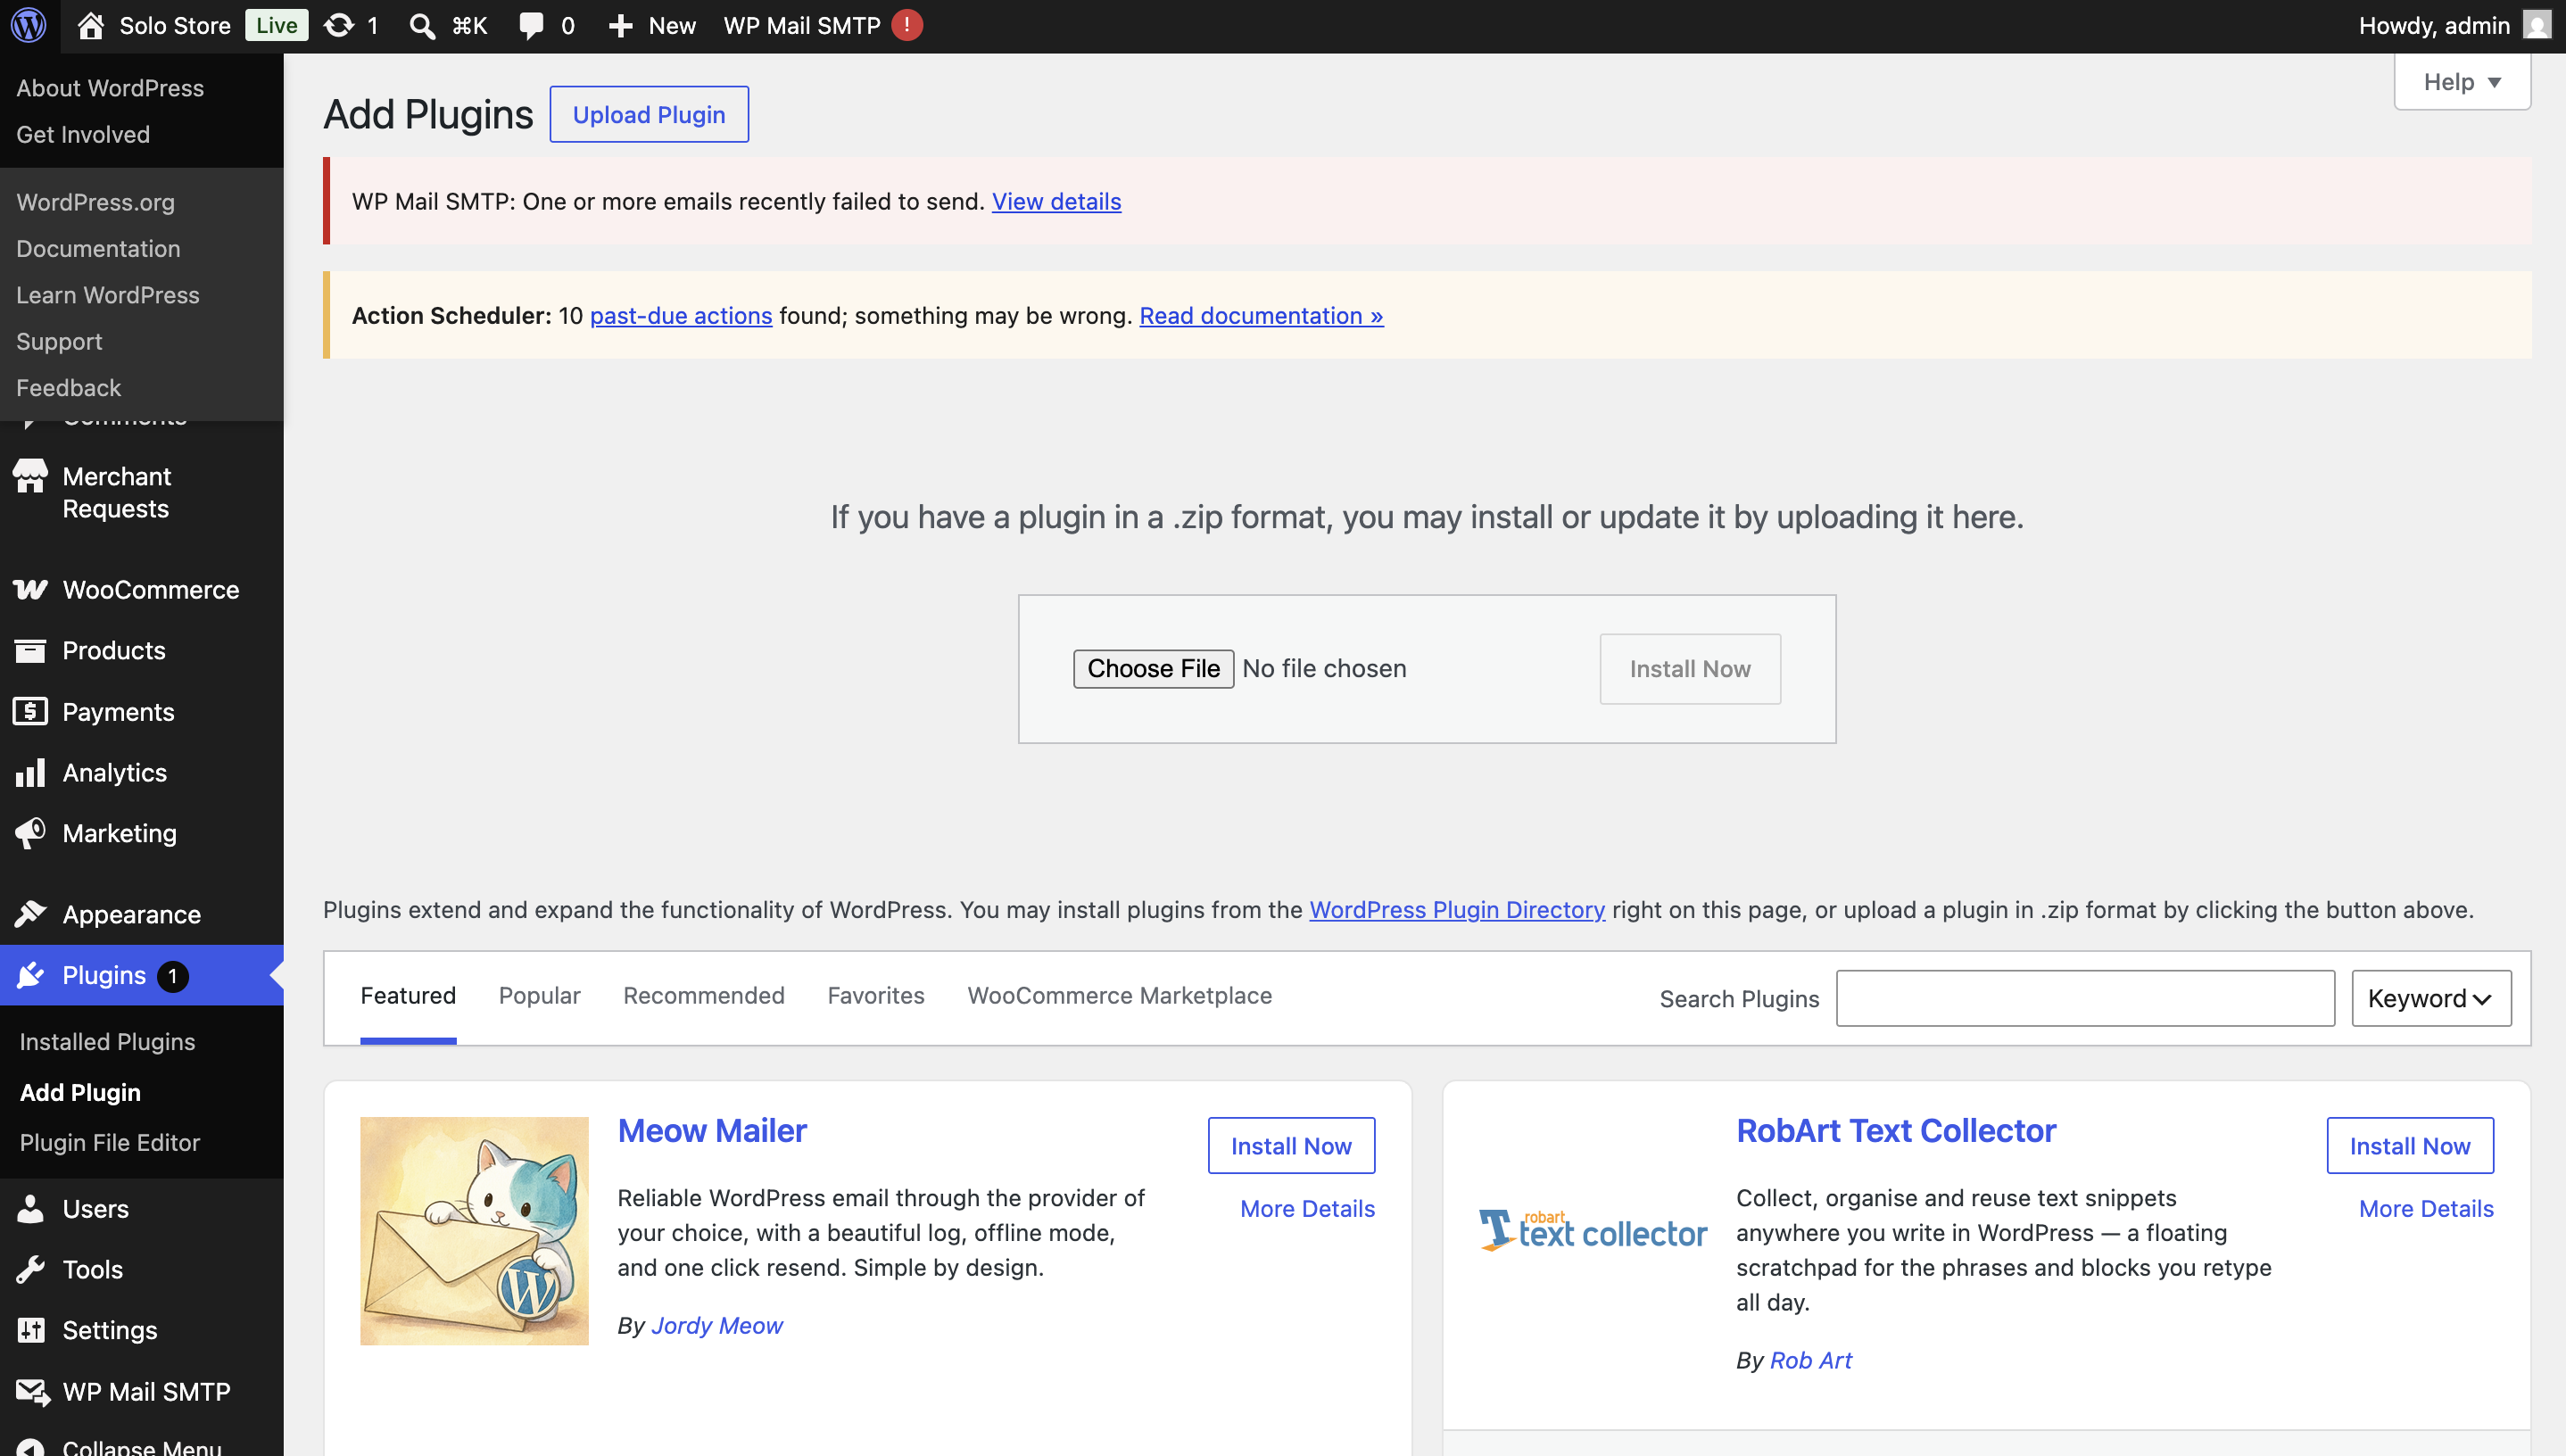
- Download
solopay-woocommerce.zipfrom the SoloPay integrations page. - In WordPress, go to Plugins → Add New → Upload Plugin.
- Choose the downloaded ZIP and click Install Now, then Activate.
Step 3: Enable and Configure SoloPay
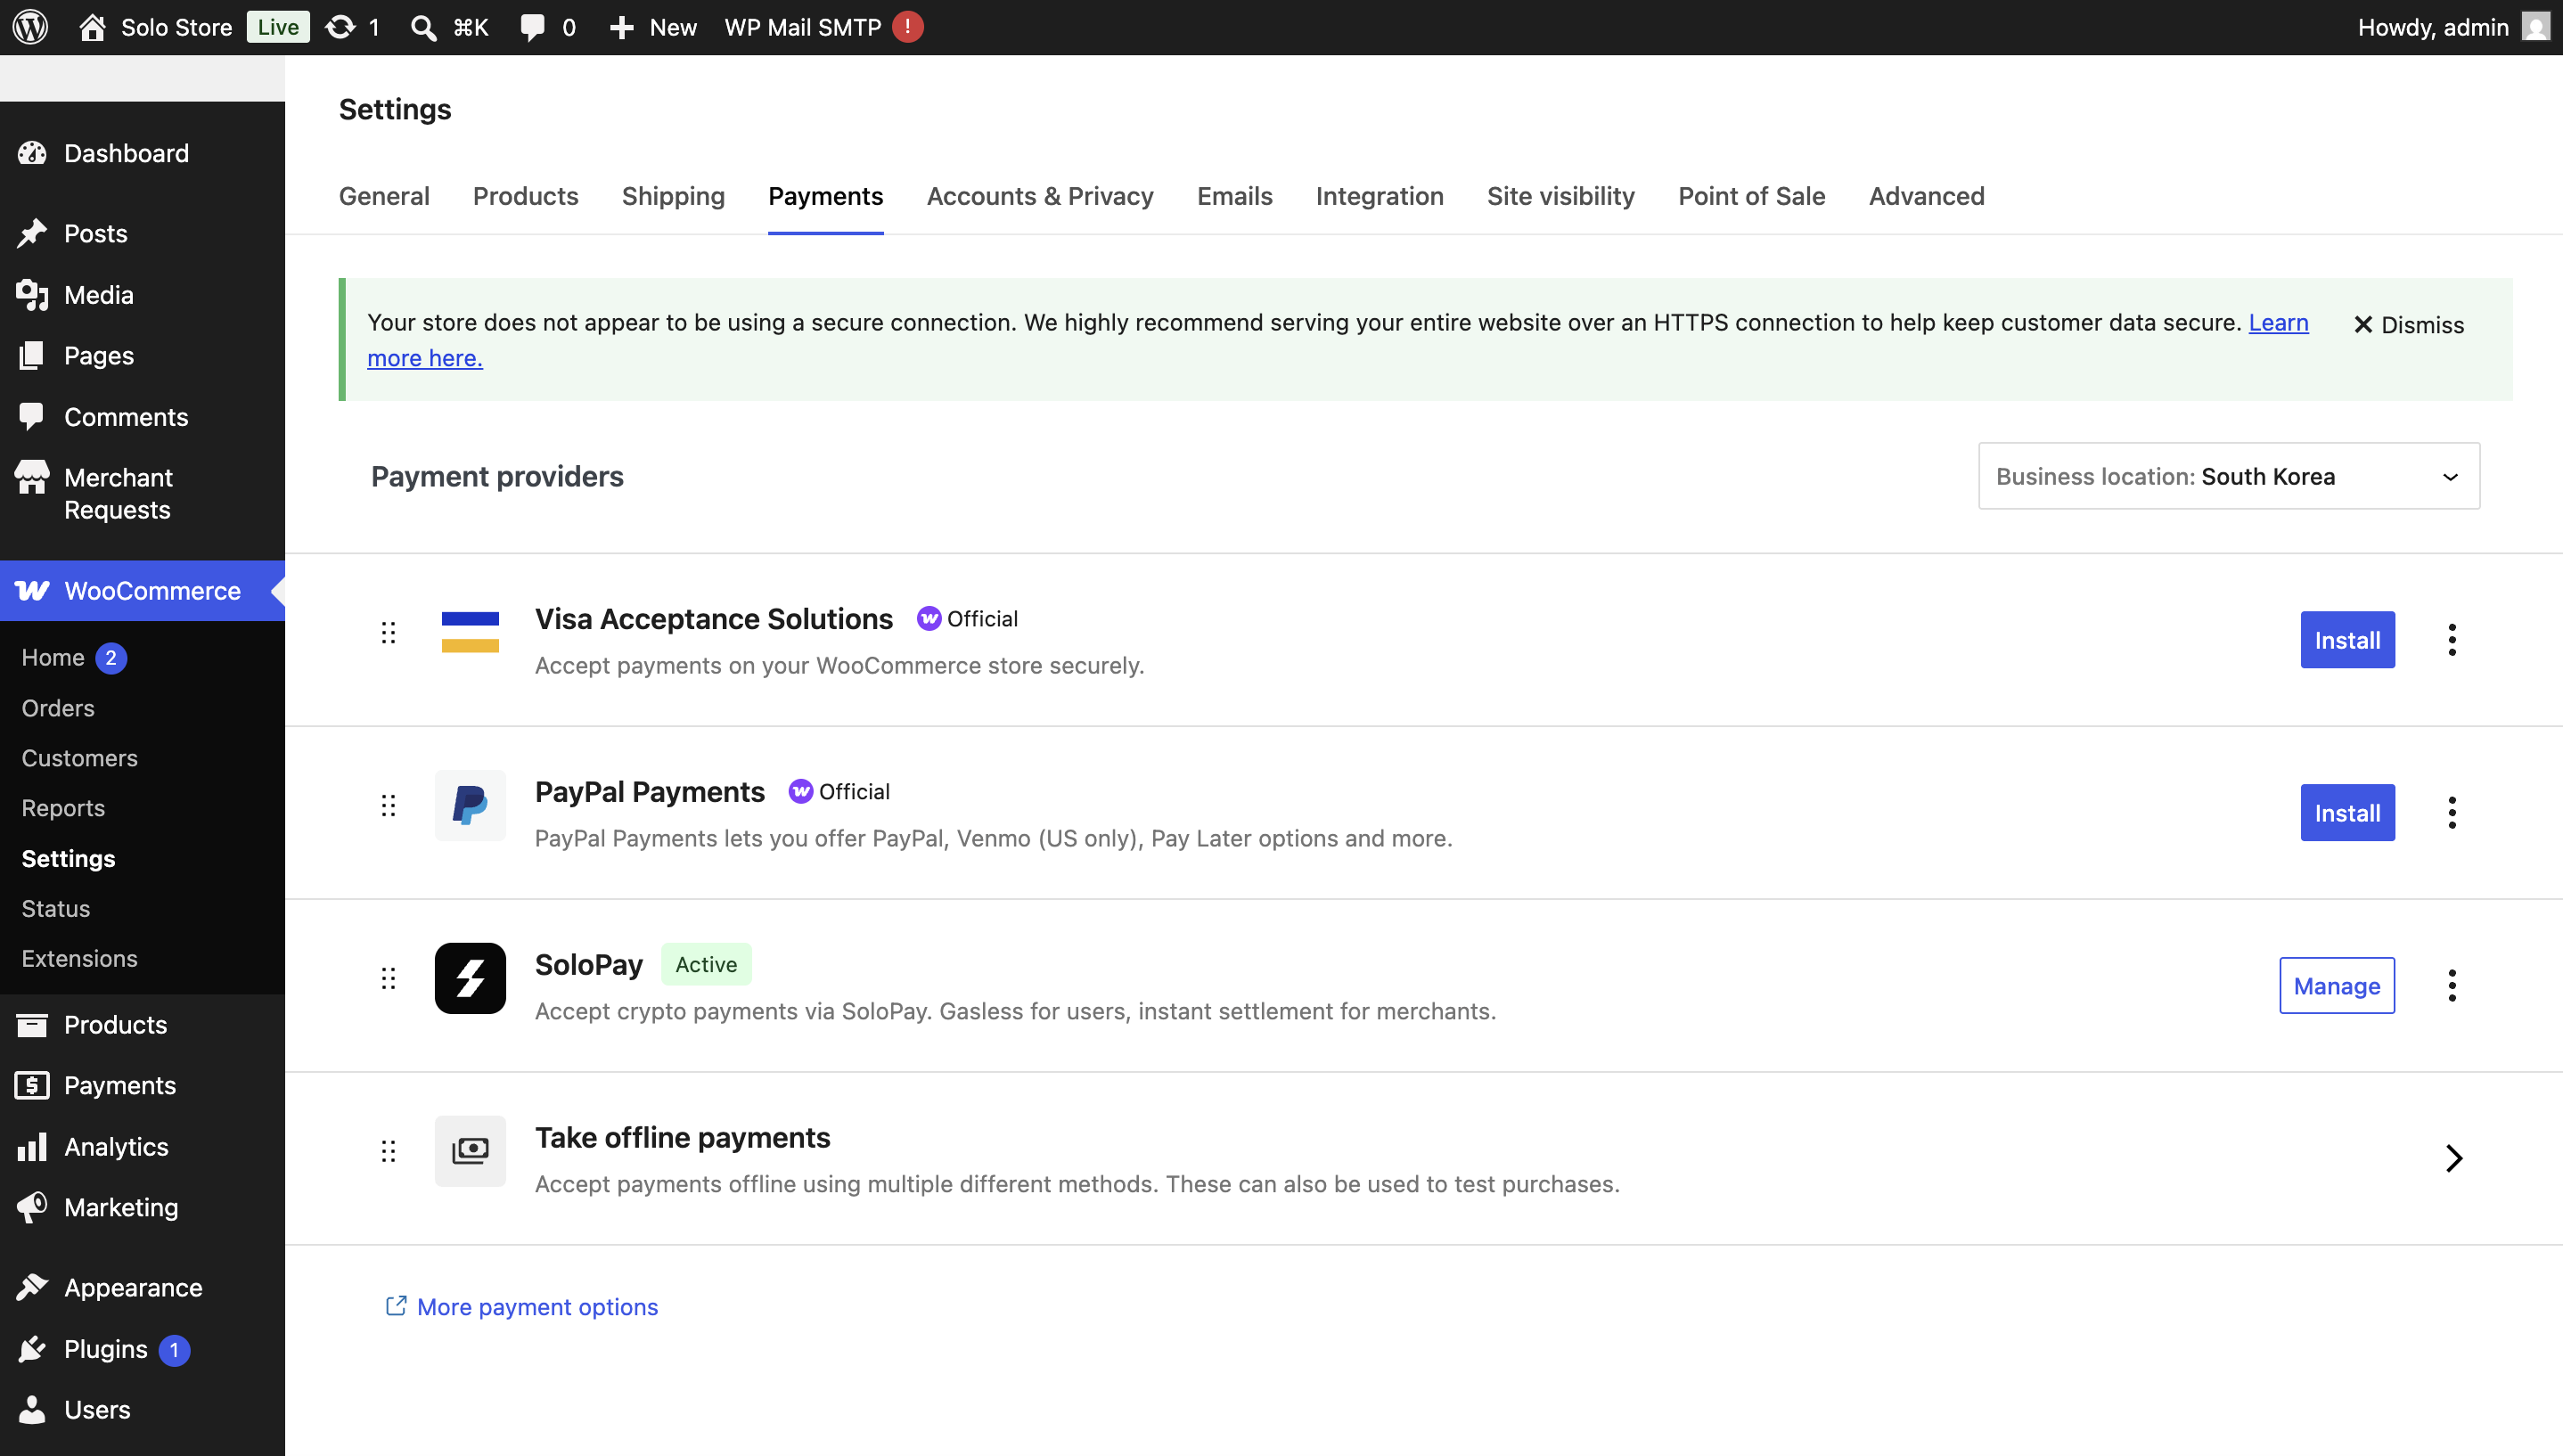
- Go to WooCommerce → Settings → Payments.
- Enable SoloPay, then click Manage (or Set up).
- Fill in the settings fields:
| Field | Description |
|---|---|
| Enable/Disable | Turns the SoloPay payment method on at checkout |
| Title | The name shown to customers at checkout (e.g. "Pay with stablecoin") |
| Description | Short text shown under the title at checkout |
| Public Key | Your pk_live_xxx key |
| Webhook Secret | Your whsec_xxx secret |
| Merchant API Key | Your x-api-key (used server-side to verify payments) |
| Webhook URL | Auto-generated, read-only. Copy this for Step 4 |
| Token Address | The ERC-20 contract address you accept (required) |
| Debug Log | Optional. Writes diagnostic logs to WooCommerce → Status → Logs |
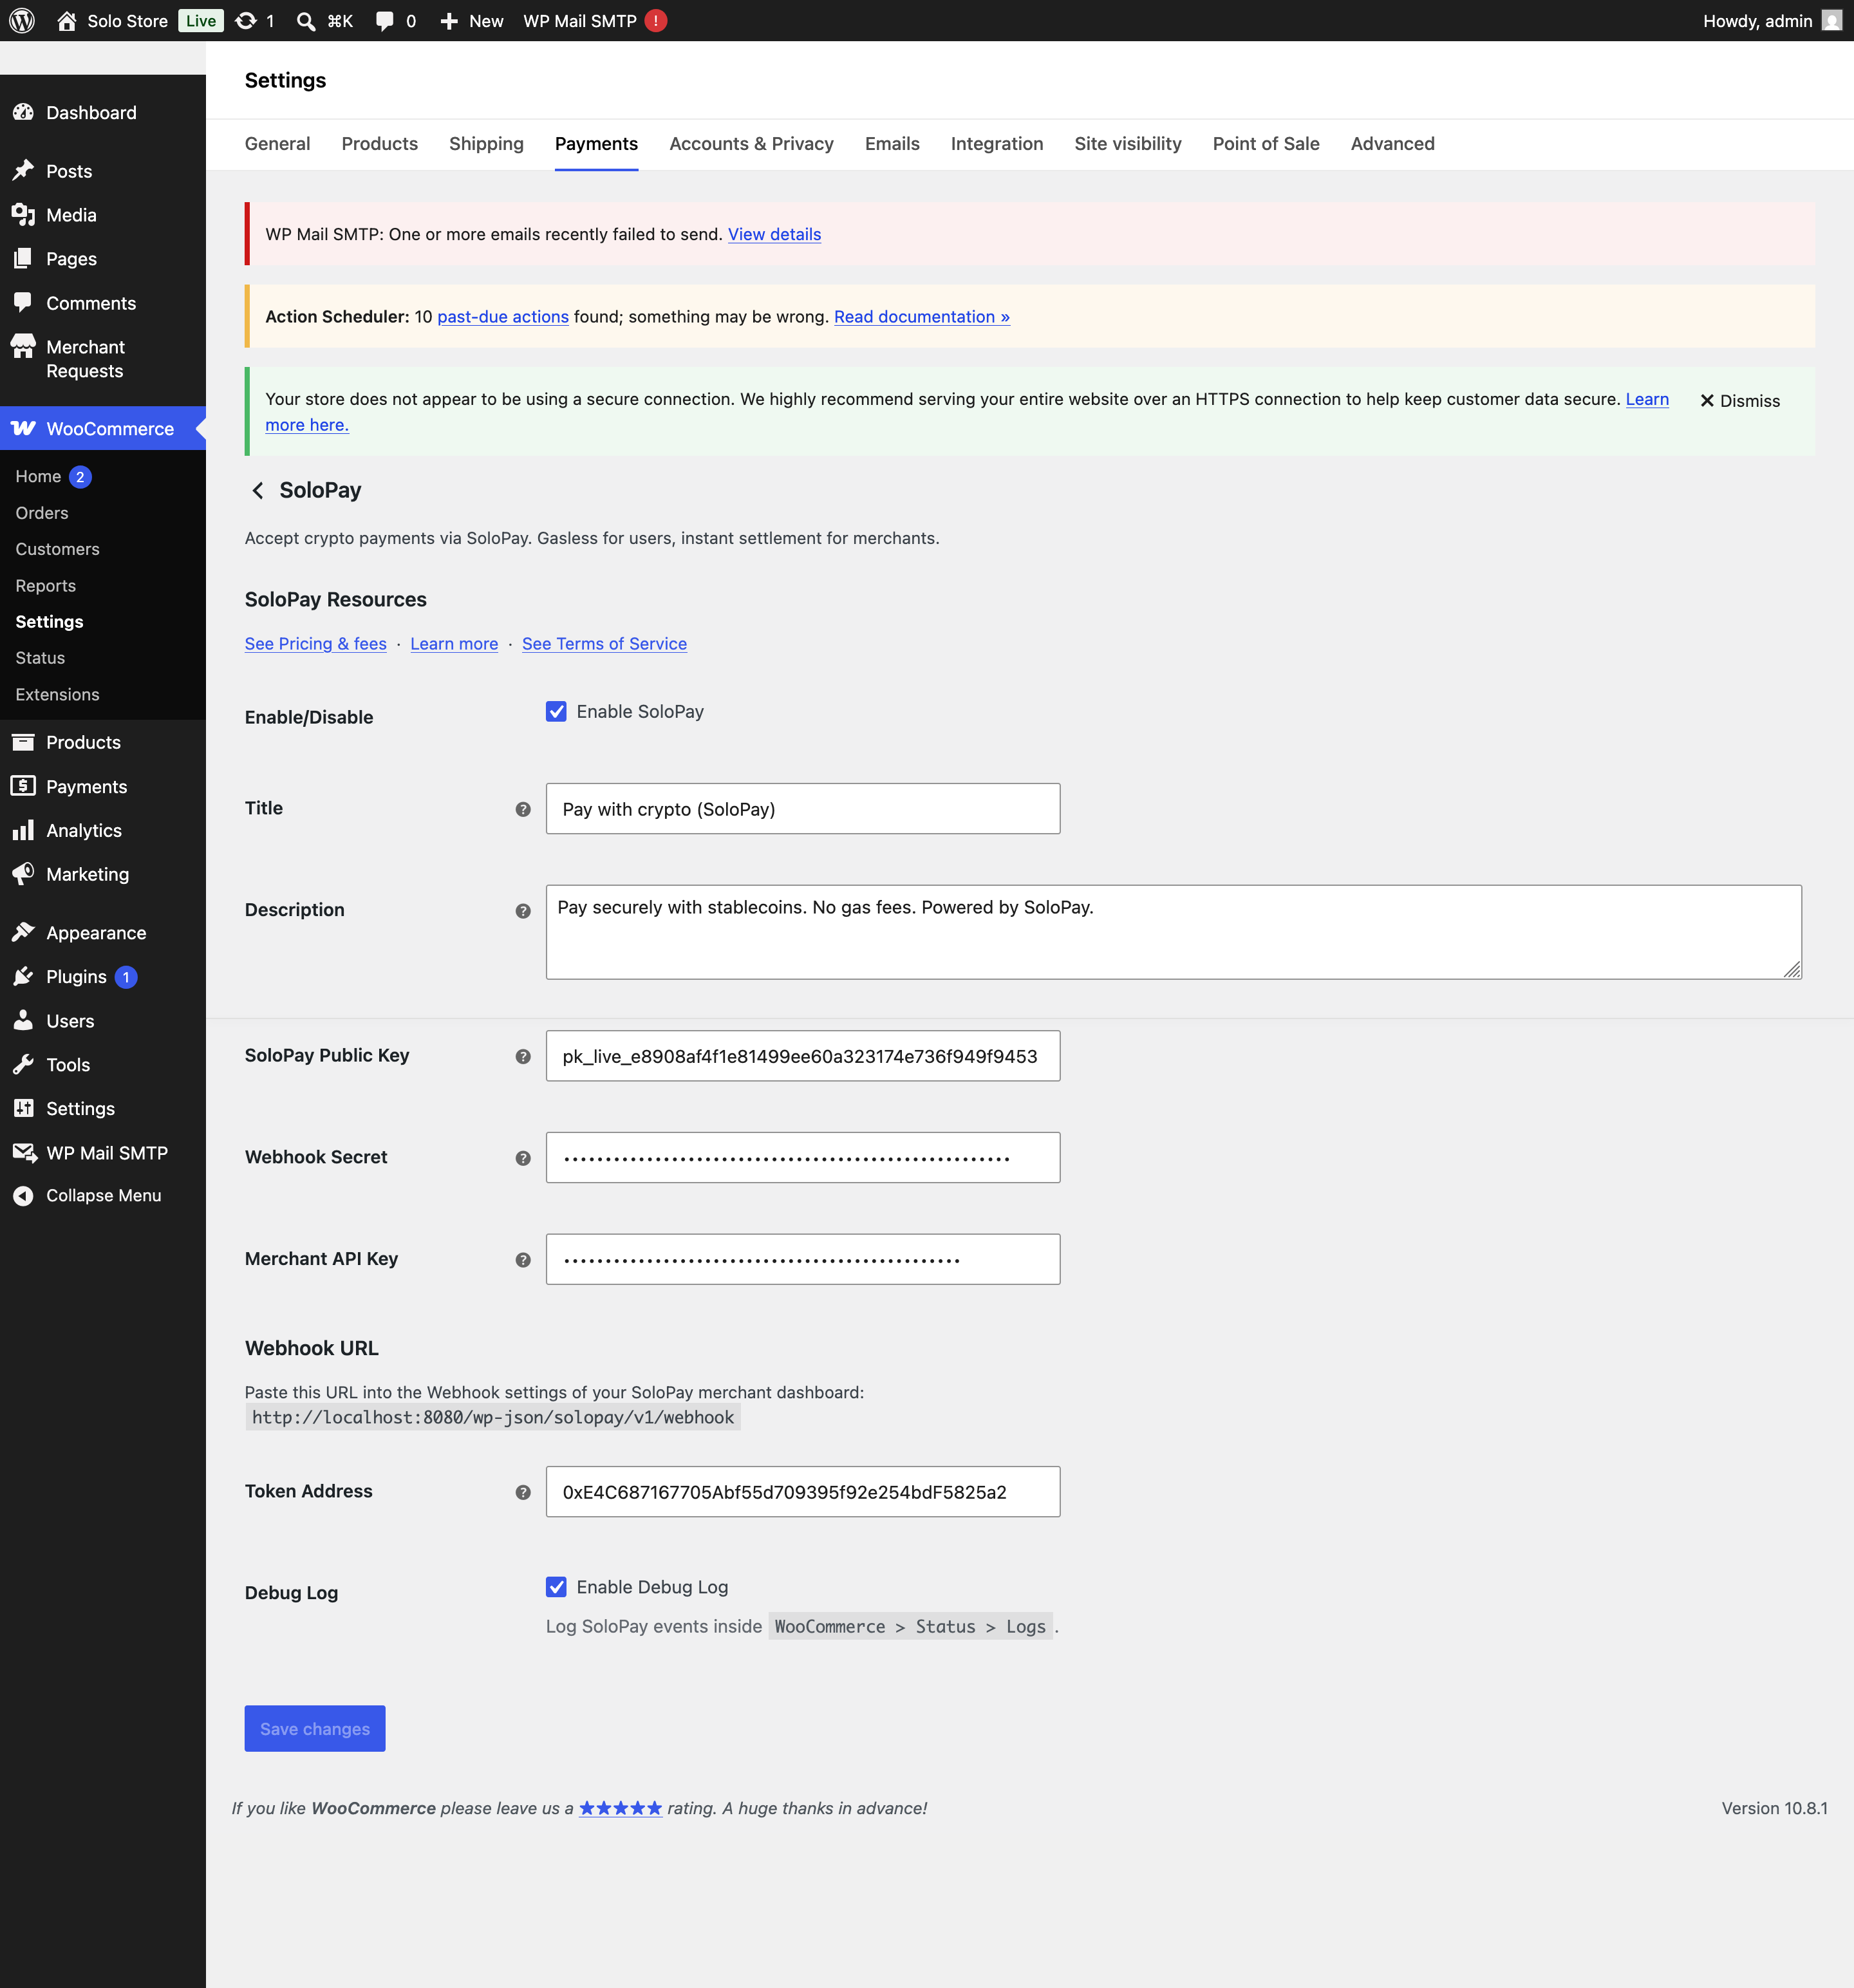
- Click Save changes.
Step 4: Set Up the Webhook
The webhook is how SoloPay reliably notifies your store when a payment is confirmed on-chain, even if the customer closes their browser before returning.
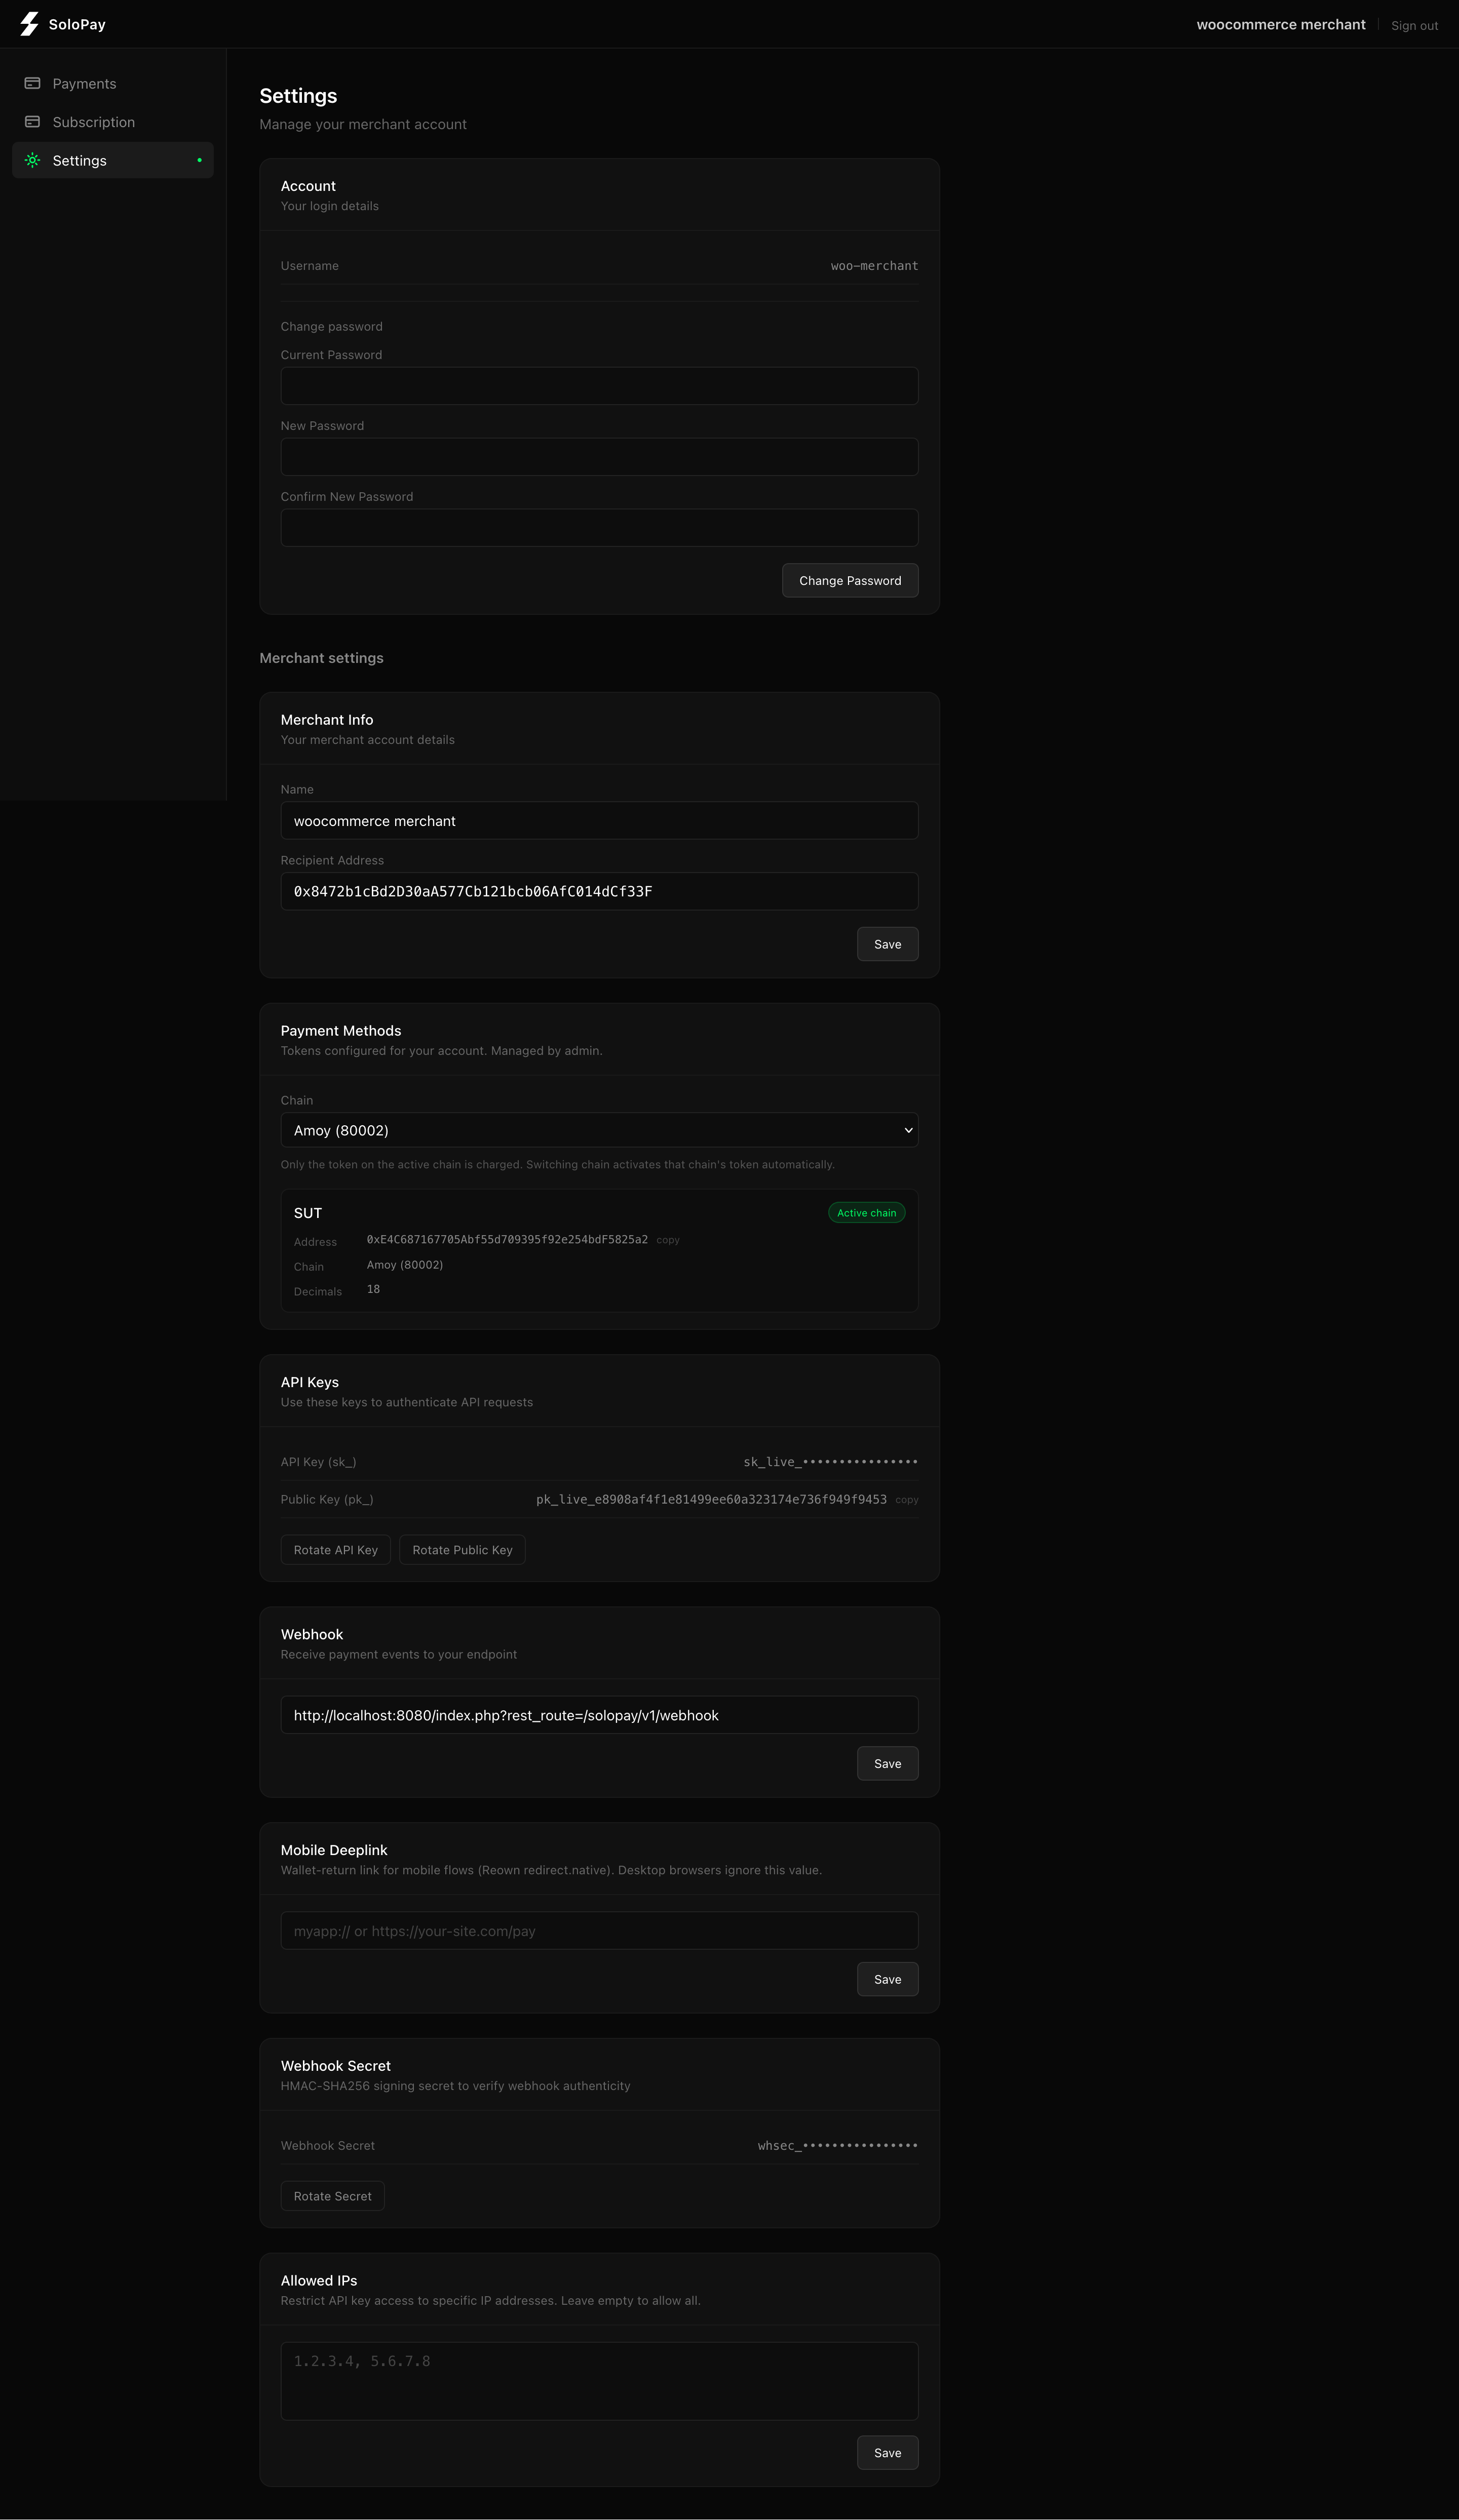
- In the plugin settings, copy the value from the Webhook URL field.
- Open the SoloPay Merchant Dashboard → Settings → Webhooks and paste that URL.
- Confirm the Webhook Secret and Merchant API Key in the plugin settings match your dashboard, then save.
The webhook must be reachable
On a live store the webhook URL must be publicly reachable. During local development the webhook usually cannot reach localhost, so the plugin also completes orders through the signed return URL (see How completion works). To receive the webhook locally, expose your store with a tunnel such as ngrok or cloudflared.
The Webhook URL adapts to your permalink settings:
- Pretty permalinks:
https://yourstore.com/wp-json/solopay/v1/webhook - Plain permalinks:
https://yourstore.com/?rest_route=/solopay/v1/webhook
Always use the exact value shown in the plugin, do not type it by hand.
Step 5: Test a Payment
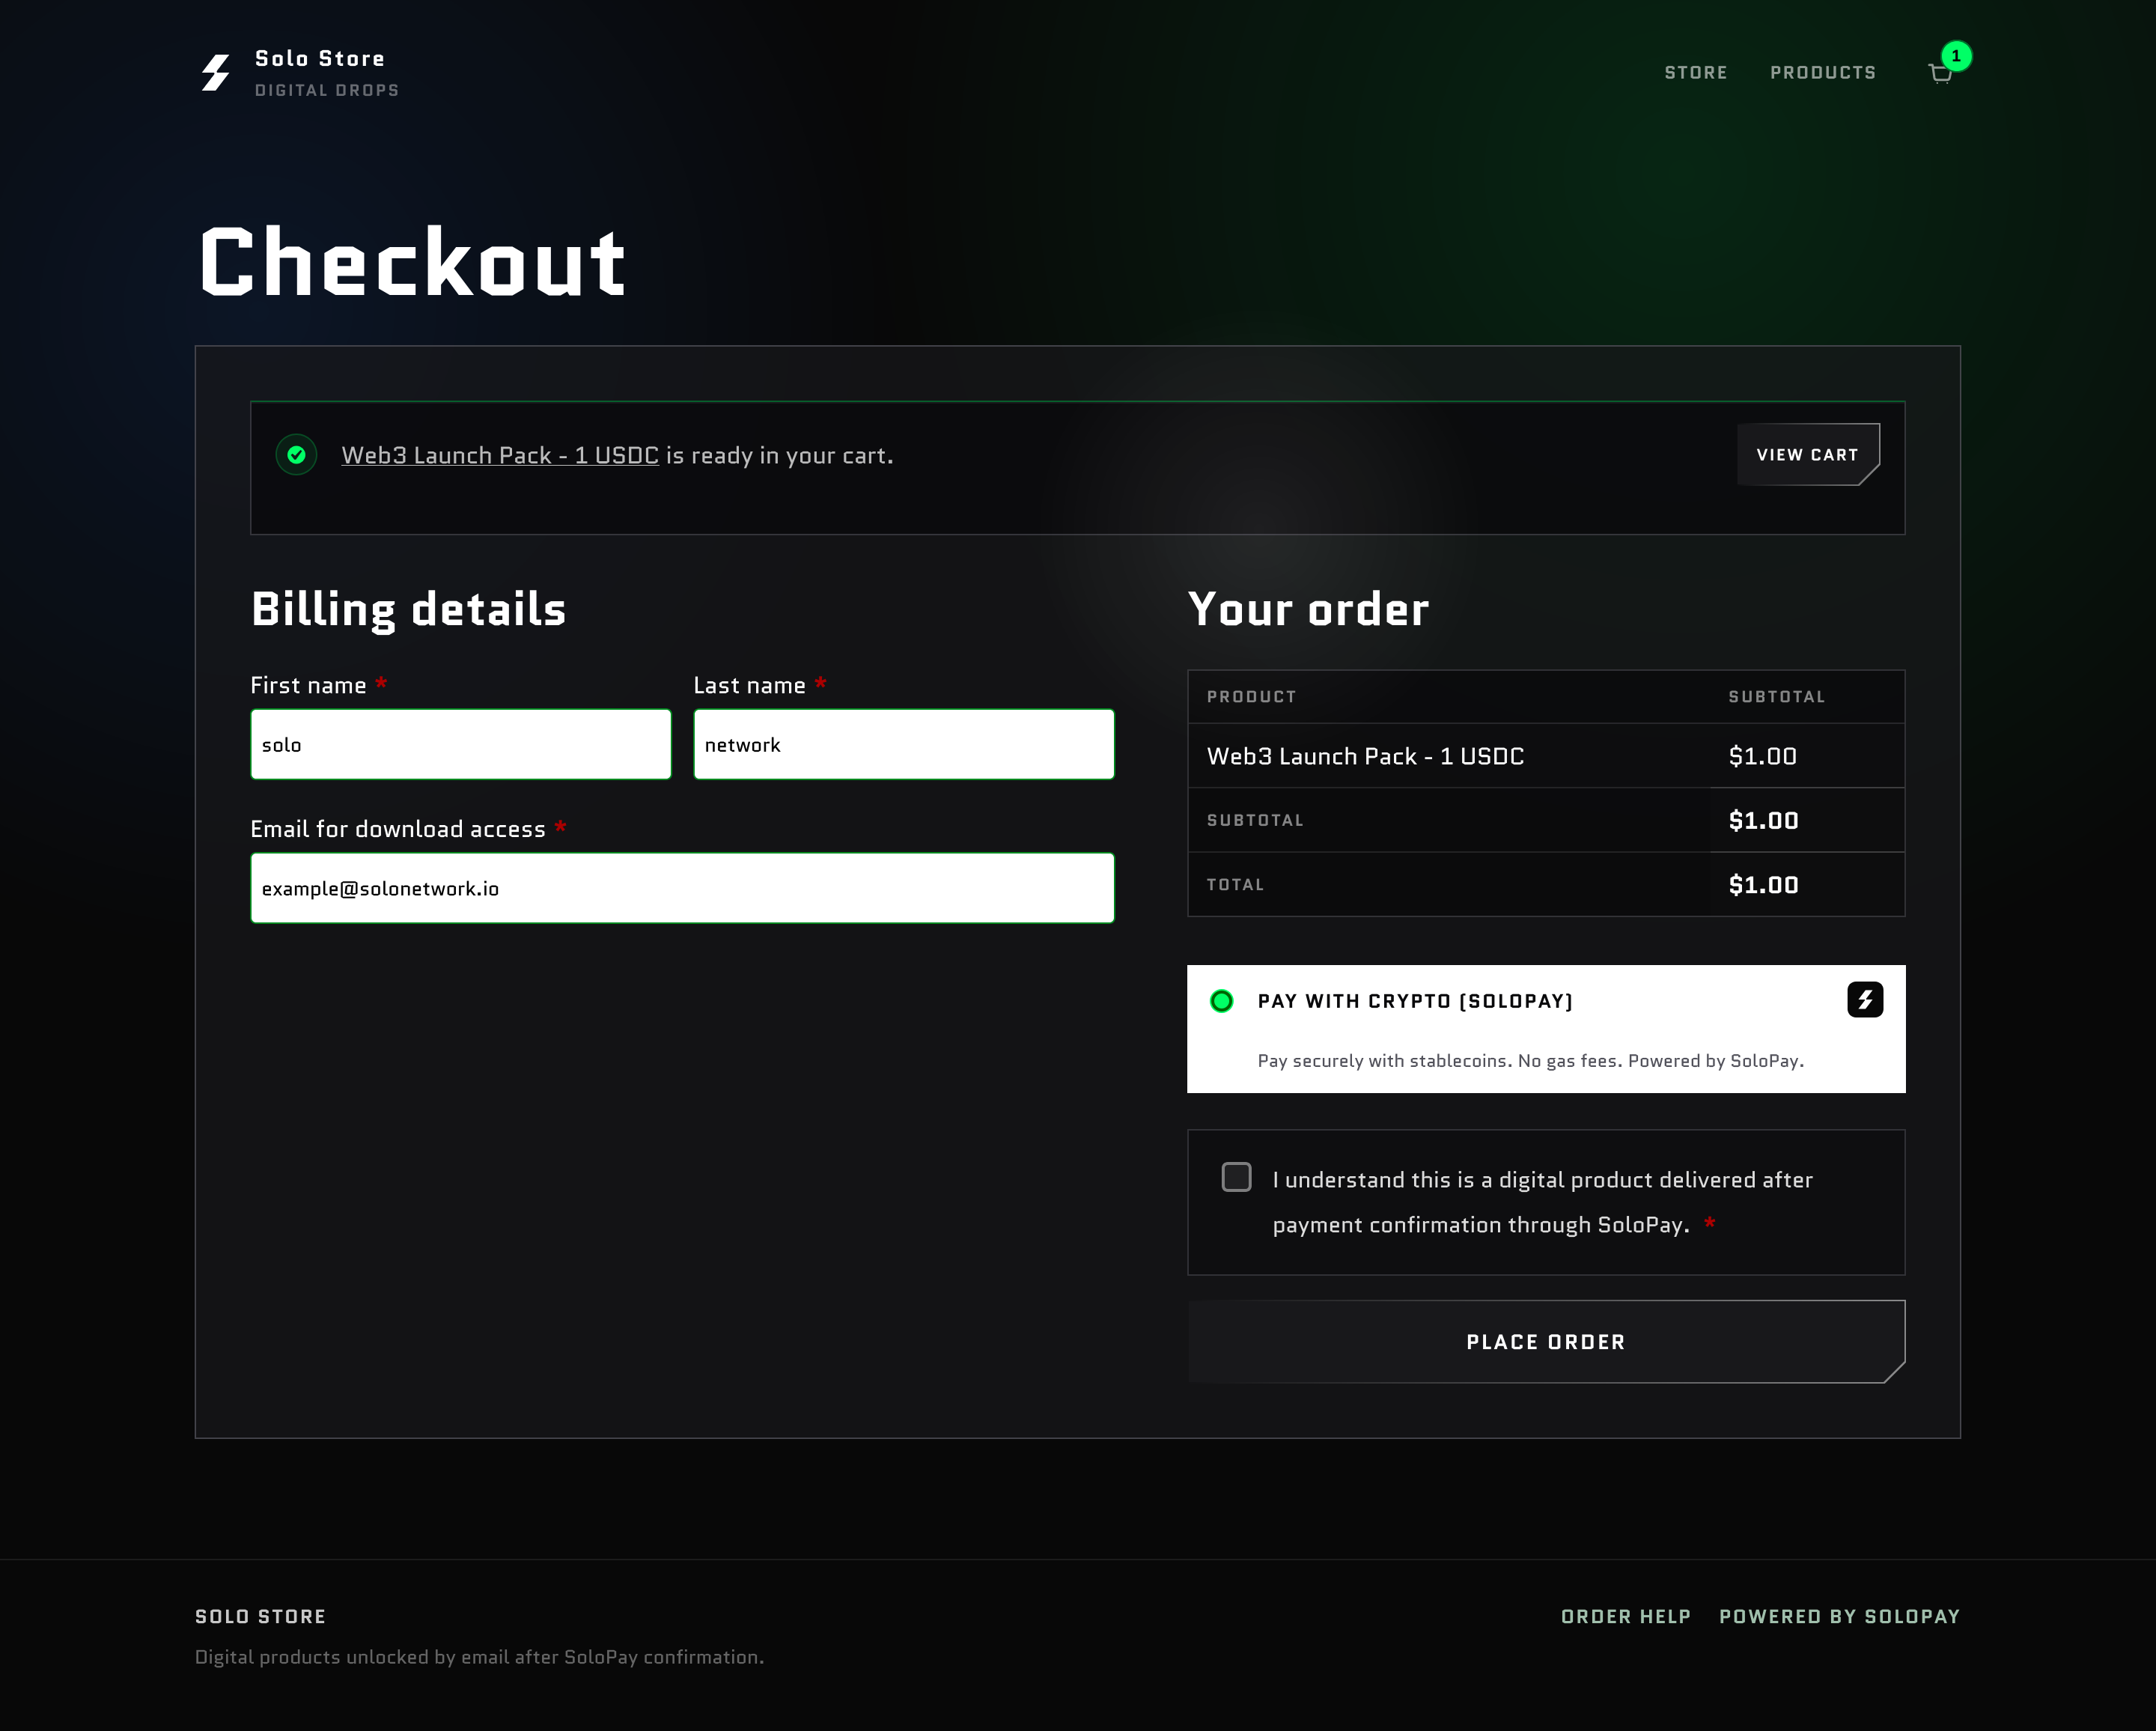
- Add a product to the cart and go to checkout.
- Select SoloPay as the payment method and place the order.
- The store redirects to the hosted SoloPay payment page, where the widget opens. Complete the payment with your wallet.
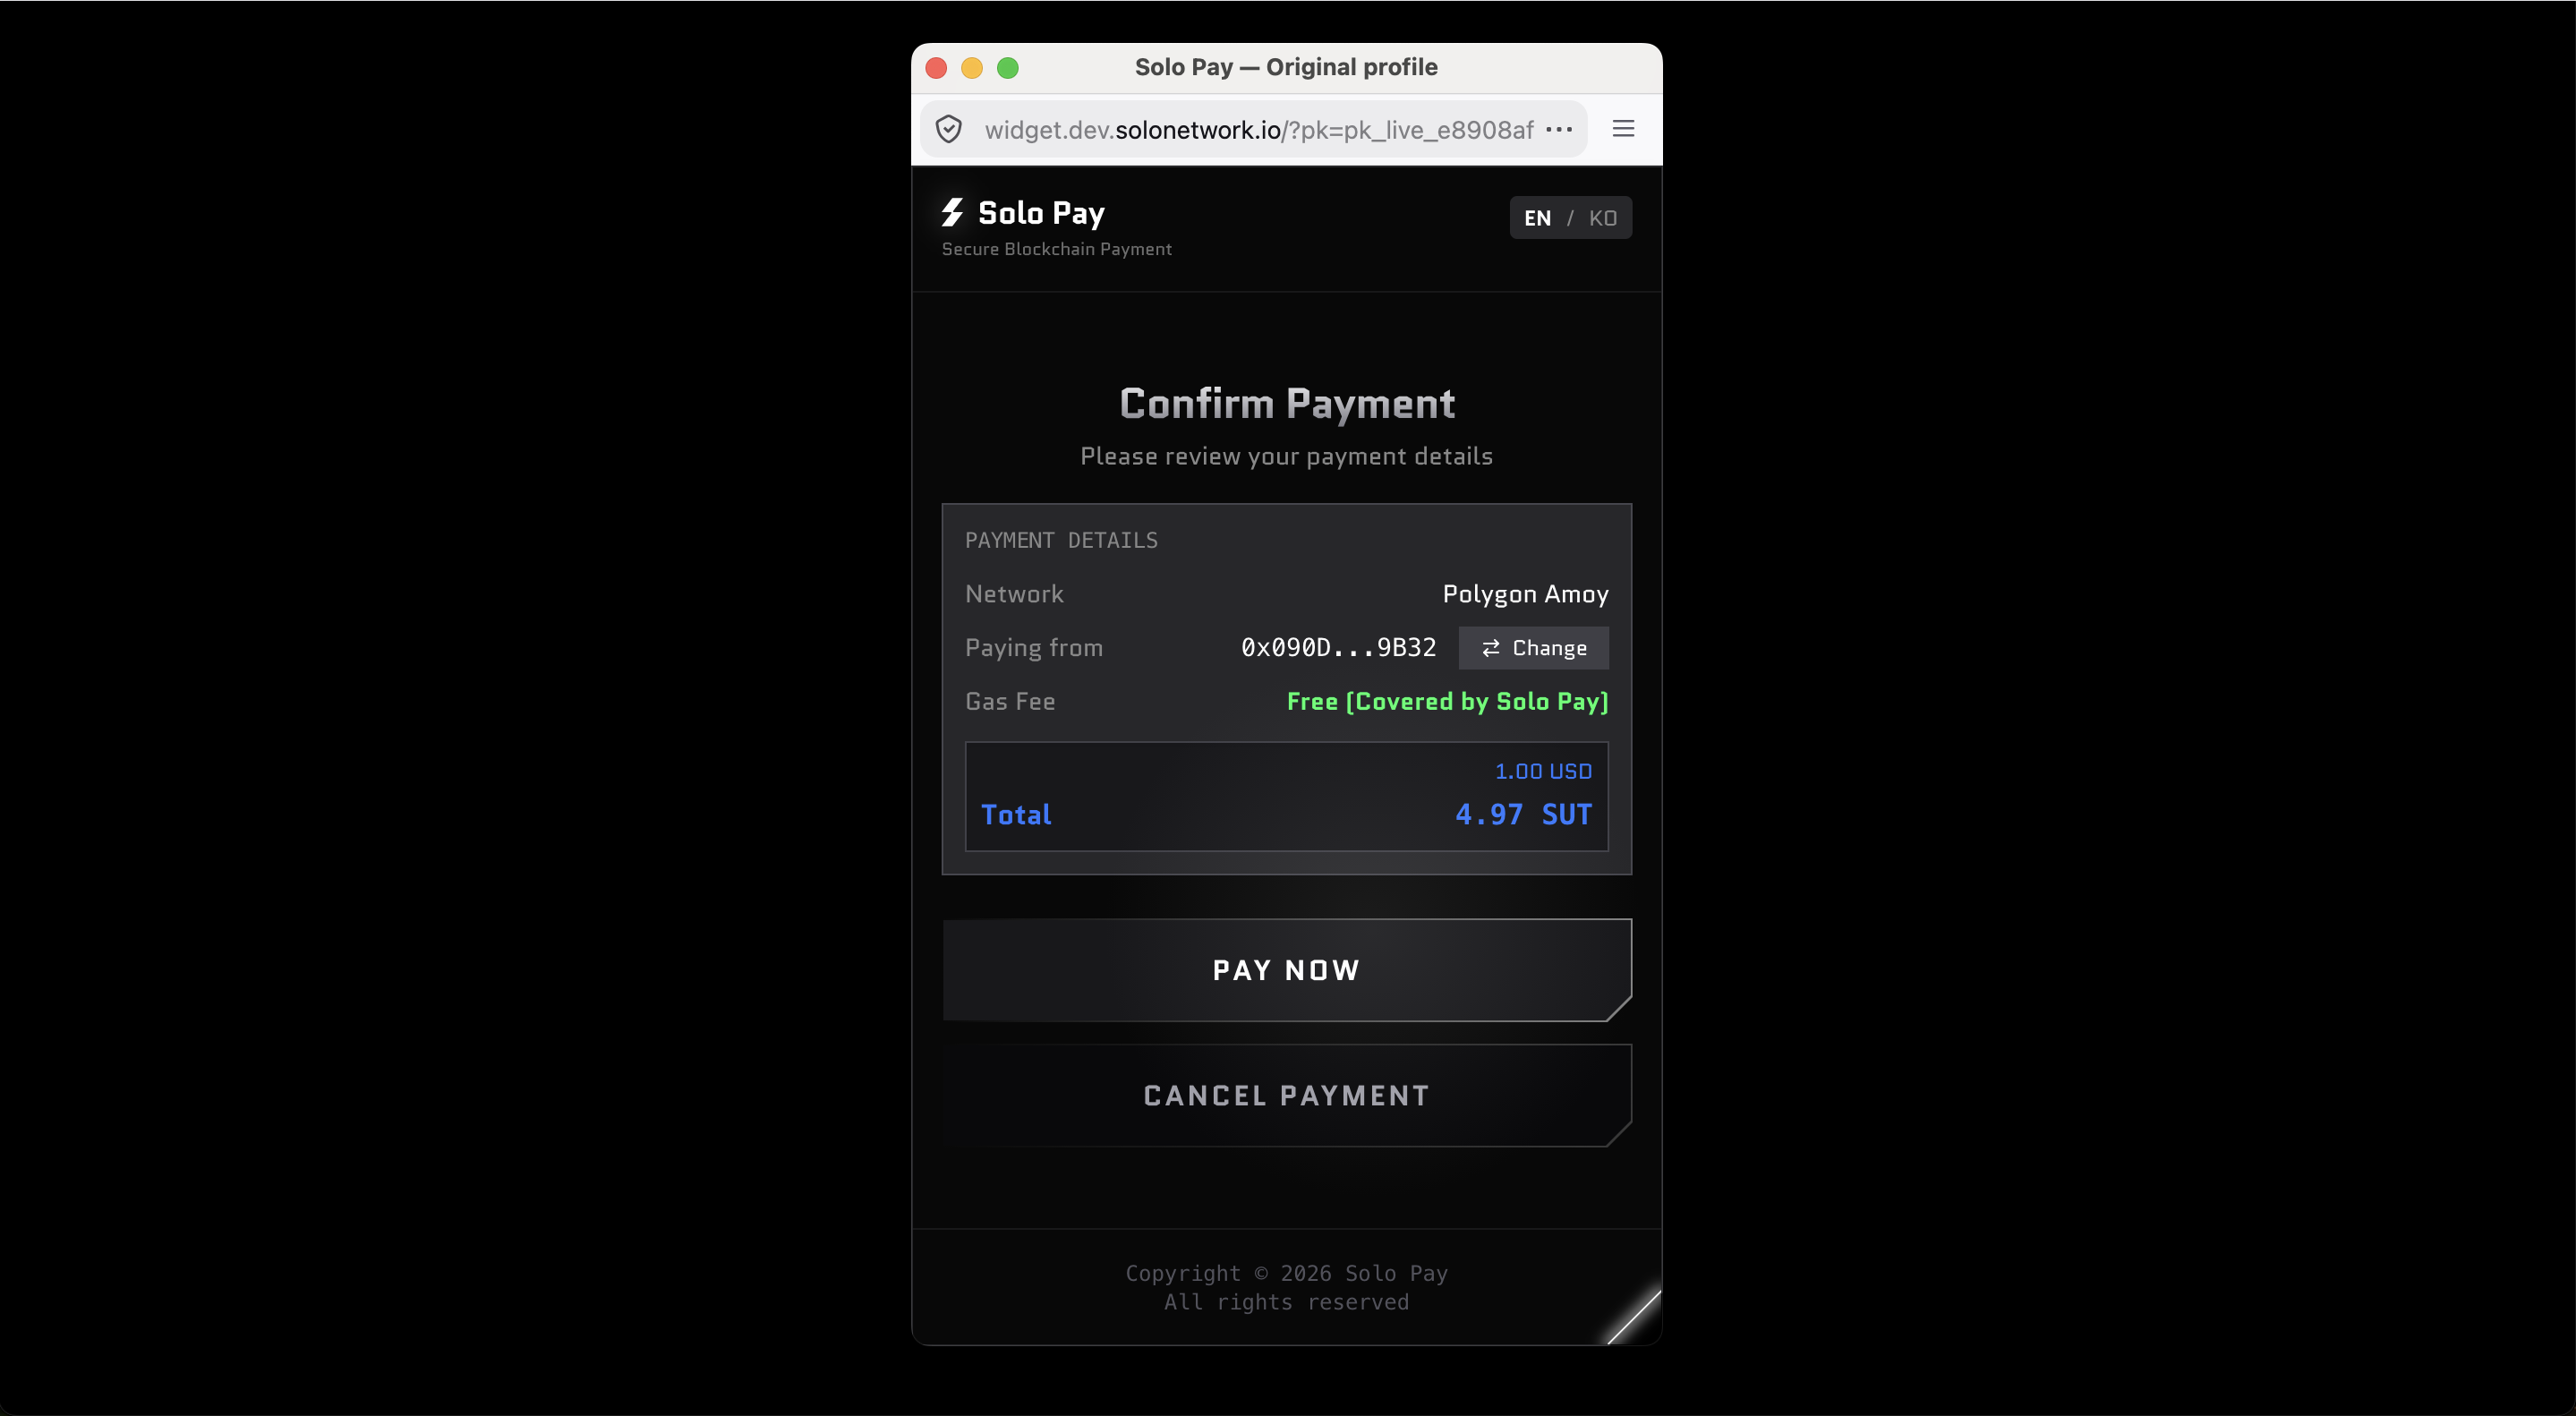
For the buyer-side wallet flow (connecting, sponsored gas, approval, and signing), see the User Guide.
Step 6: Confirm Order Completion
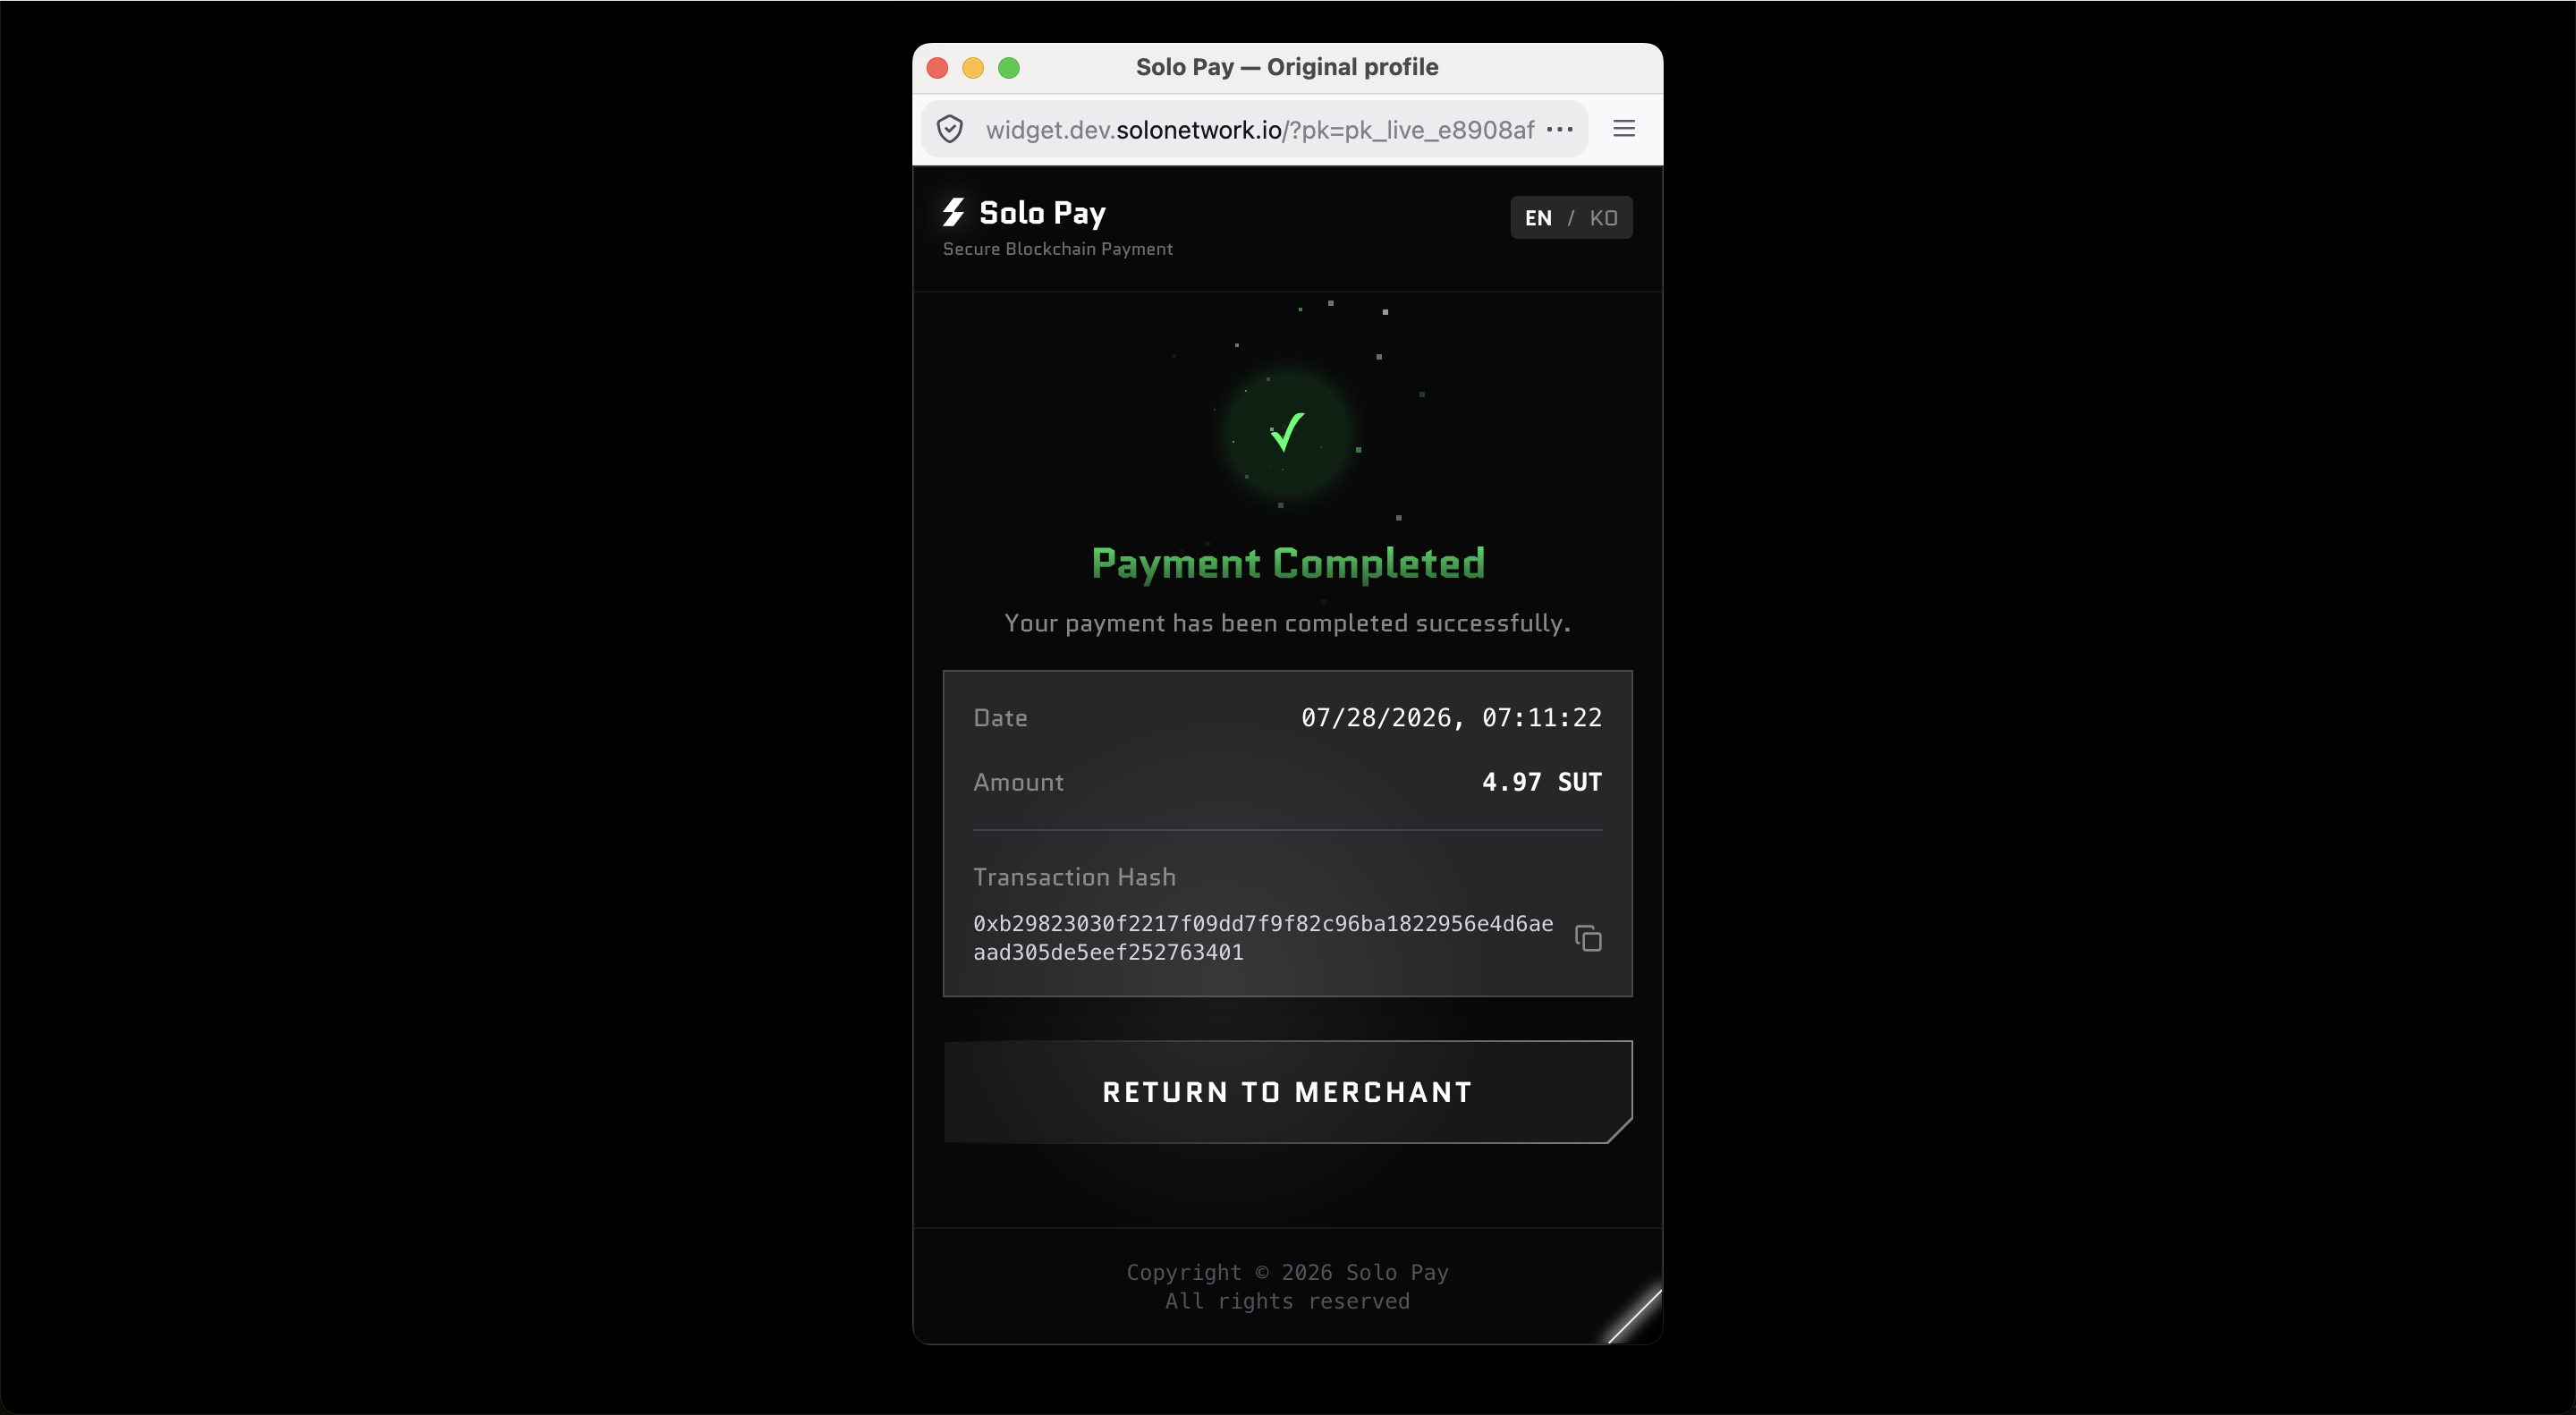
After the payment is confirmed on-chain, the order moves to Processing or Completed automatically, and WooCommerce sends the customer the standard order email.
How Order Completion Works
An order is completed by whichever of two verified paths arrives first. Both run the same authoritative amount check using the Merchant API Key and are idempotent, so an order is never completed twice or completed while underpaid.
- Signed return URL — when the buyer returns to the success page, the plugin verifies the HMAC signature, then re-fetches the payment from the gateway to confirm
status === PAIDand that the paid amount matches the order total. This works even when the webhook cannot reach the store. - Webhook (source of truth) — SoloPay also sends a signed POST to your webhook URL; the plugin verifies the signature and runs the same amount check. This covers buyers who close the browser without returning.
Why the Merchant API Key is required
Both paths verify the paid amount server-side with the Merchant API Key before completing an order. Without it, orders stay Pending and are not auto-completed.
Troubleshooting
| Symptom | Likely cause and fix |
|---|---|
| Orders stay Pending after payment | Missing or wrong Merchant API Key, or the webhook URL is not registered/reachable. Verify both. |
| Webhook not received | The store is not publicly reachable, or the URL in the dashboard does not match the plugin's Webhook URL. |
| Payment method not shown at checkout | SoloPay is not enabled, or the Token Address is empty. Both are required. |
| "Amount mismatch" in logs | The store currency, price, or token differs from what the payment was created with. Enable Debug Log. |
DUPLICATE_ORDER when retrying | Handled automatically, the plugin mints a fresh payment reference per attempt on each retry. |
Enable Debug Log in the settings and check WooCommerce → Status → Logs (source solopay) for details.
Accepting Testnet Payments (e.g. Polygon Amoy)
You can accept payments on a testnet such as Polygon Amoy without any code change or rebuild:
- In the SoloPay Merchant Dashboard, switch the chain/network for your merchant account to the testnet (e.g. Polygon Amoy).
- Copy that network's token address and paste it into the plugin's Token Address setting, then save.
The gateway then processes payments on the selected testnet. To go back to mainnet, switch the chain again and update the Token Address to the mainnet token.
Next Steps
- Webhook Guide — Event payloads and signature verification
- User Guide — The buyer-side wallet and payment flow
- Quick Start — Build a custom integration without the plugin