
User Guide
A guide on how to make payments with SoloPay.
Before You Start
To make payments with SoloPay, you need:
- MetaMask or Trust Wallet (browser extension or mobile app)
- ERC-20 token balance to pay with
No Gas Fees
SoloPay covers blockchain gas fees on your behalf. You don't need POL or any other native token to pay.
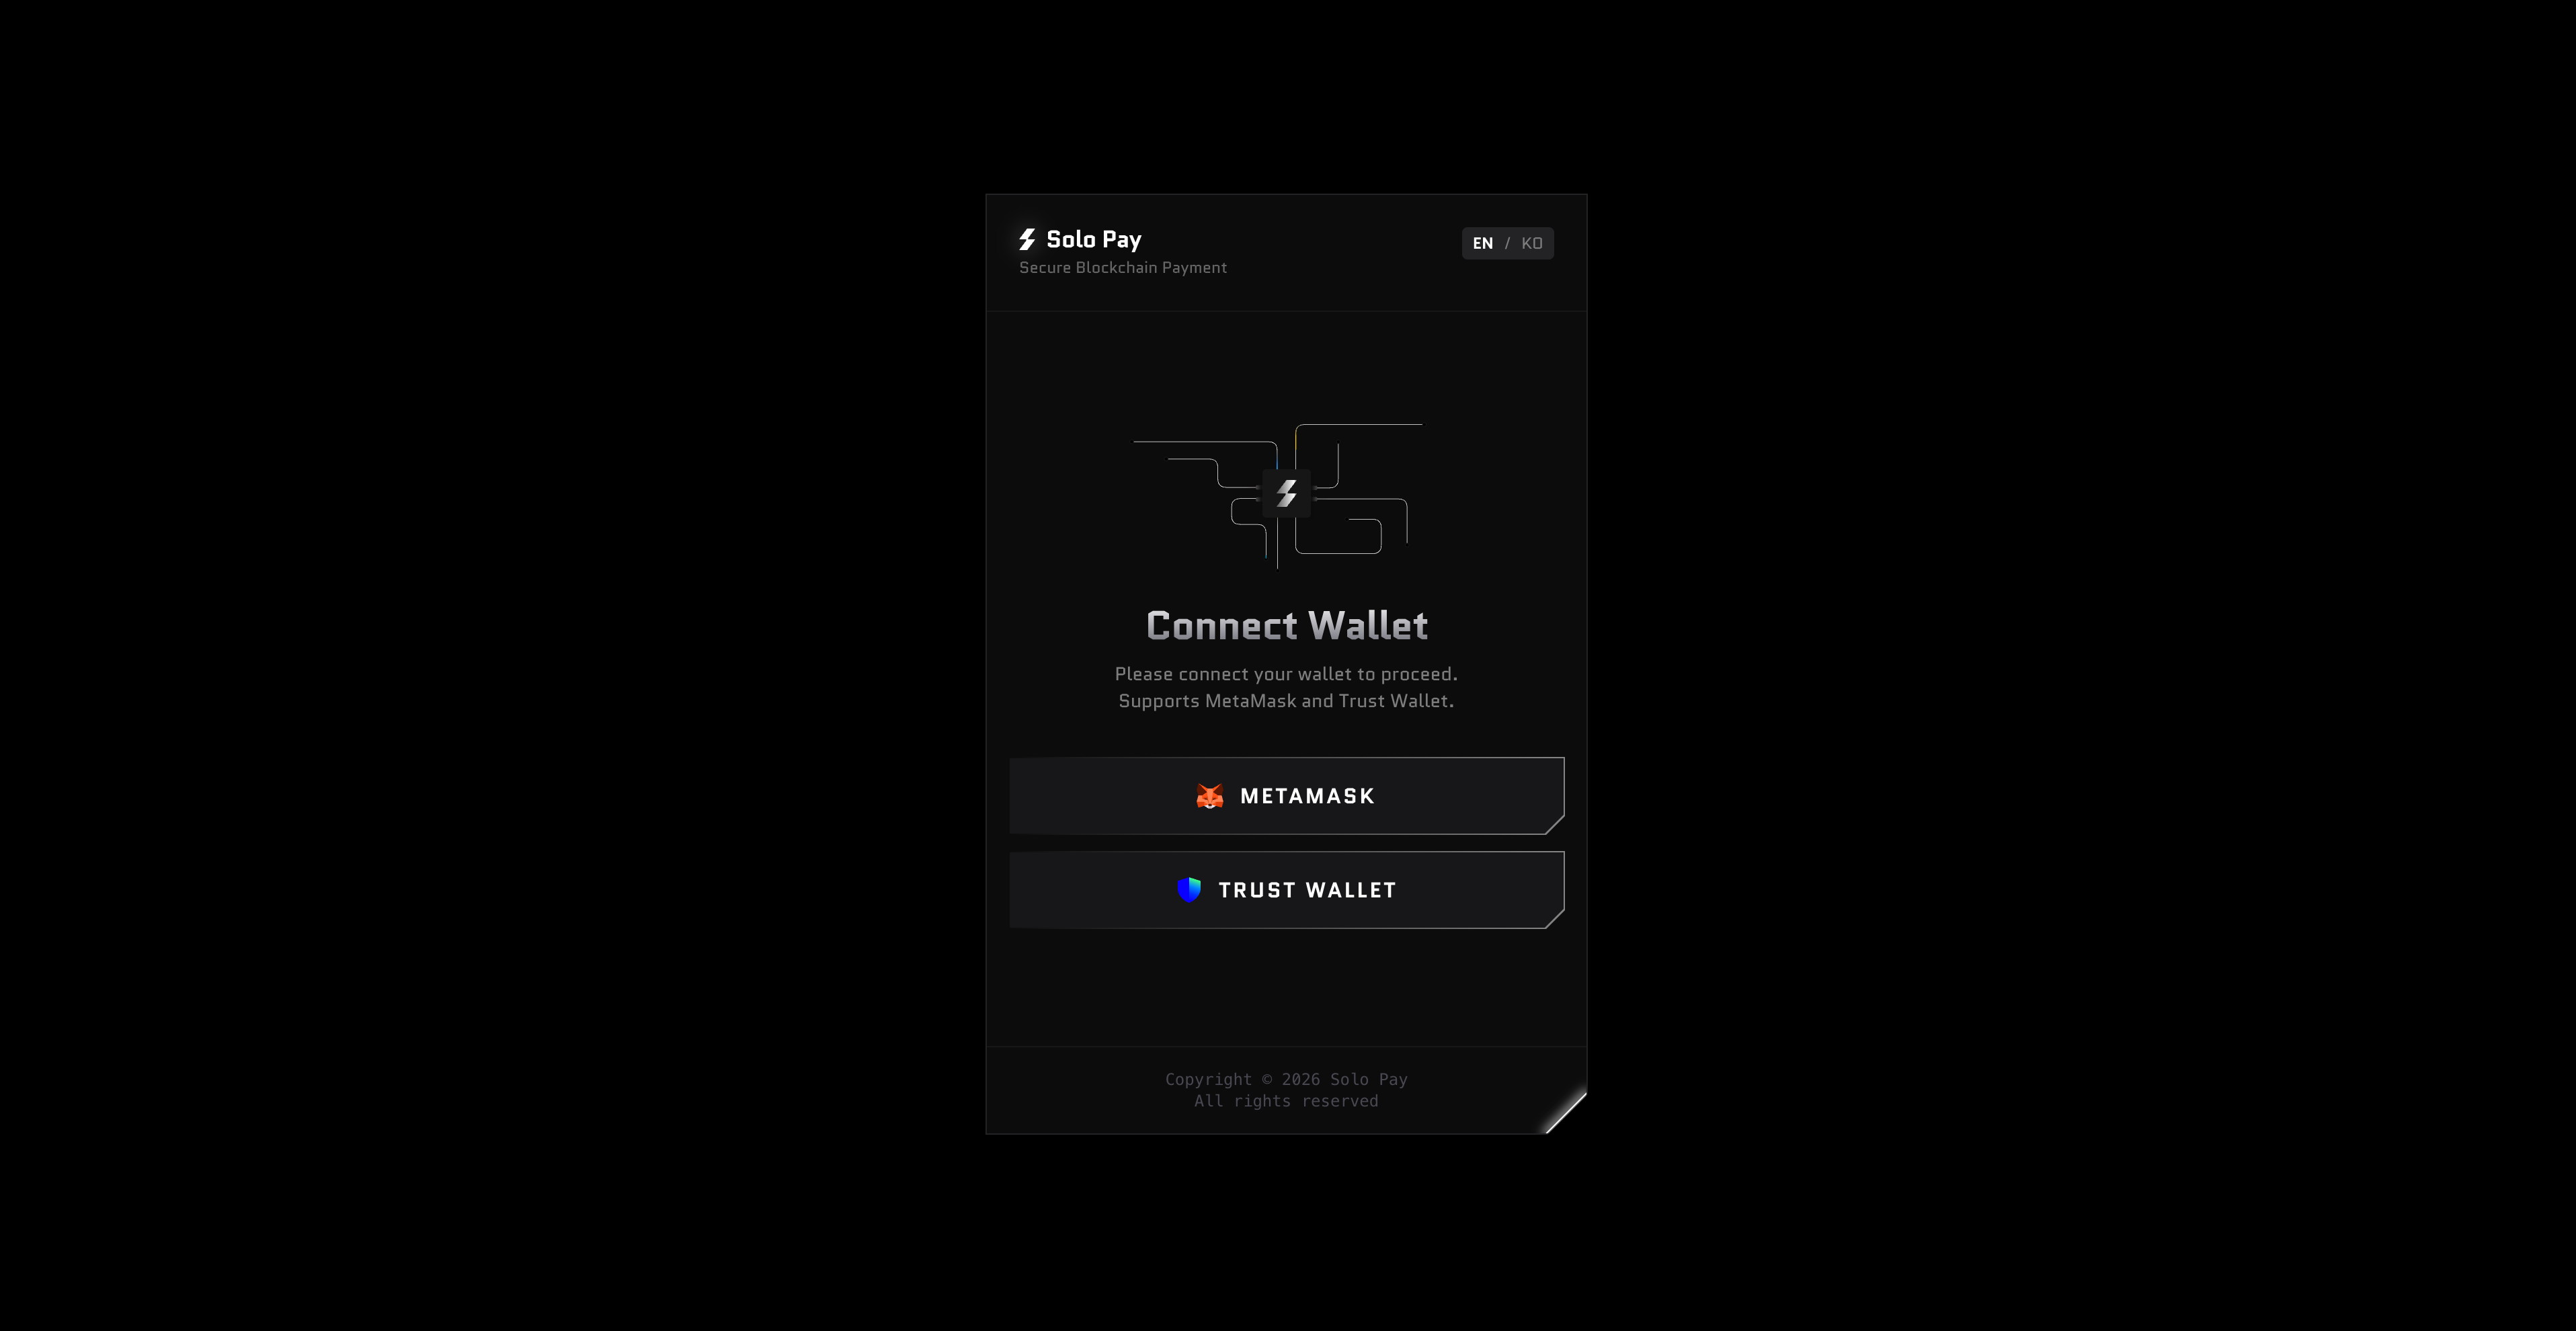
Step 1: Select Your Wallet
When the payment widget opens, select the wallet you want to use.
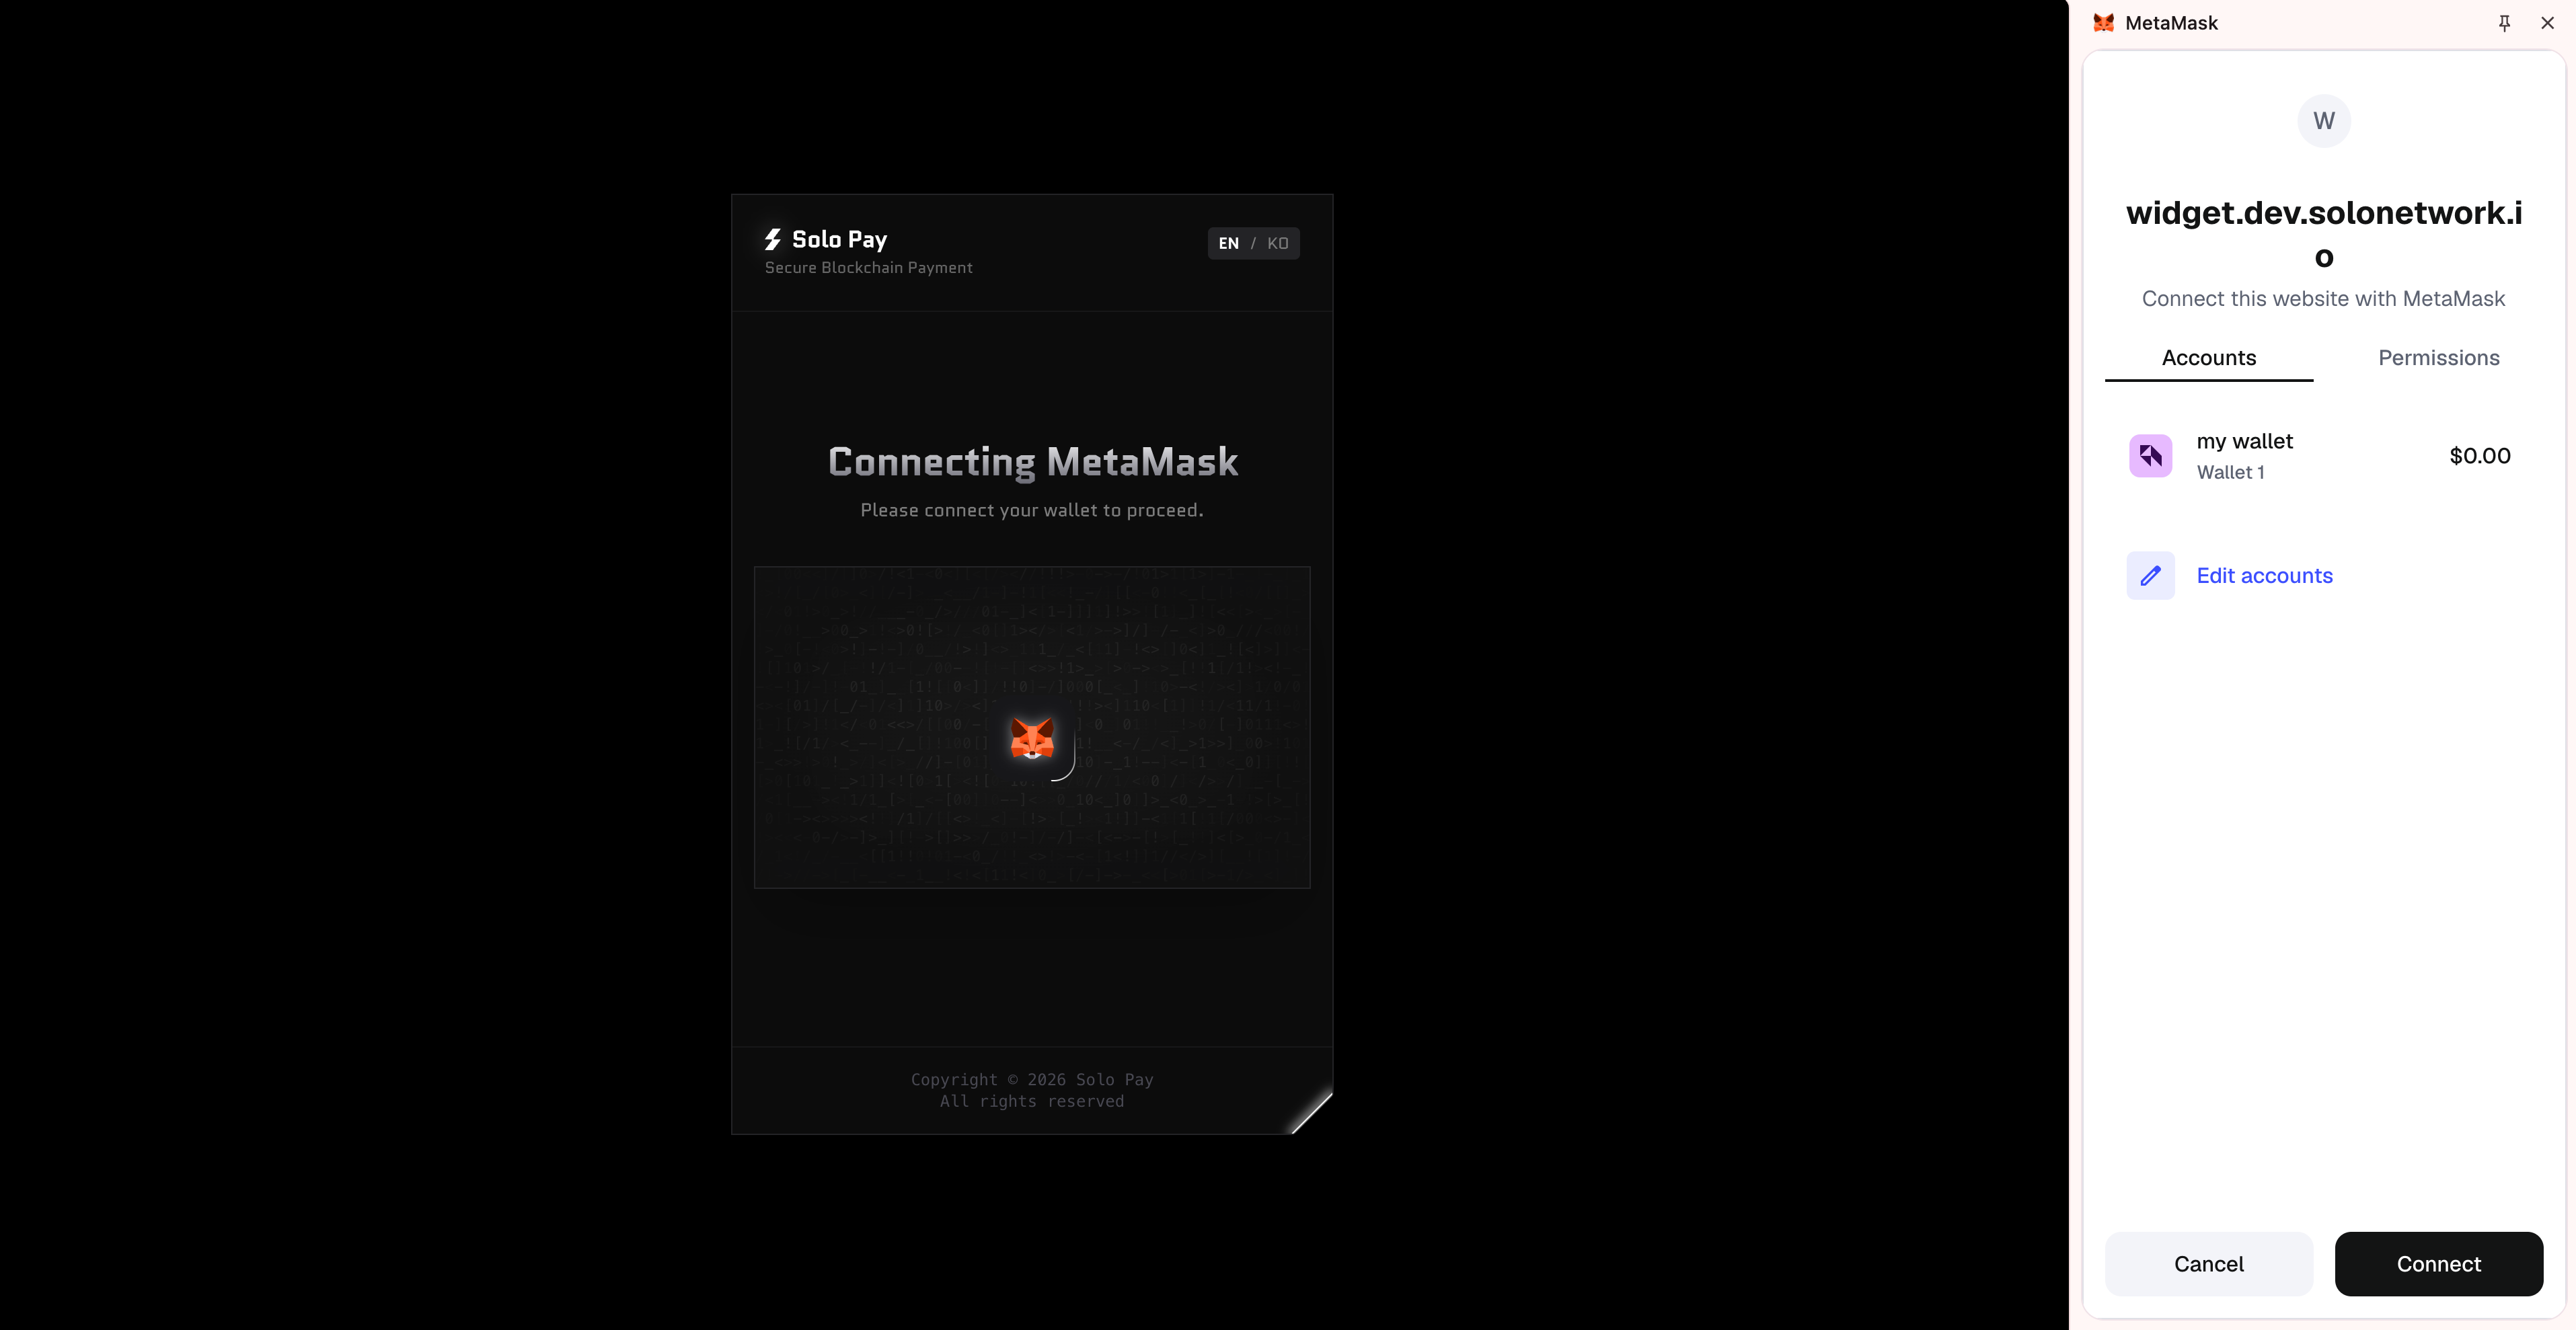
Paying with MetaMask
Step 2: Approve Connection
A MetaMask popup will appear. Select your account and click Connect.
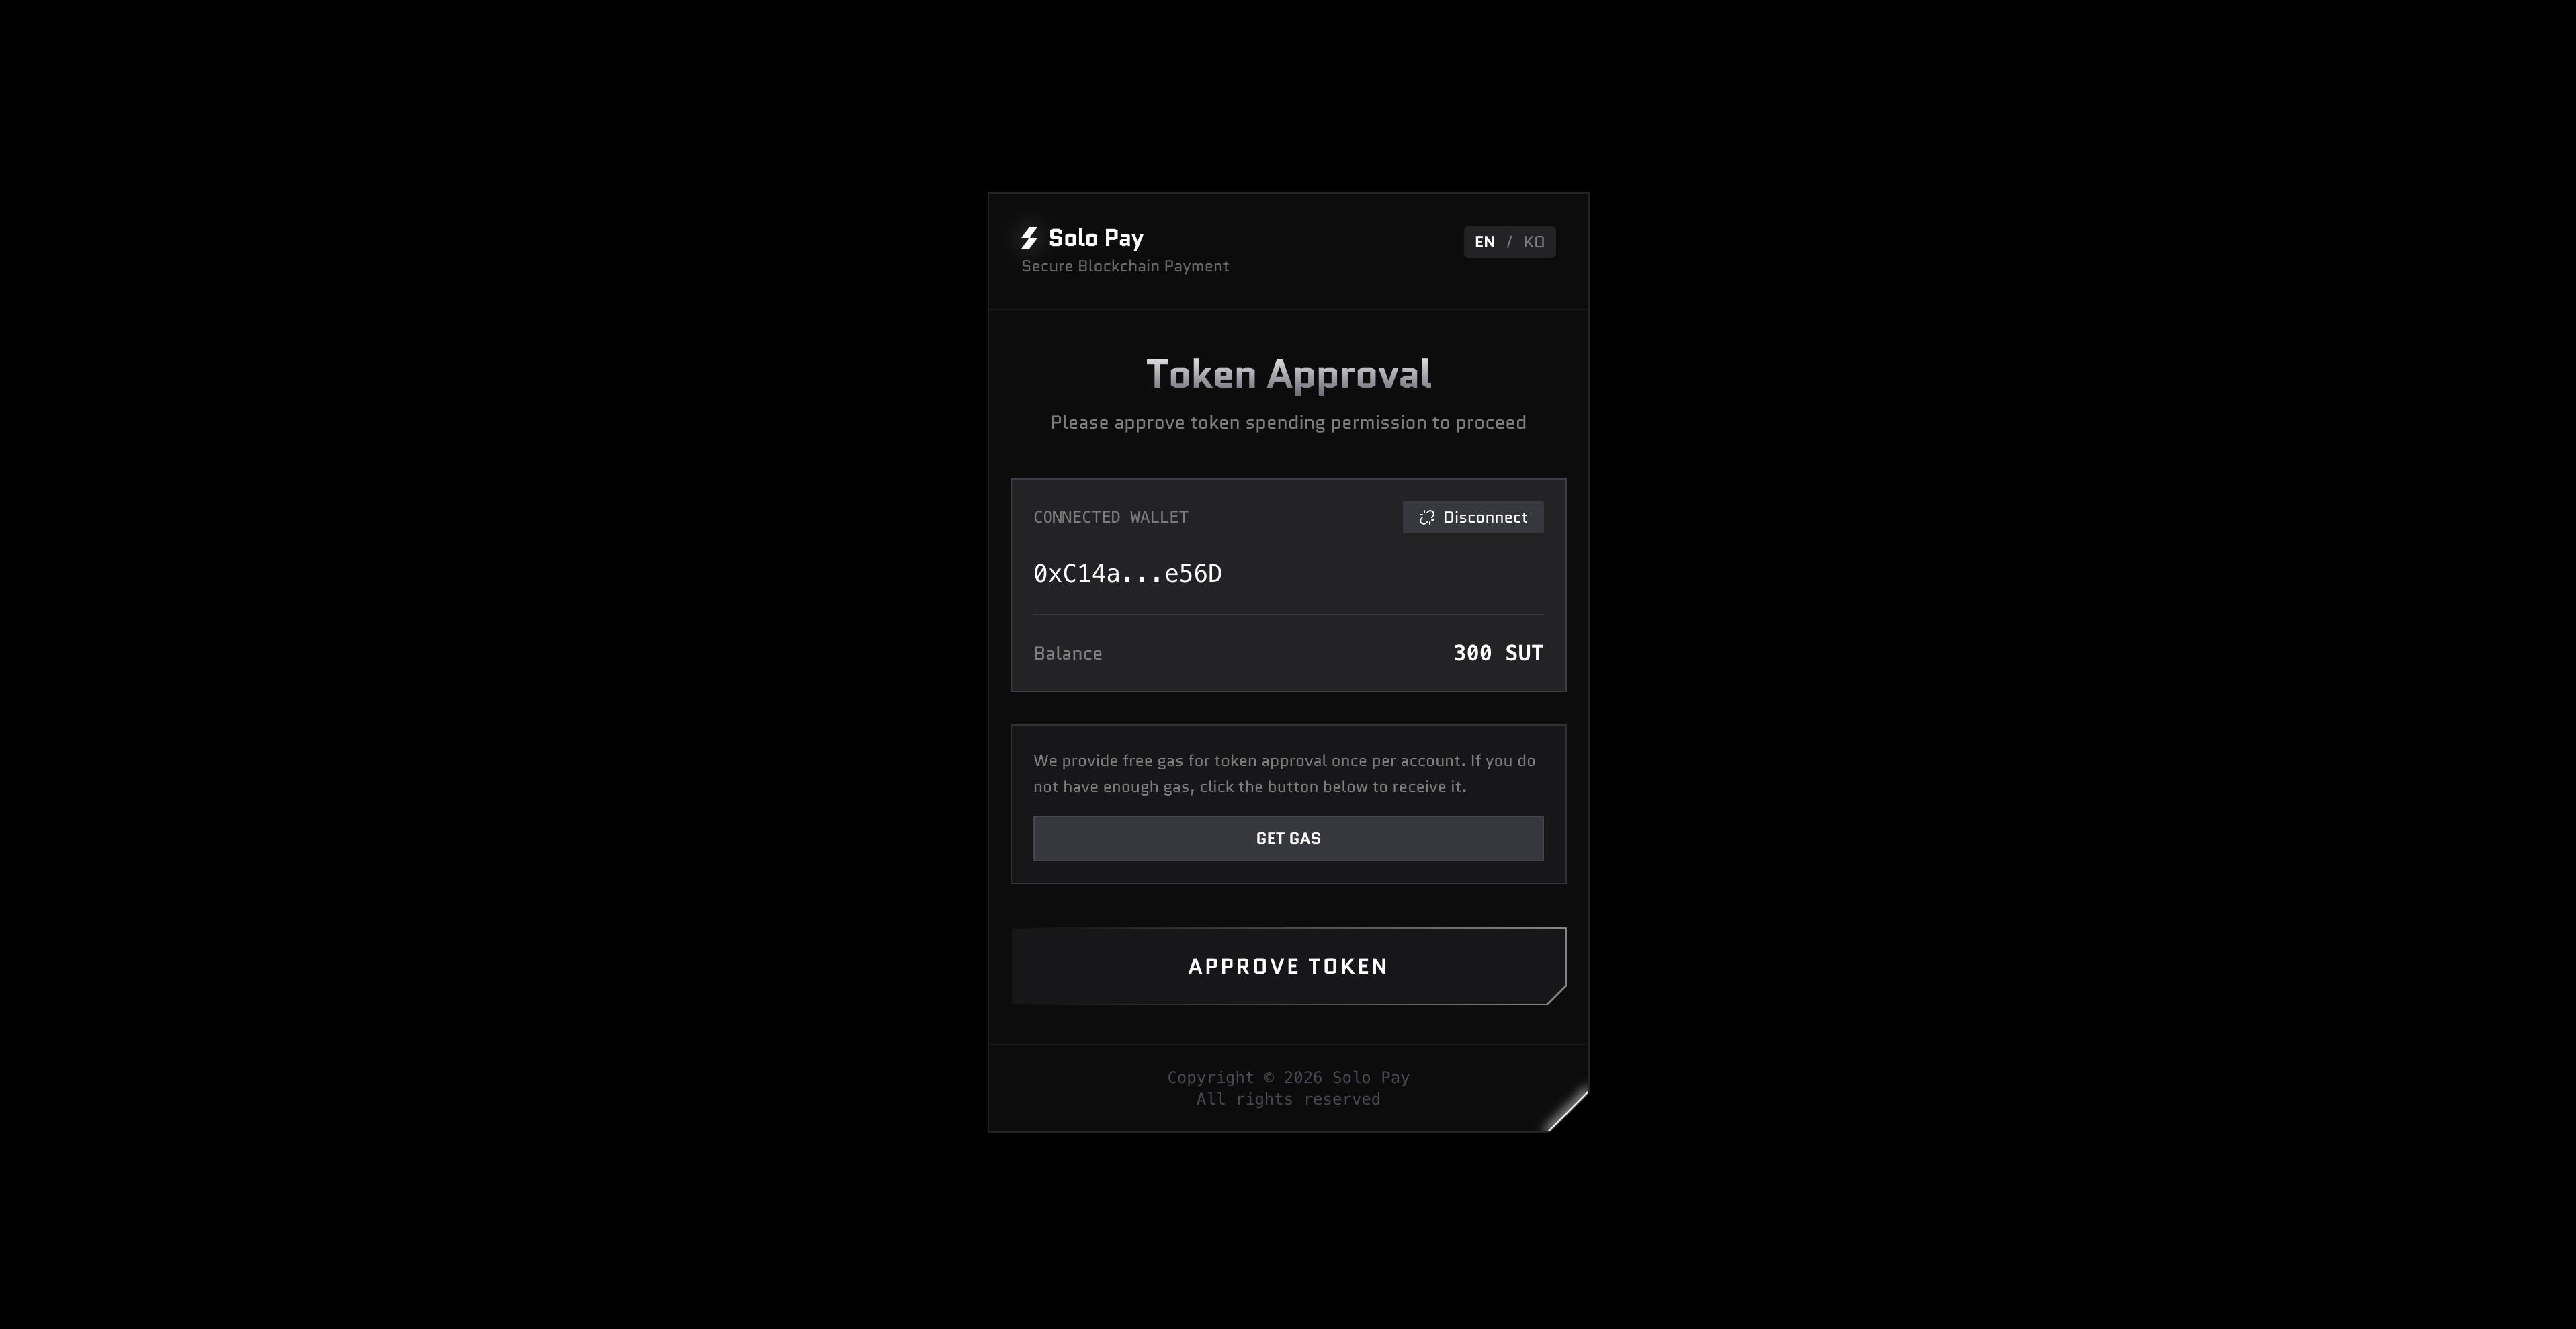
Step 3: Get Free Gas
This step only appears when all of the following conditions are met:
- Your wallet does not have enough native token (POL) to process the approval transaction
- You have not received free gas from SoloPay before (limited to once per wallet)
- Your payment token balance is sufficient for the payment amount
If the GET GAS button appears, click it to receive free gas from SoloPay.
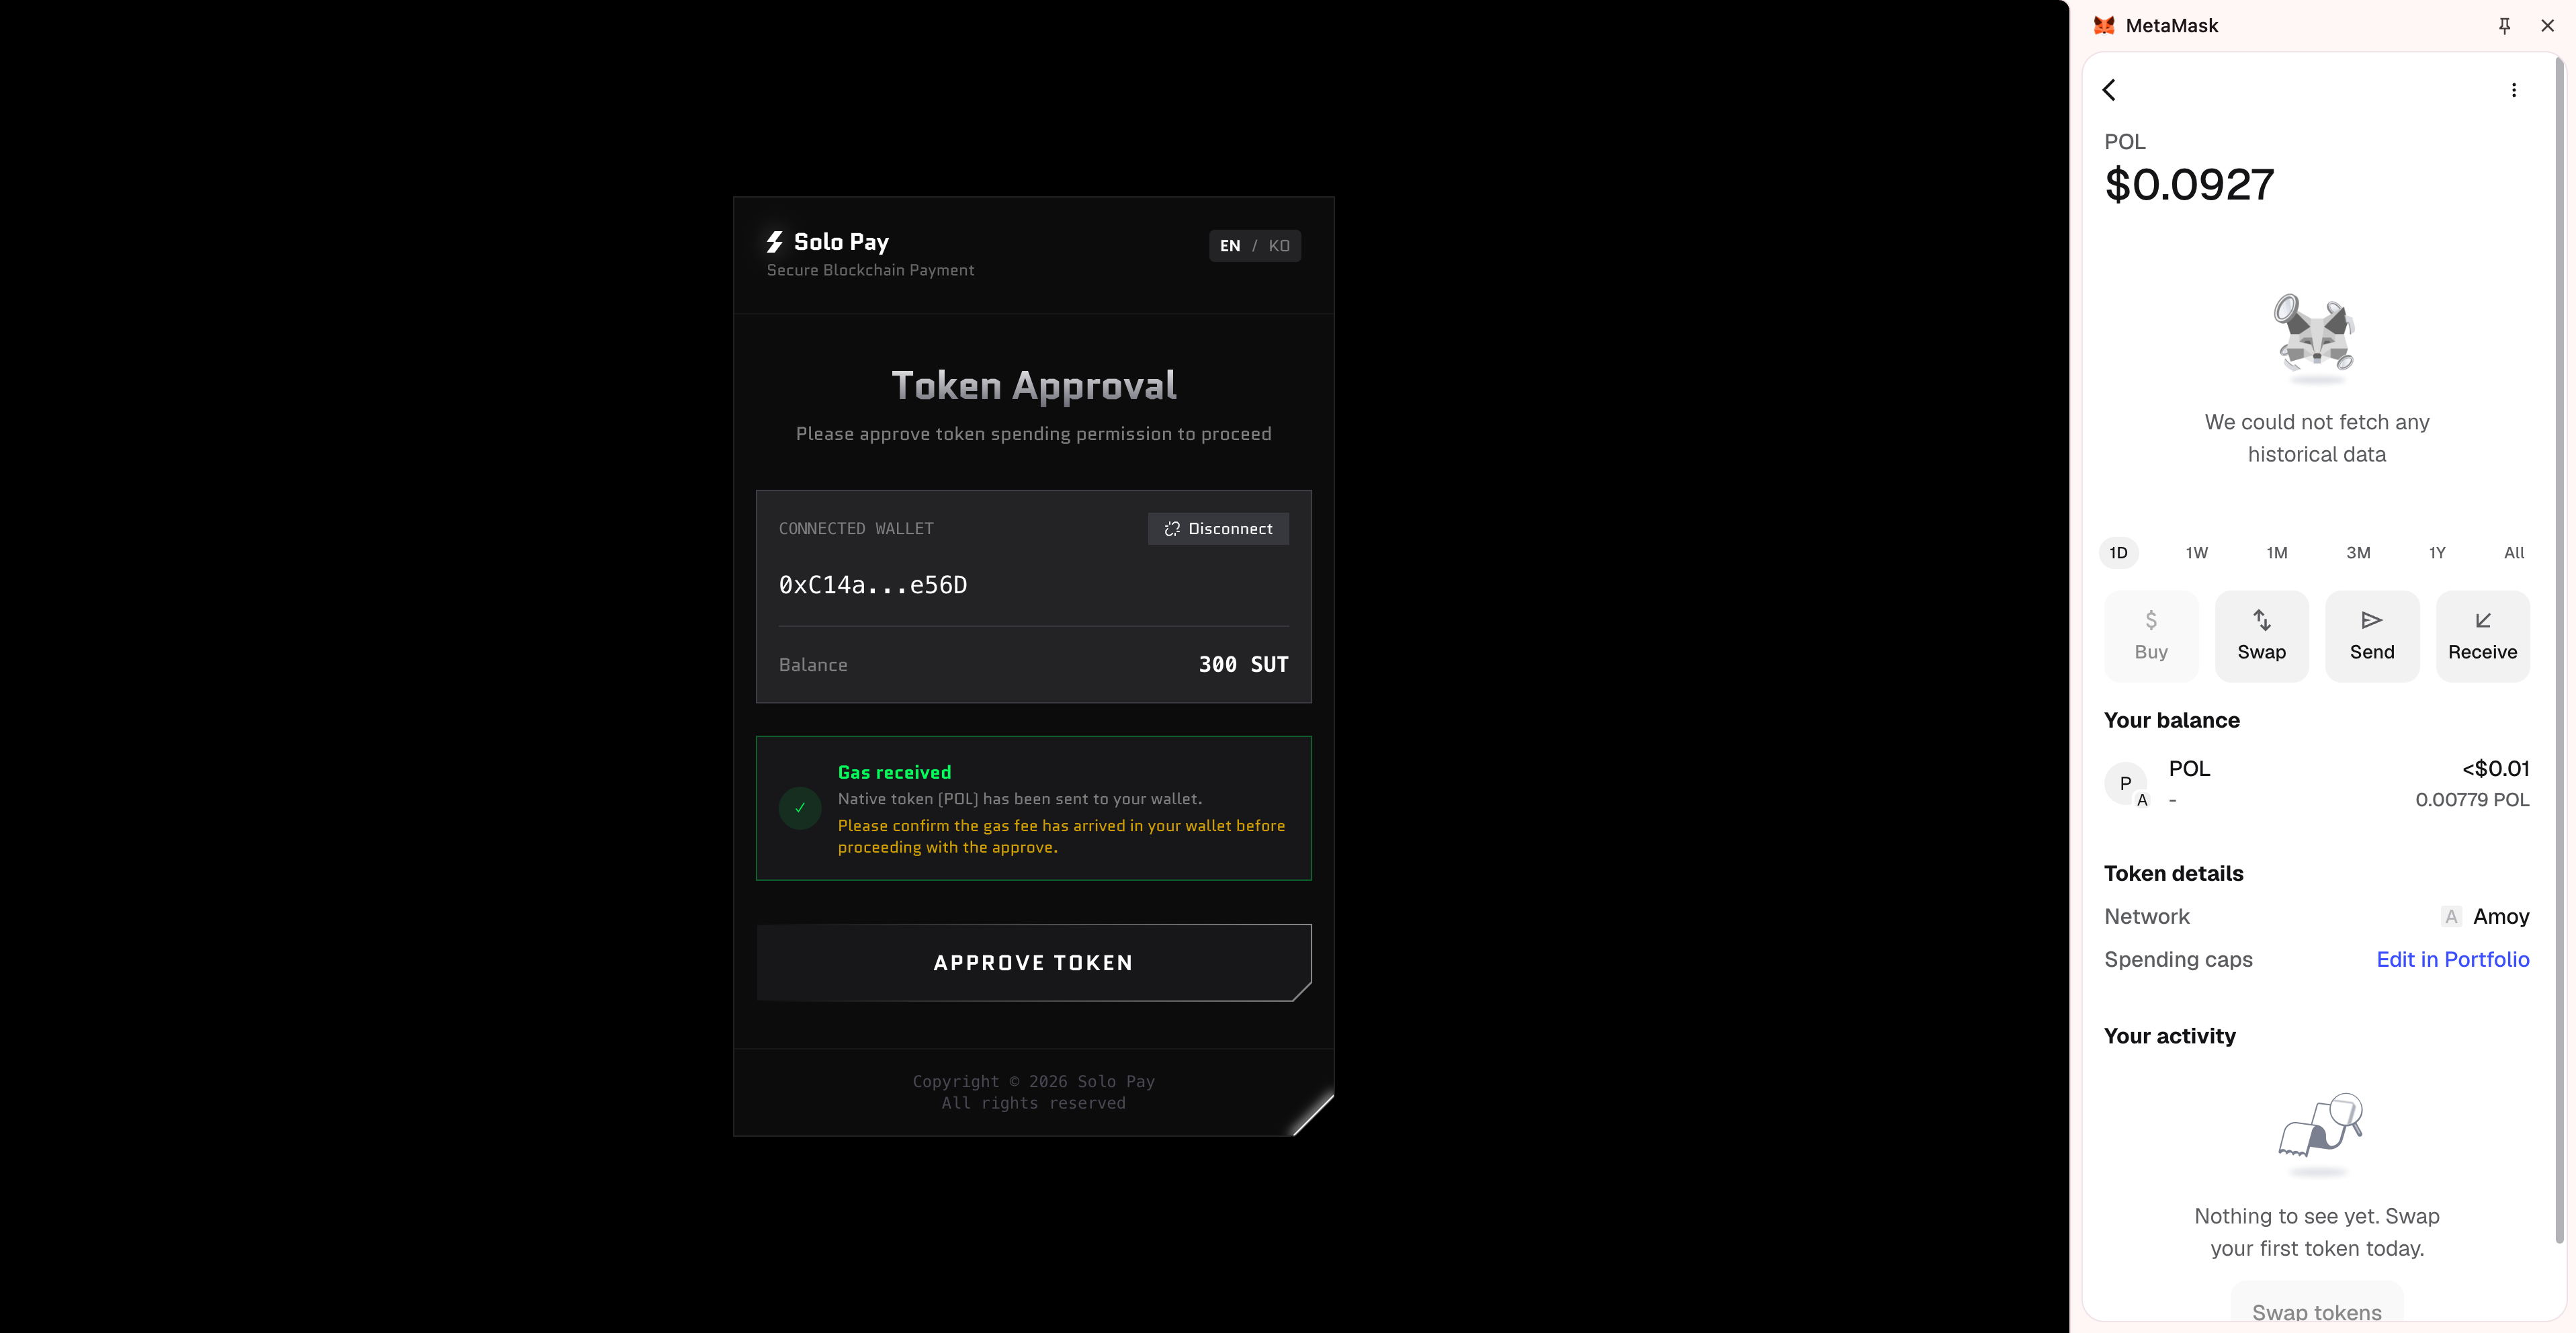
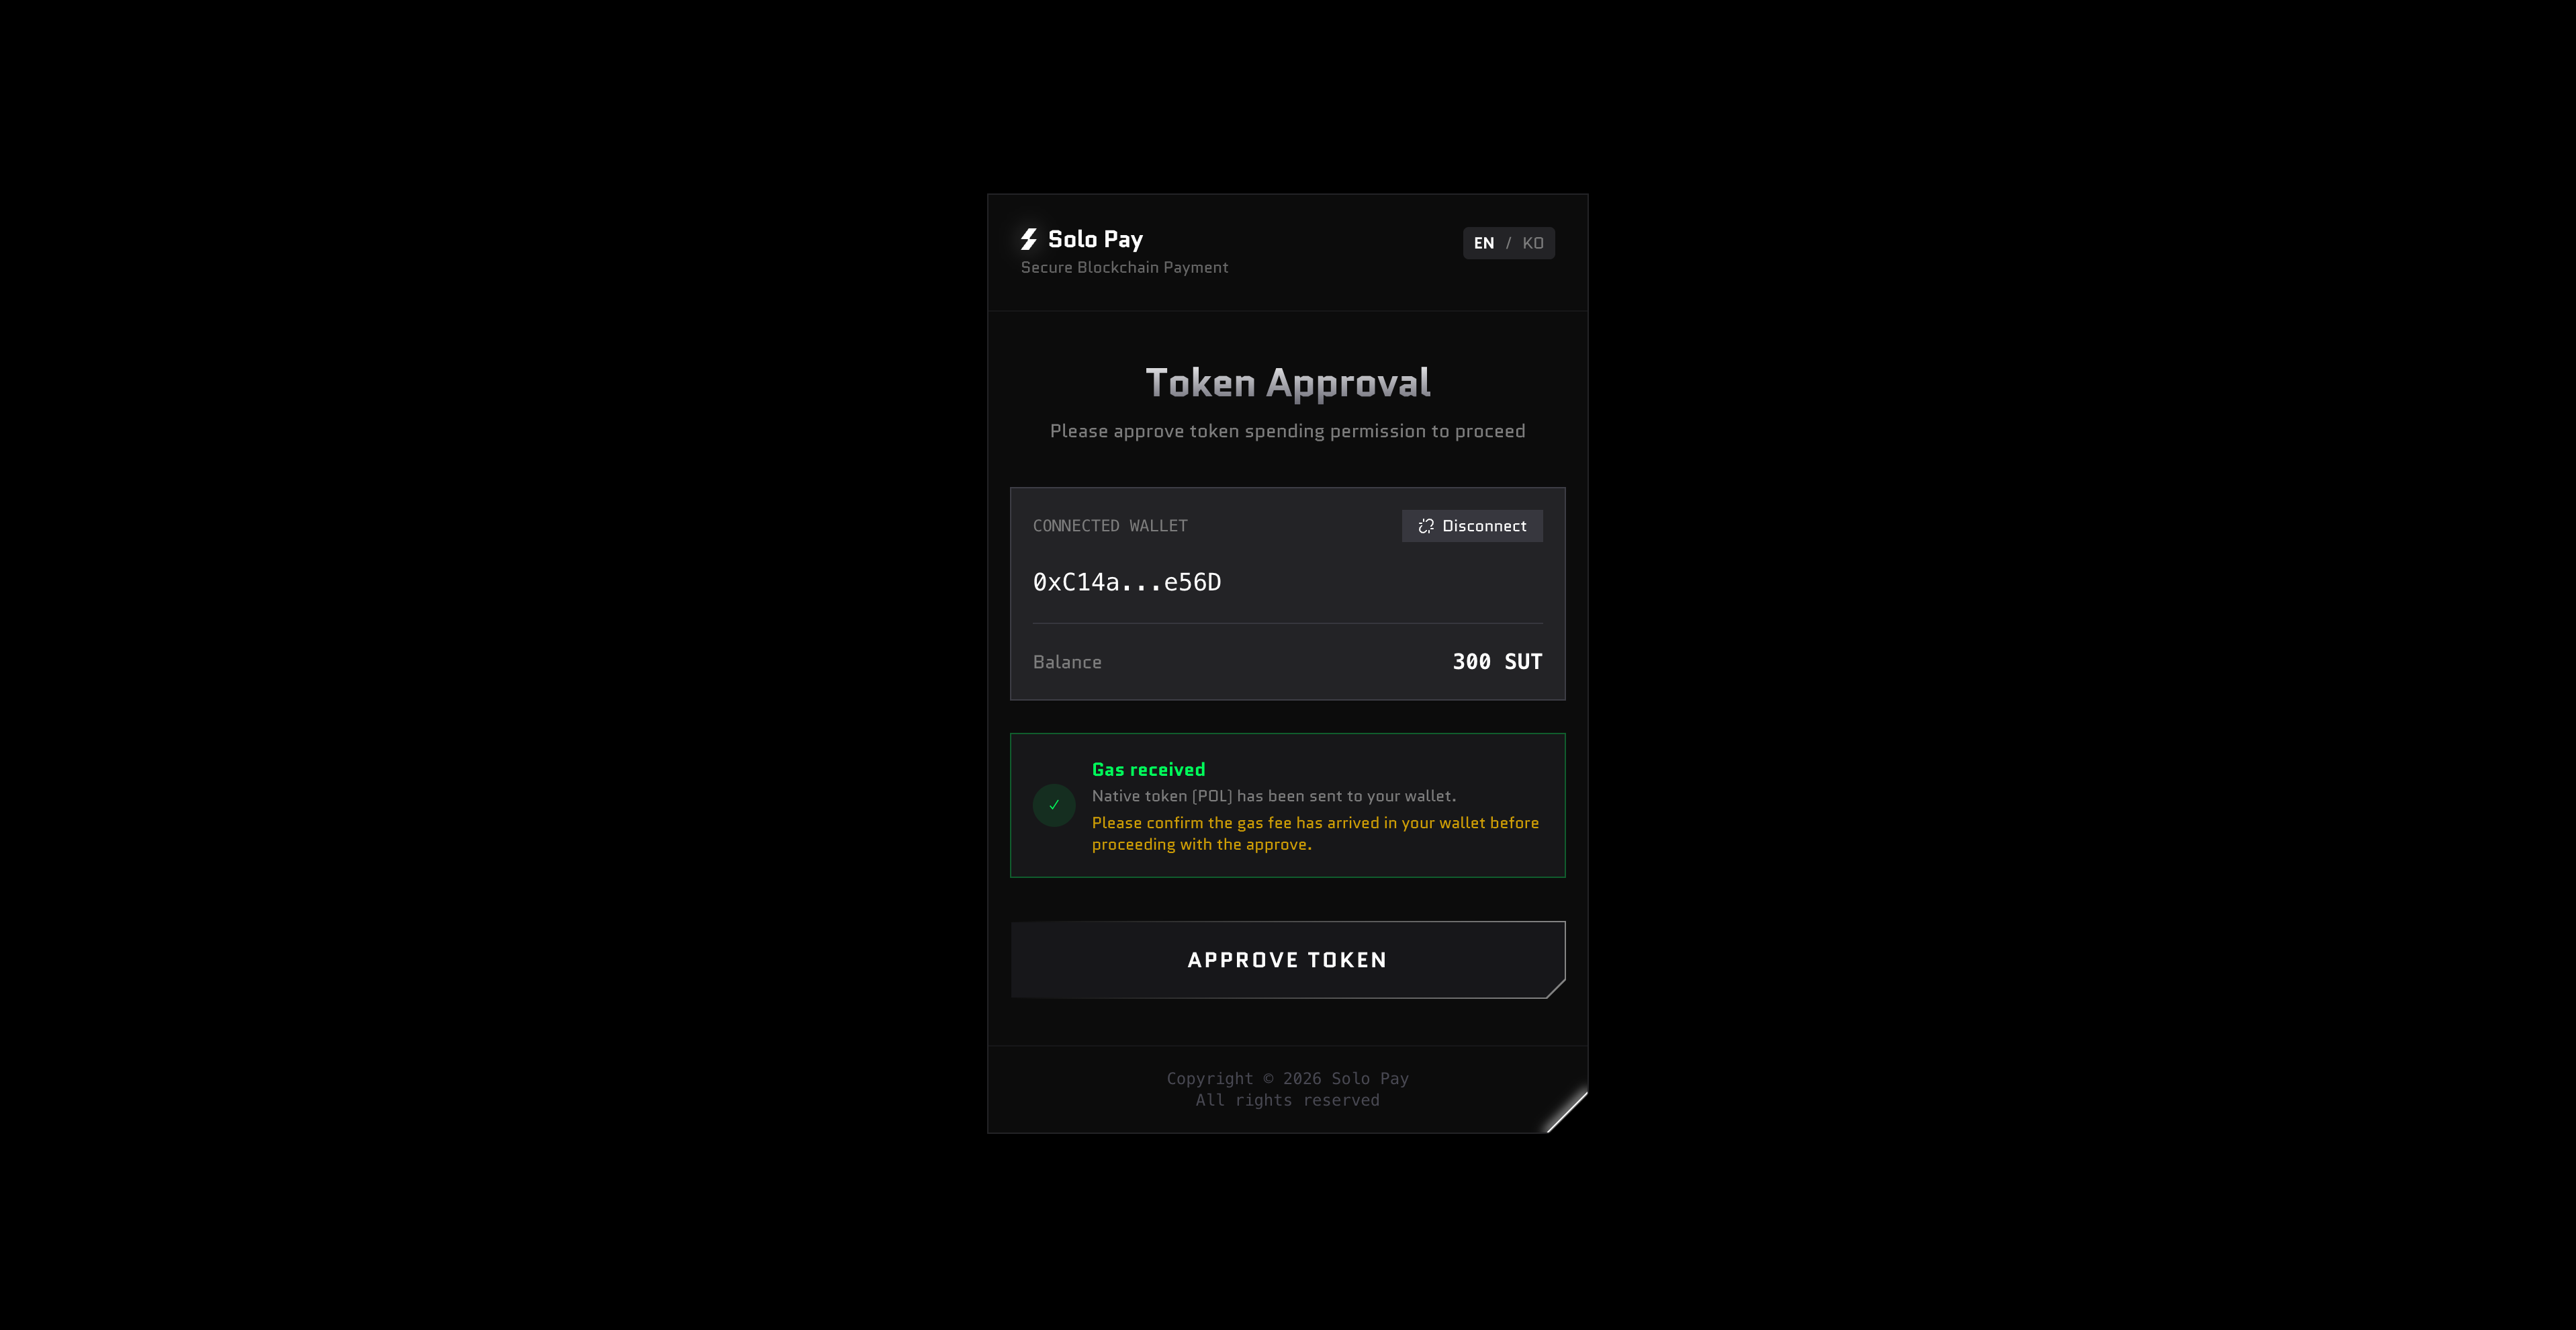
Once you receive the gas, a Gas received message will appear in the widget. Before proceeding, open MetaMask and confirm that the native token (POL) has arrived in your wallet.
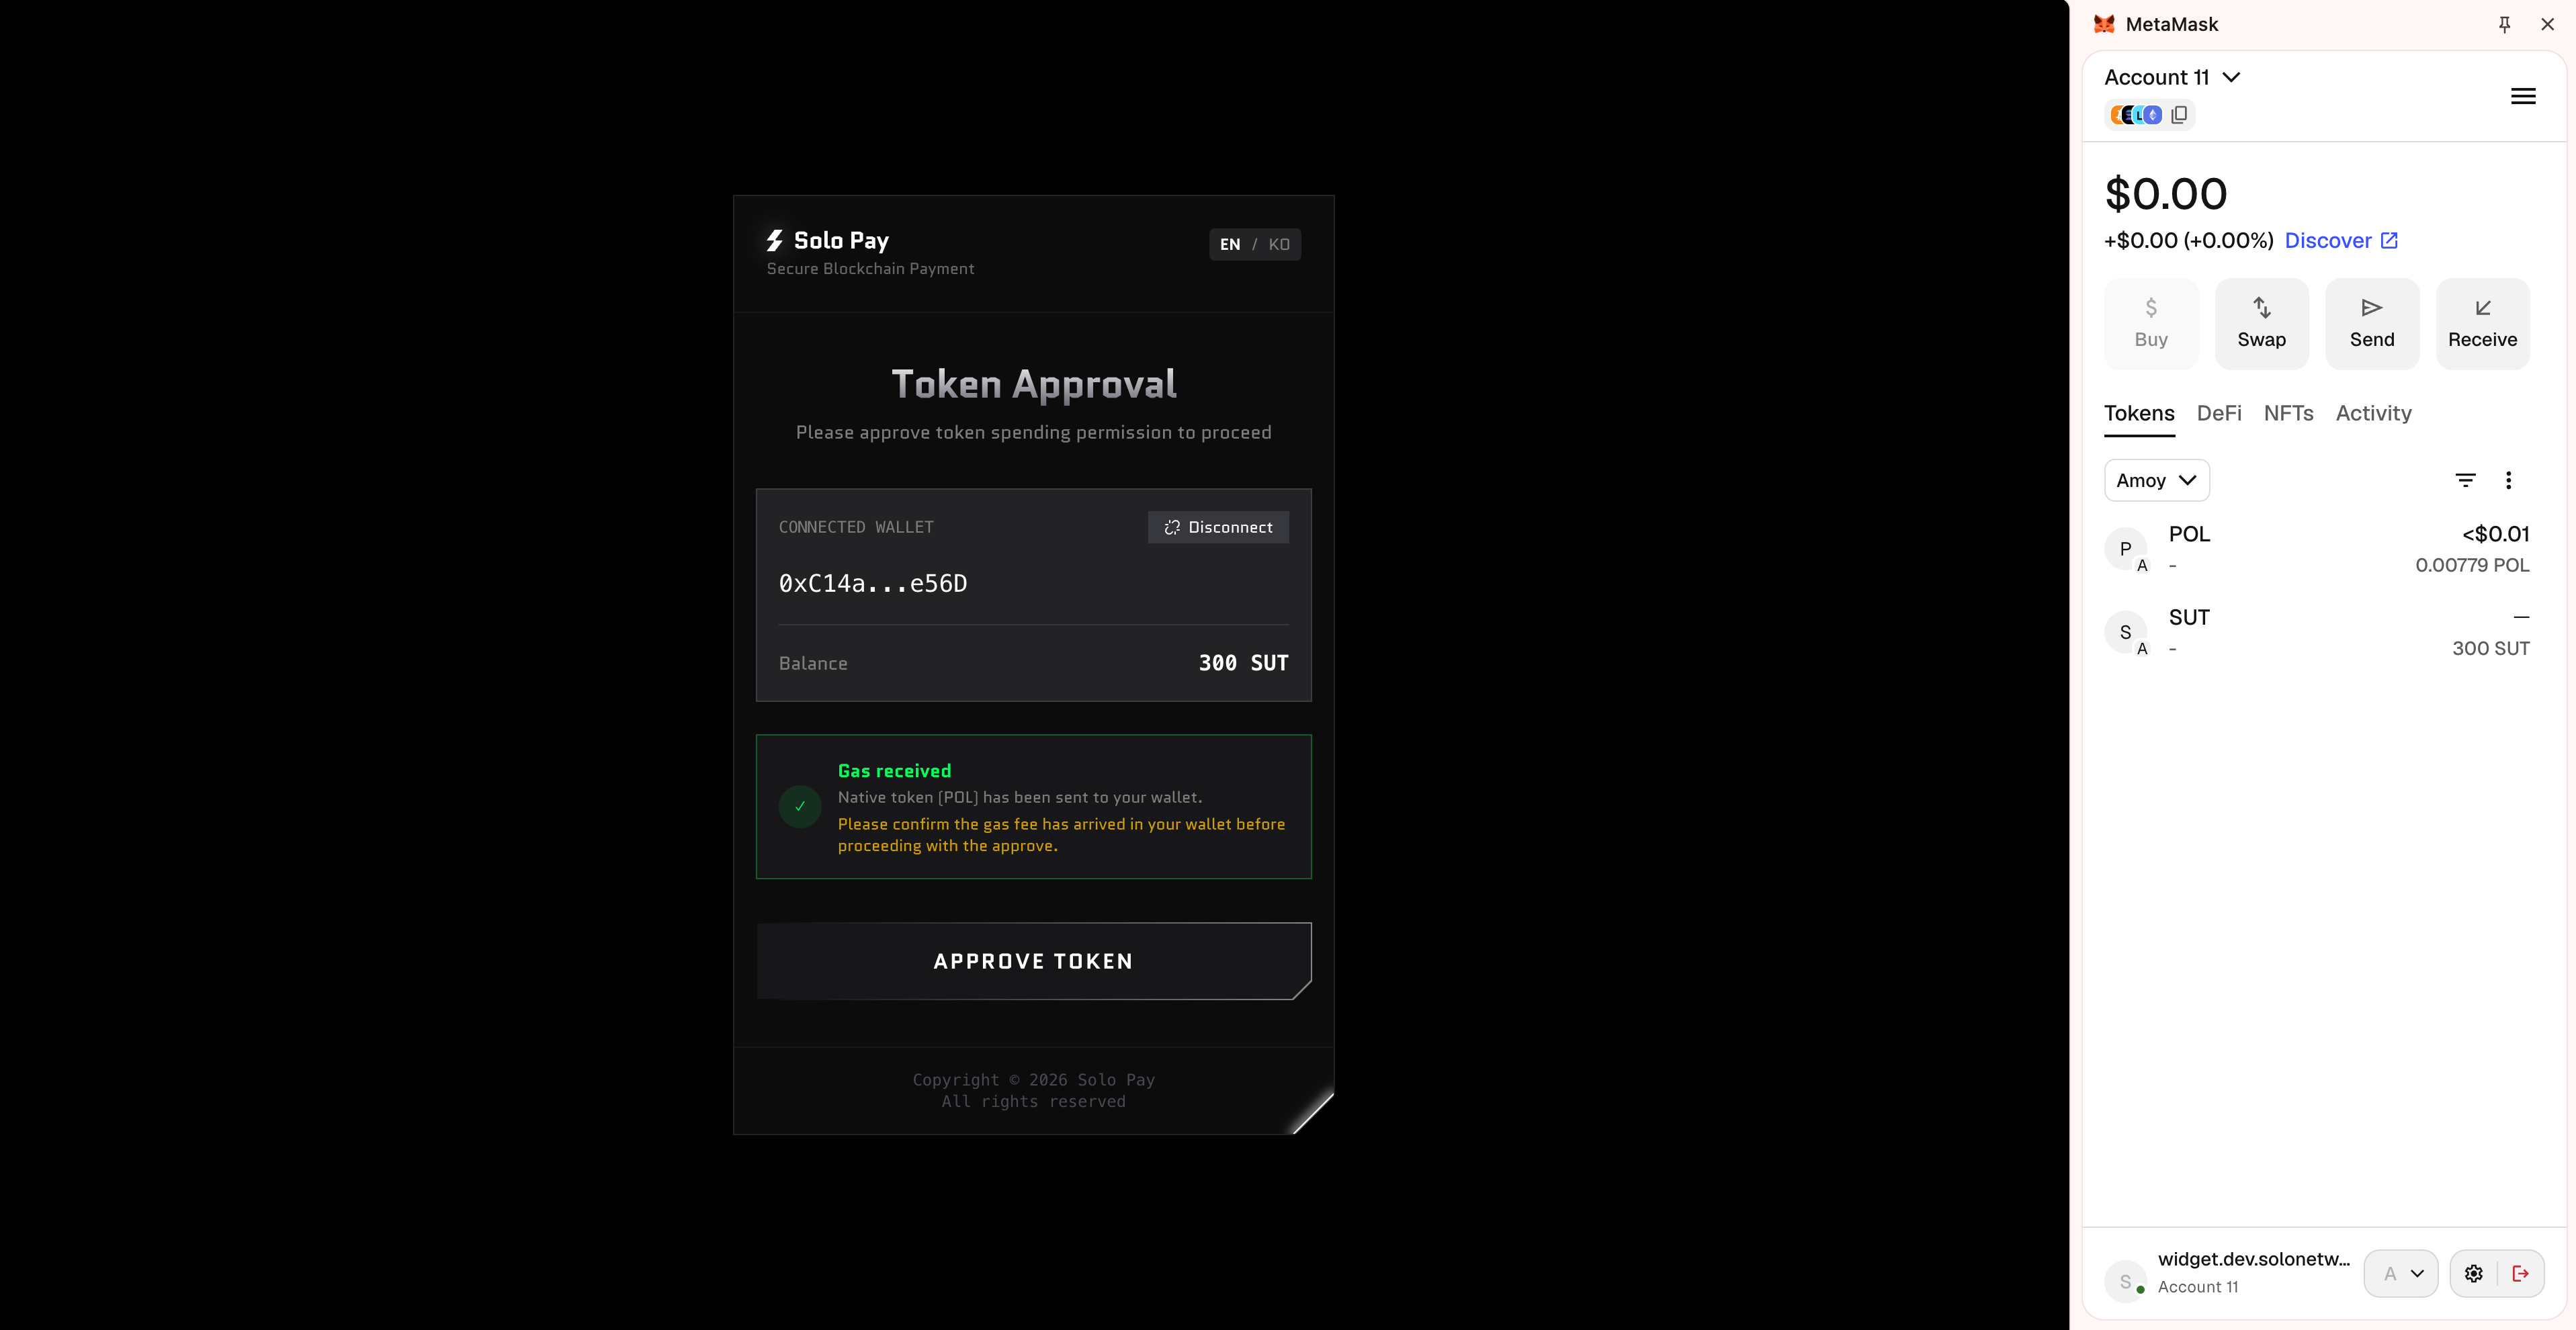
You can also click on the POL token in MetaMask to verify the exact balance.
Step 4: Approve Token Usage
To approve the transaction of tokens to be used for payment, click APPROVE TOKEN in the widget.
Step 5: Approval Transaction
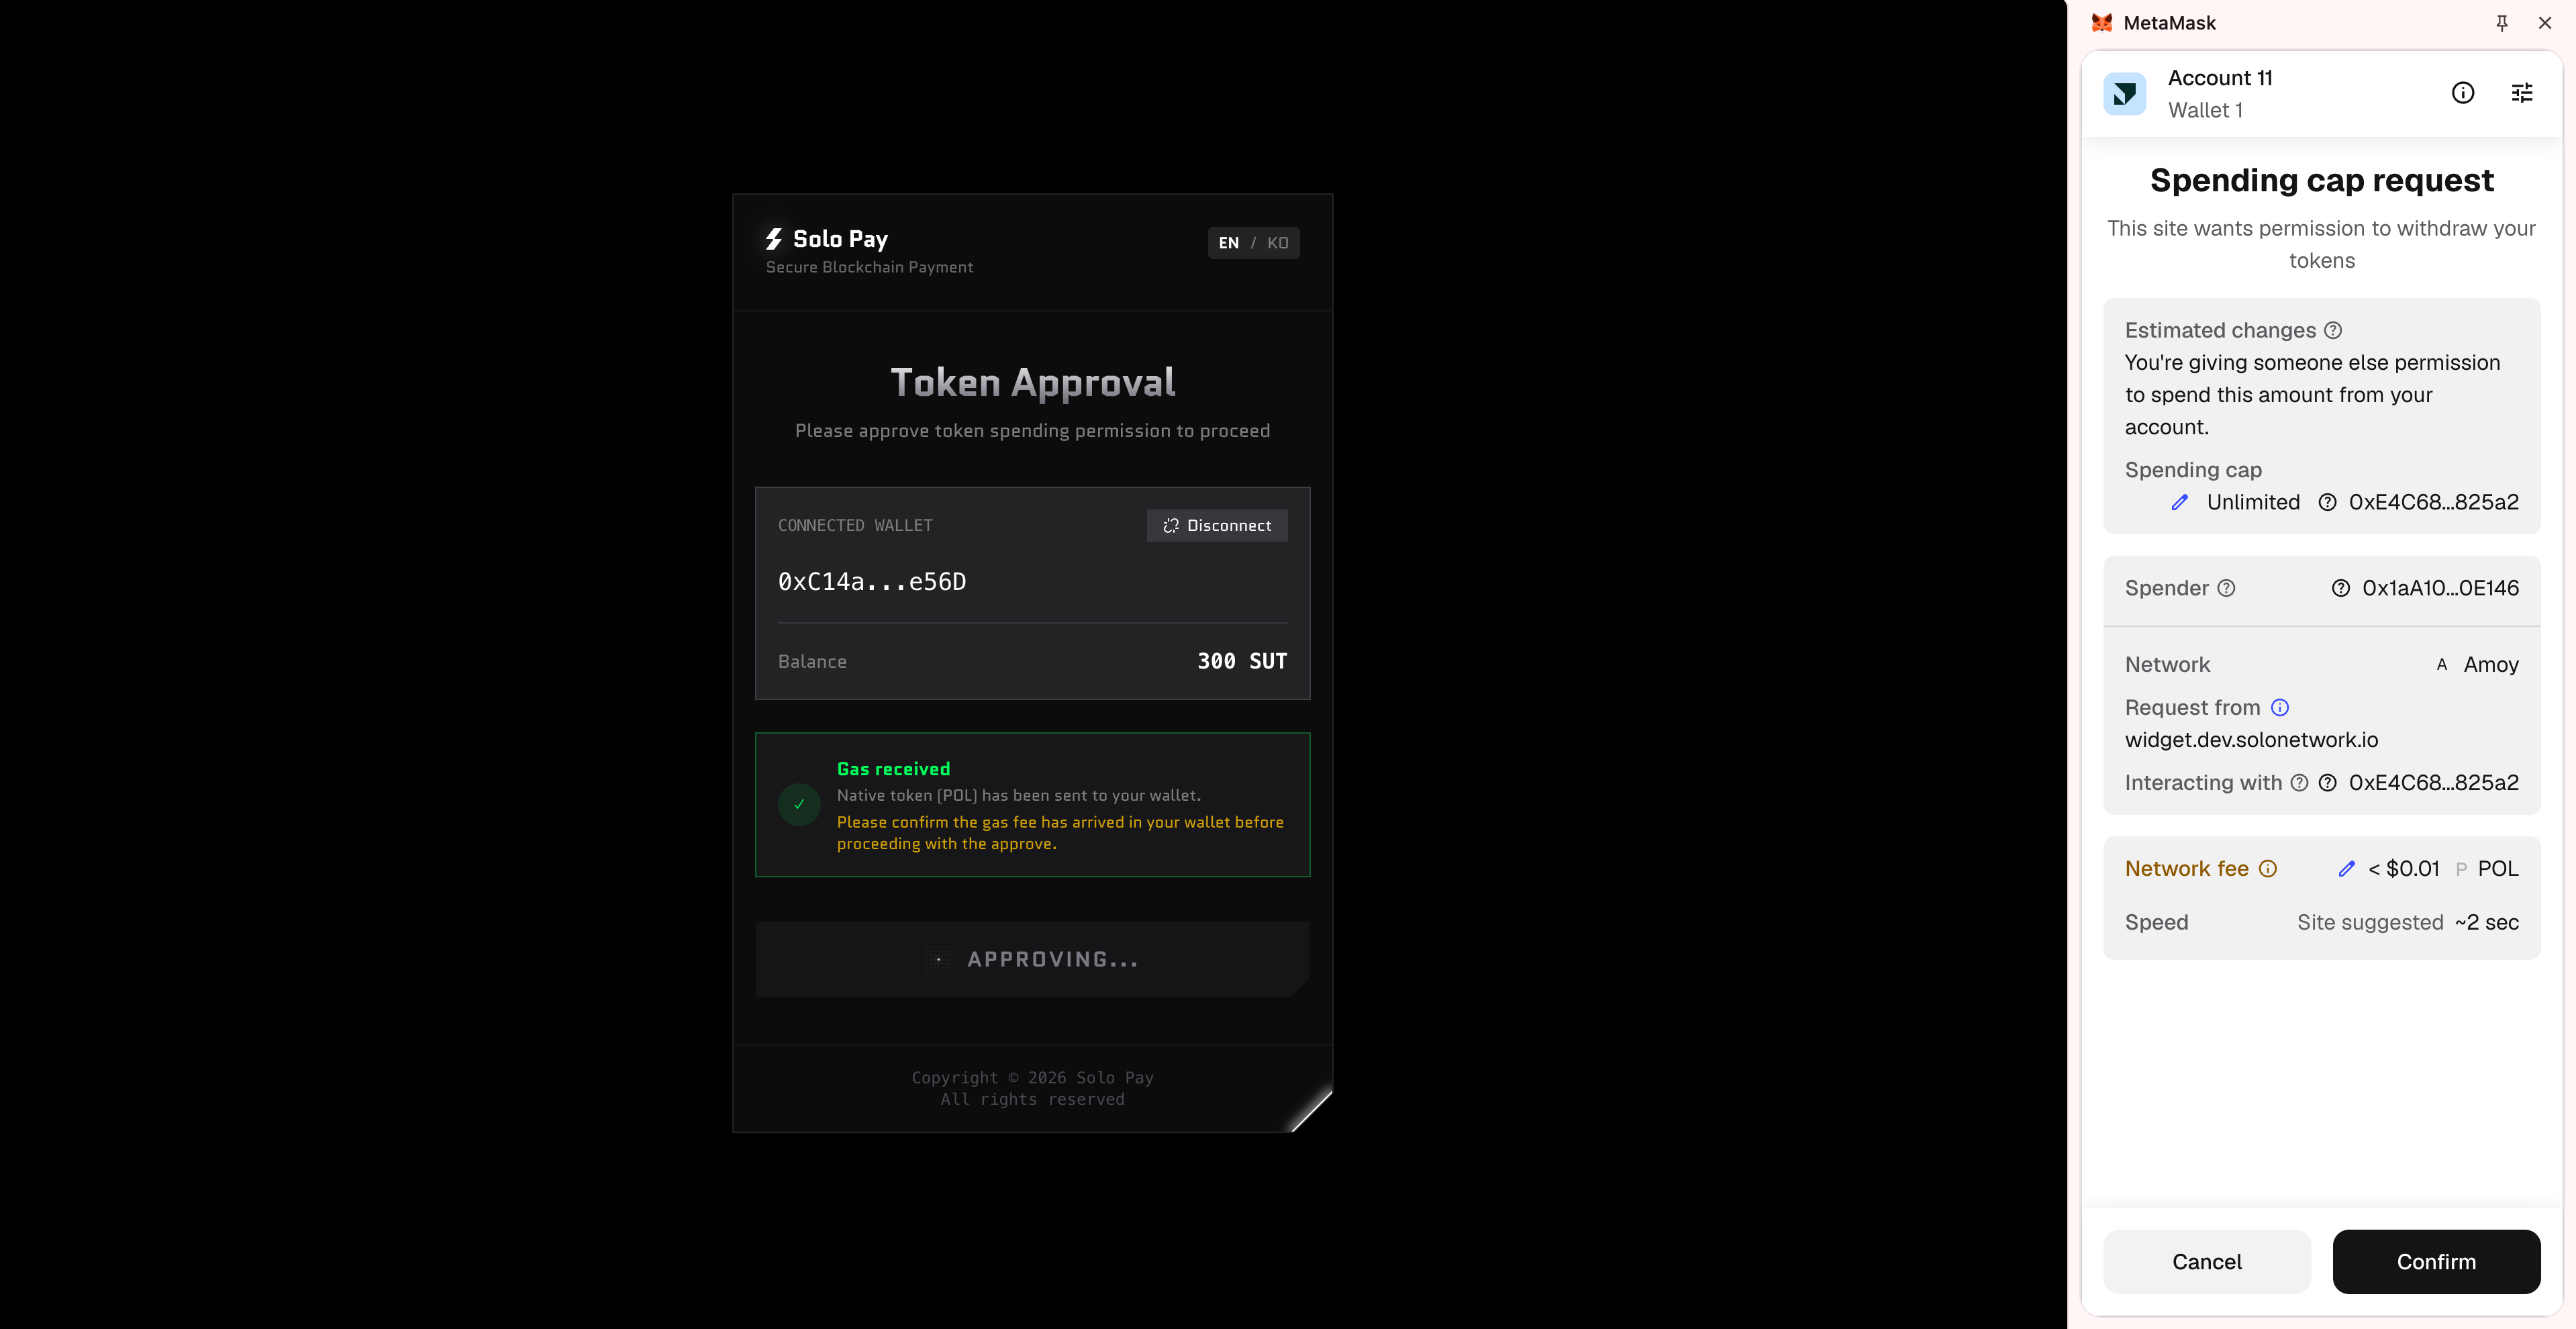
A Spending cap request popup will appear. This is the process of authorizing SoloPay to process your tokens. Follow the on-screen instructions and click Confirm.
Step 6: Review Payment Details & Proceed
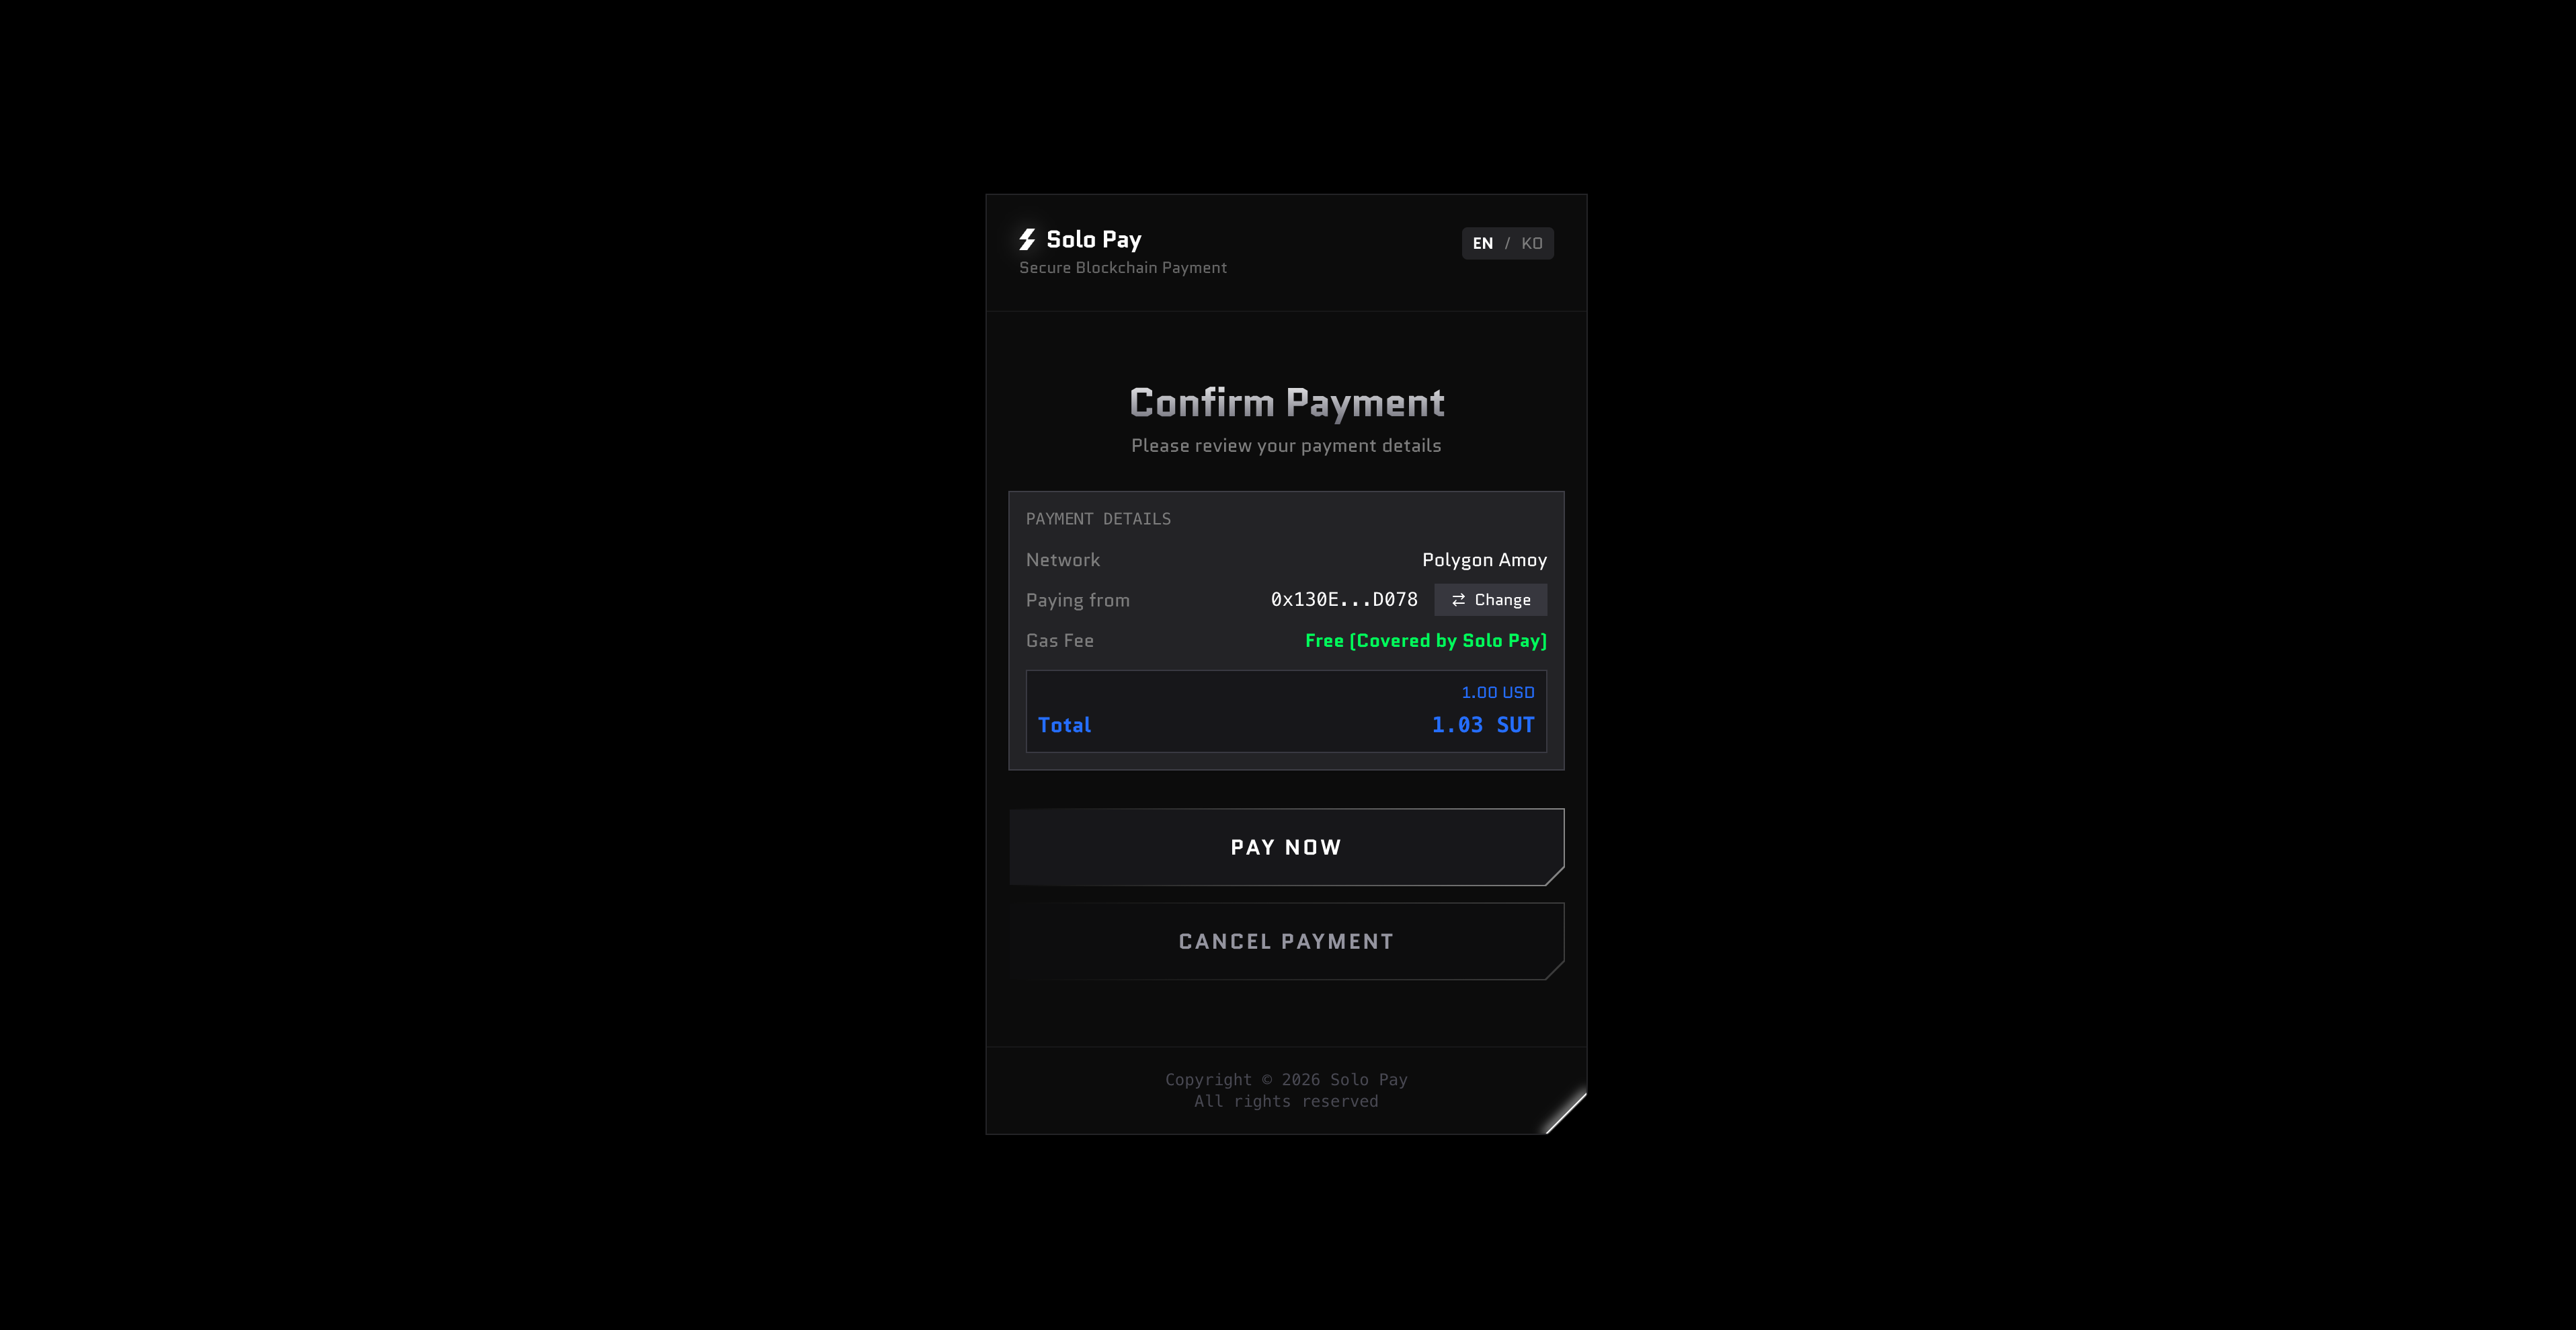
Once token approval is complete, you will proceed to the payment screen. Review the amount, network, and gas fee. The gas fee shows Free (Covered by Solo Pay). Click PAY NOW.
Step 7: Sign the Payment Request
A Signature request popup will appear. This is the final payment authorization signature. No gas fee is charged. Click Confirm.

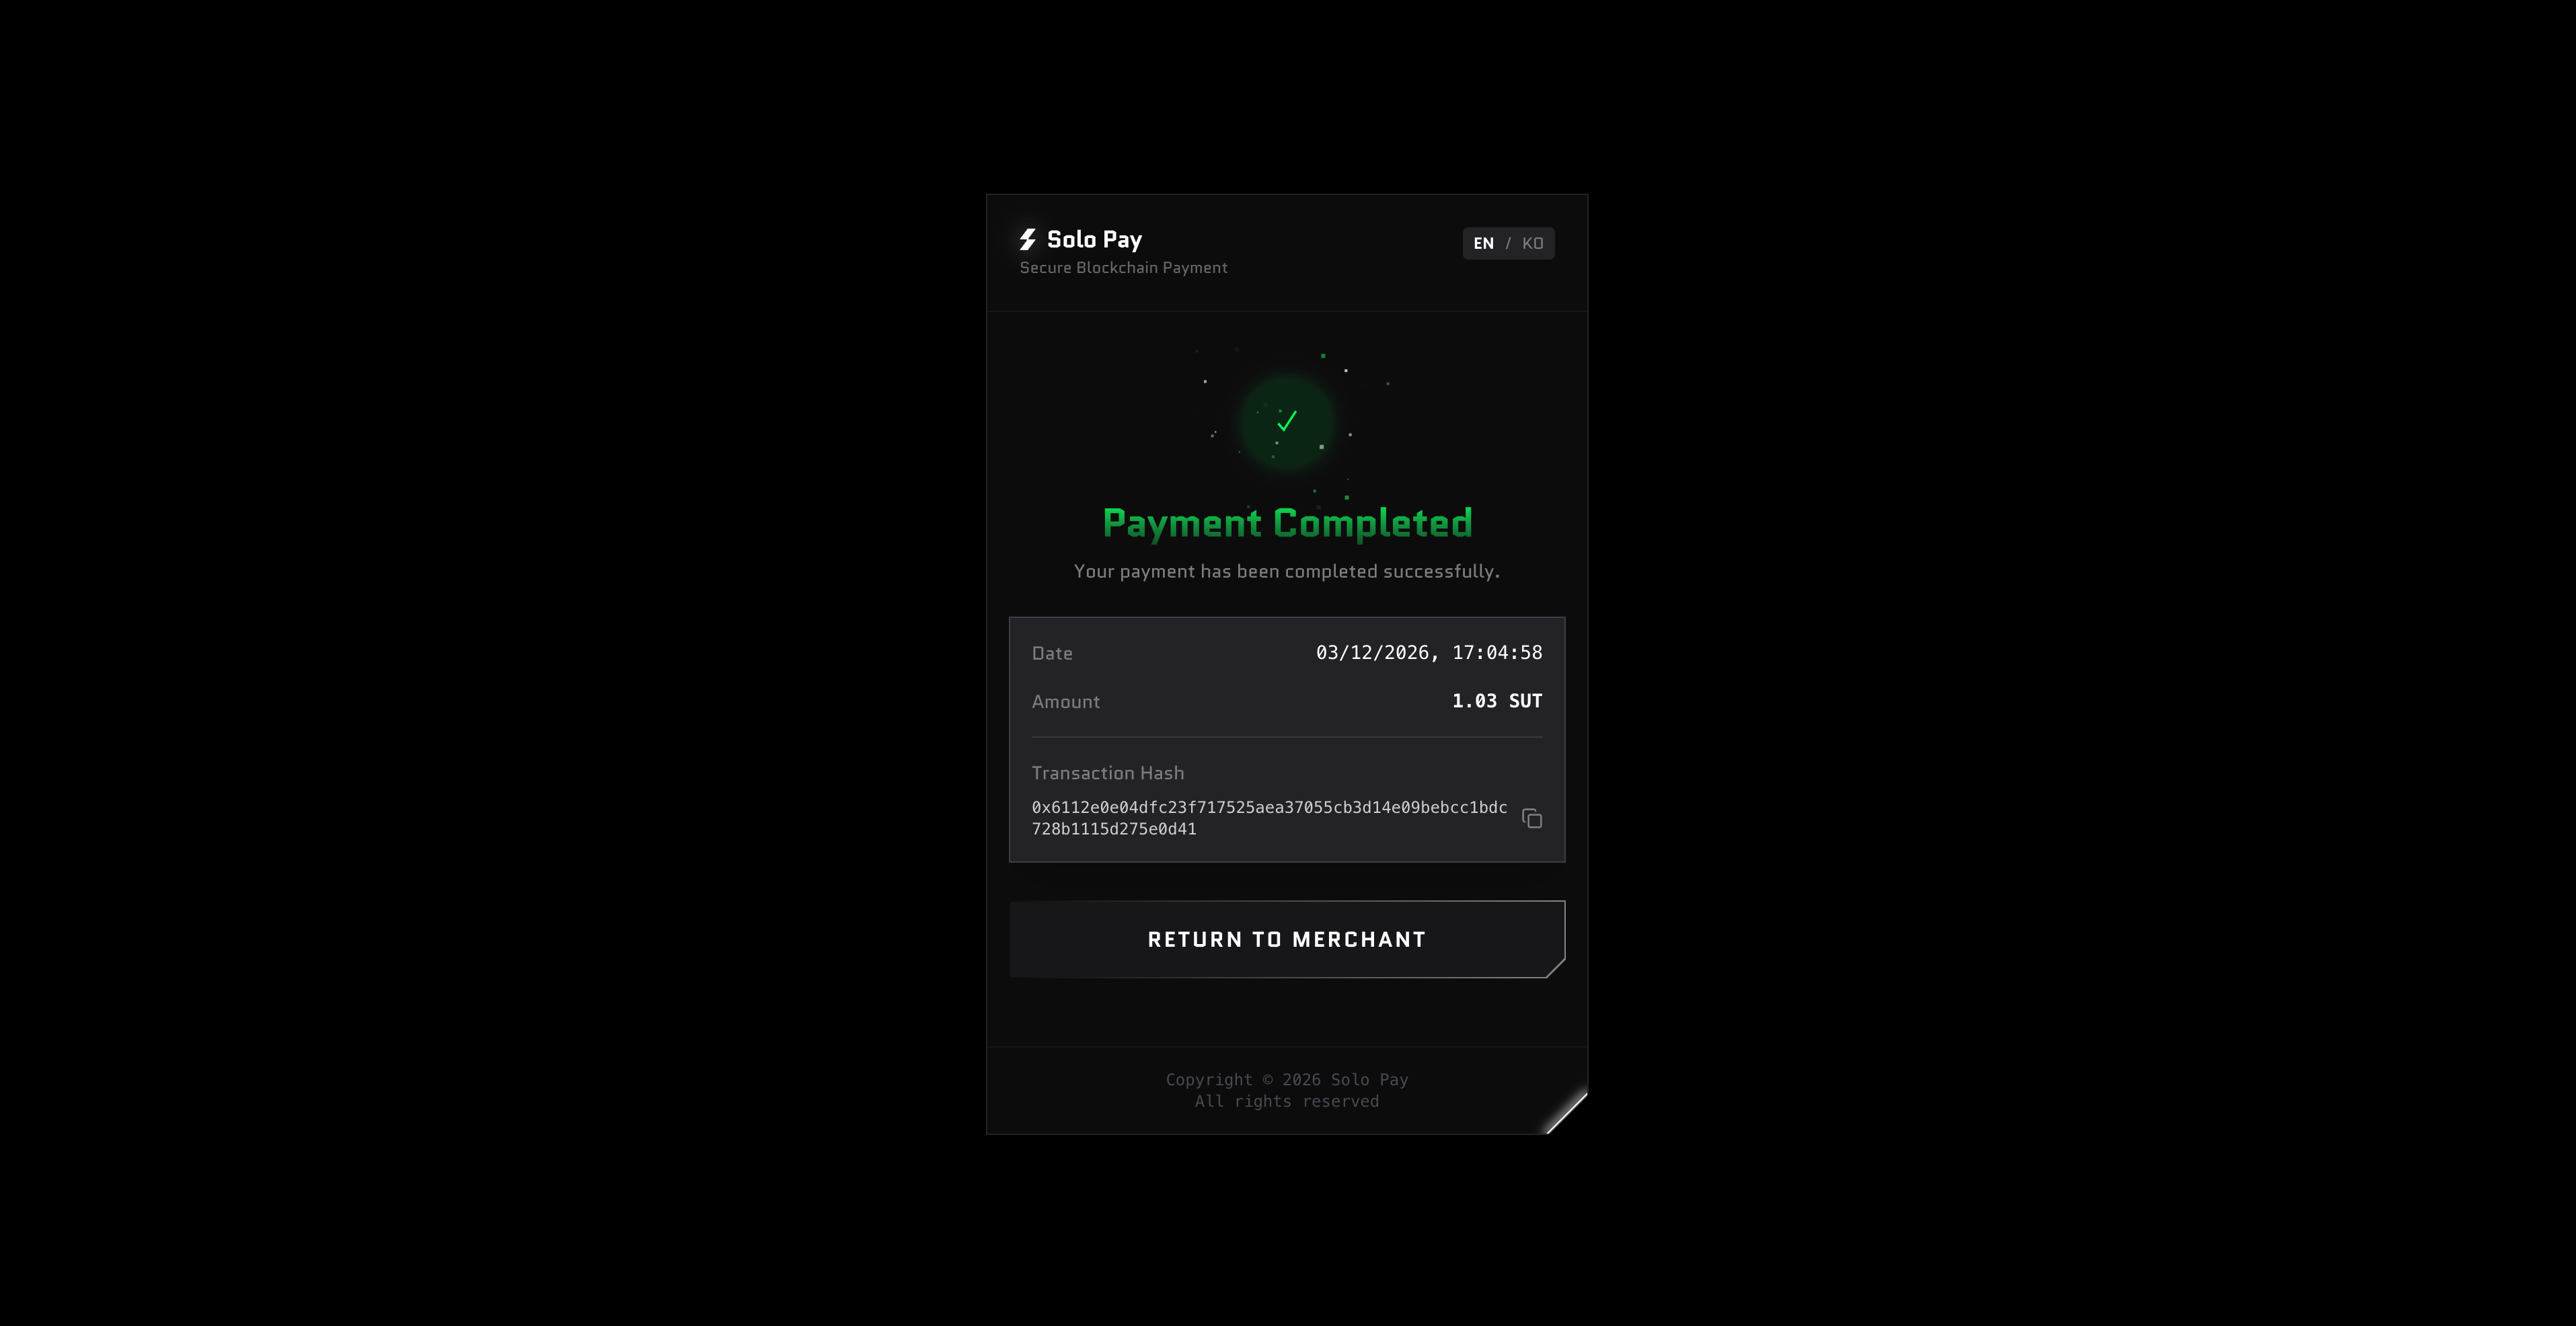
Step 8: Payment Complete
When the Payment Completed screen appears, your payment is processed, and the funds are held securely. Click RETURN TO MERCHANT to return to the merchant page.
Paying with Trust Wallet
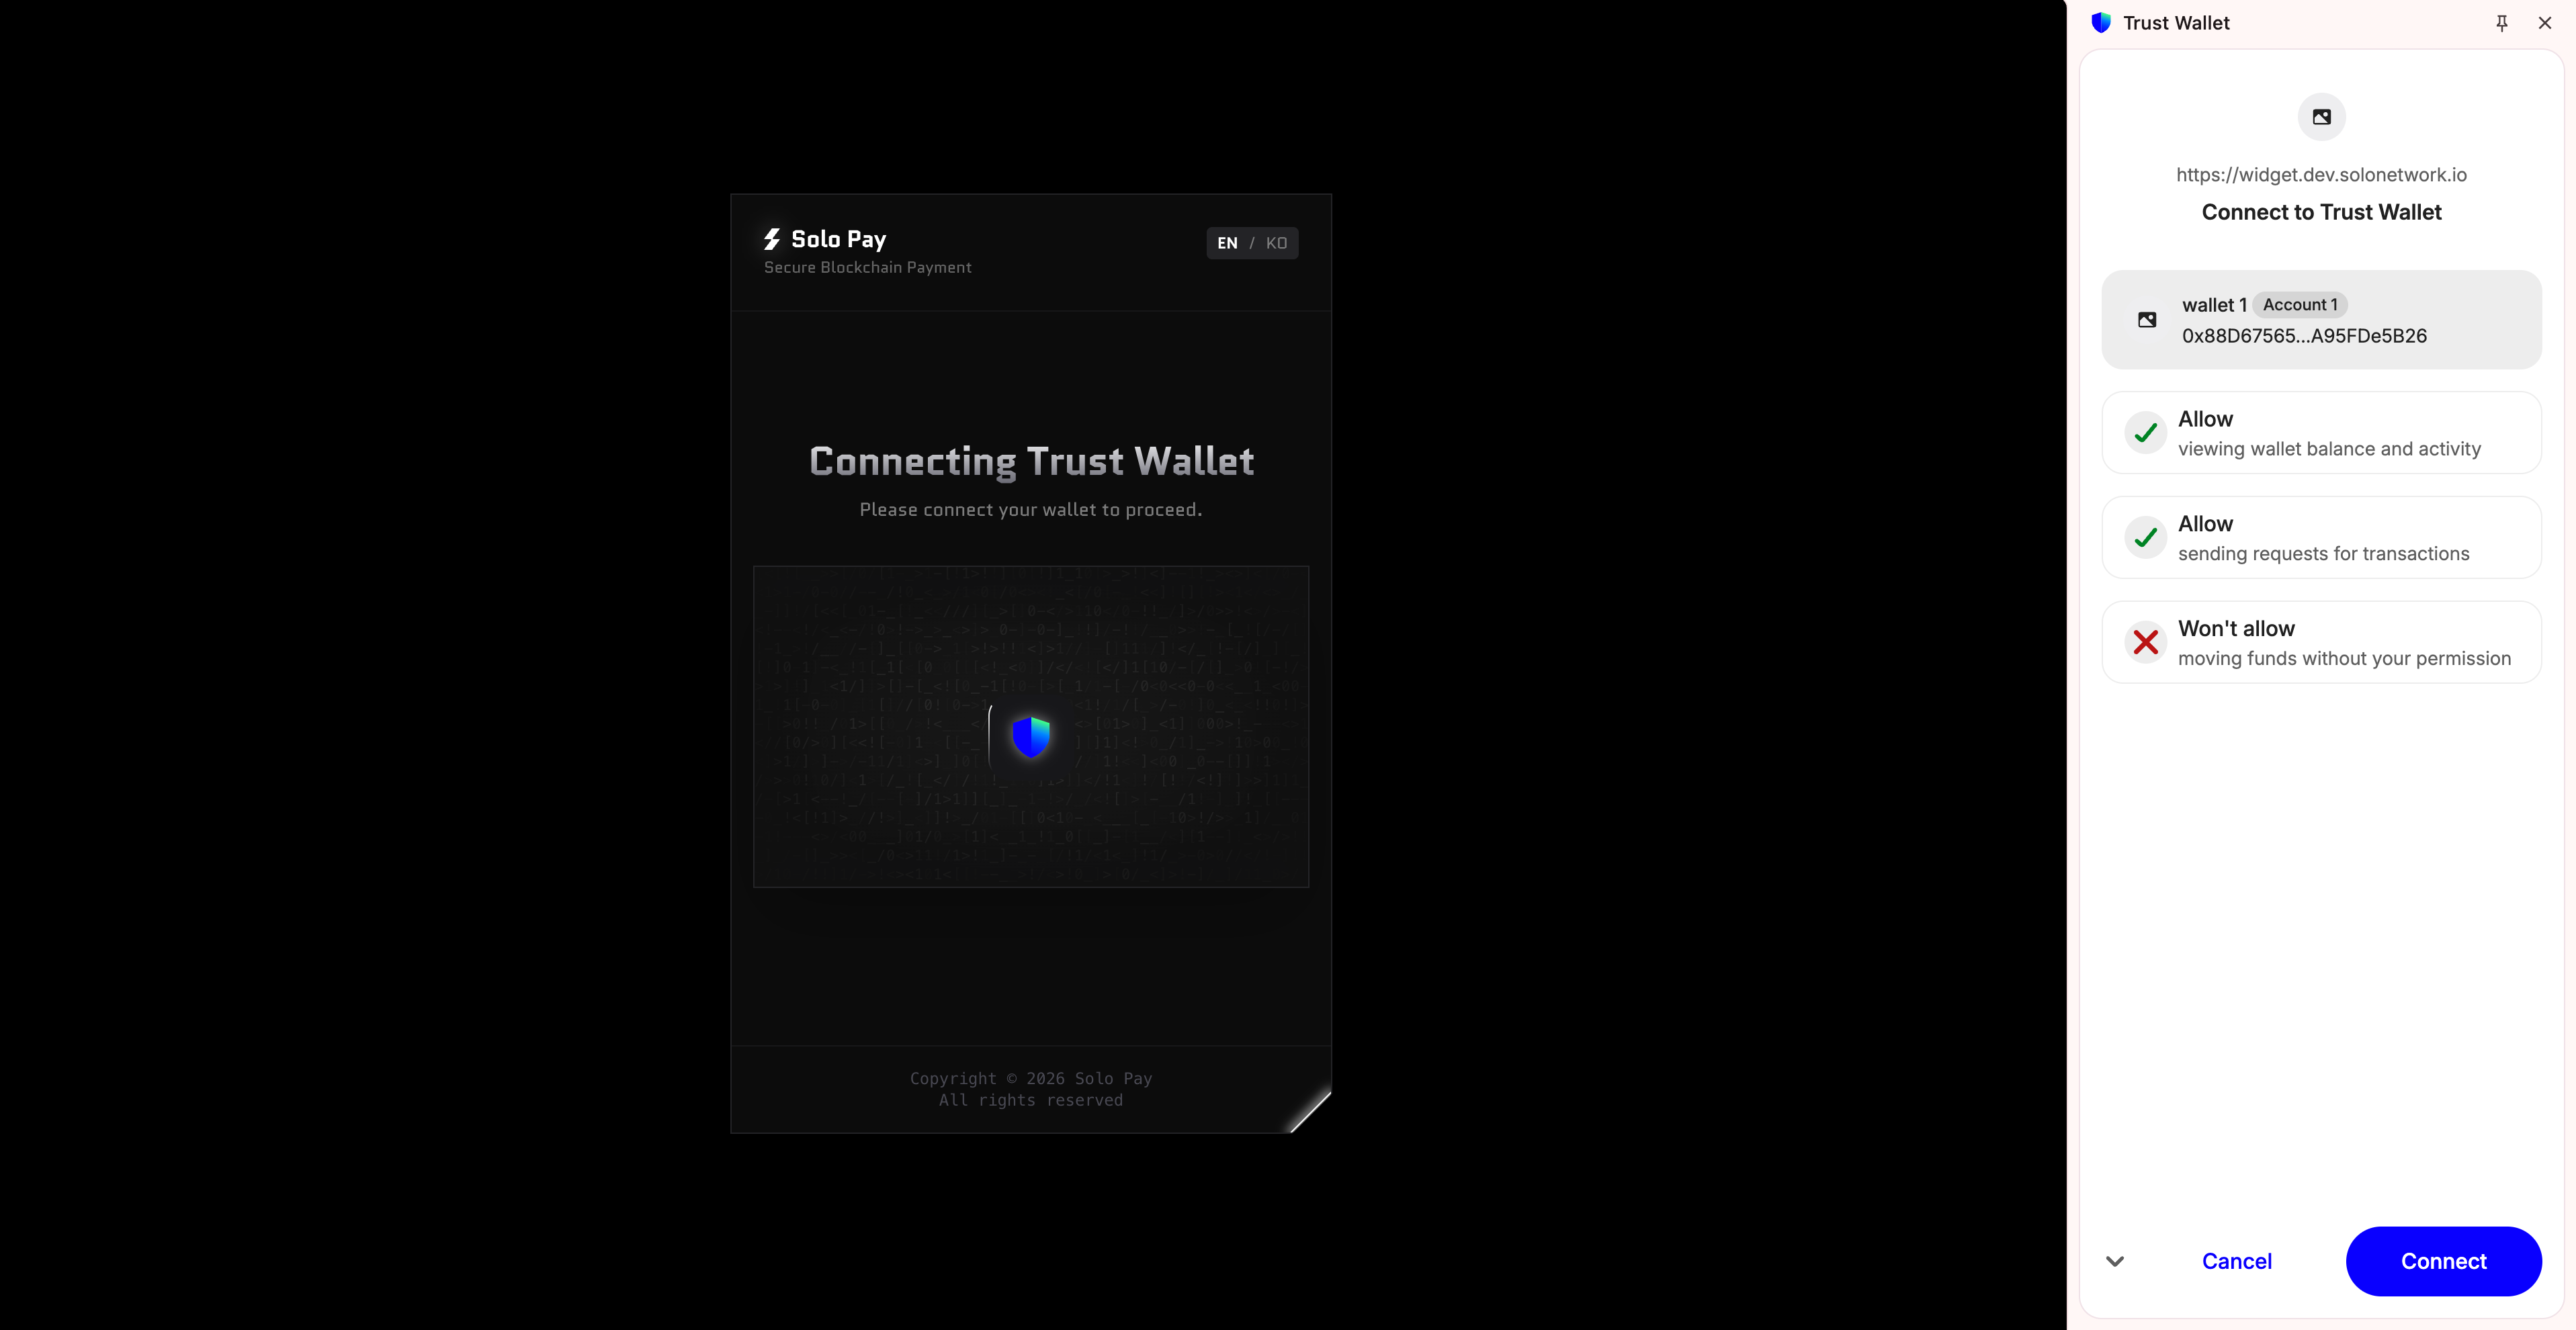
Step 2: Approve Connection
A Trust Wallet popup will appear. Confirm your account and click Connect.
Step 3: Get Free Gas
This step only appears when all of the following conditions are met:
- Your wallet does not have enough native token (POL) to process the approval transaction
- You have not received free gas from SoloPay before (limited to once per wallet)
- Your payment token balance is sufficient for the payment amount
If the GET GAS button appears, click it to receive free gas from SoloPay.
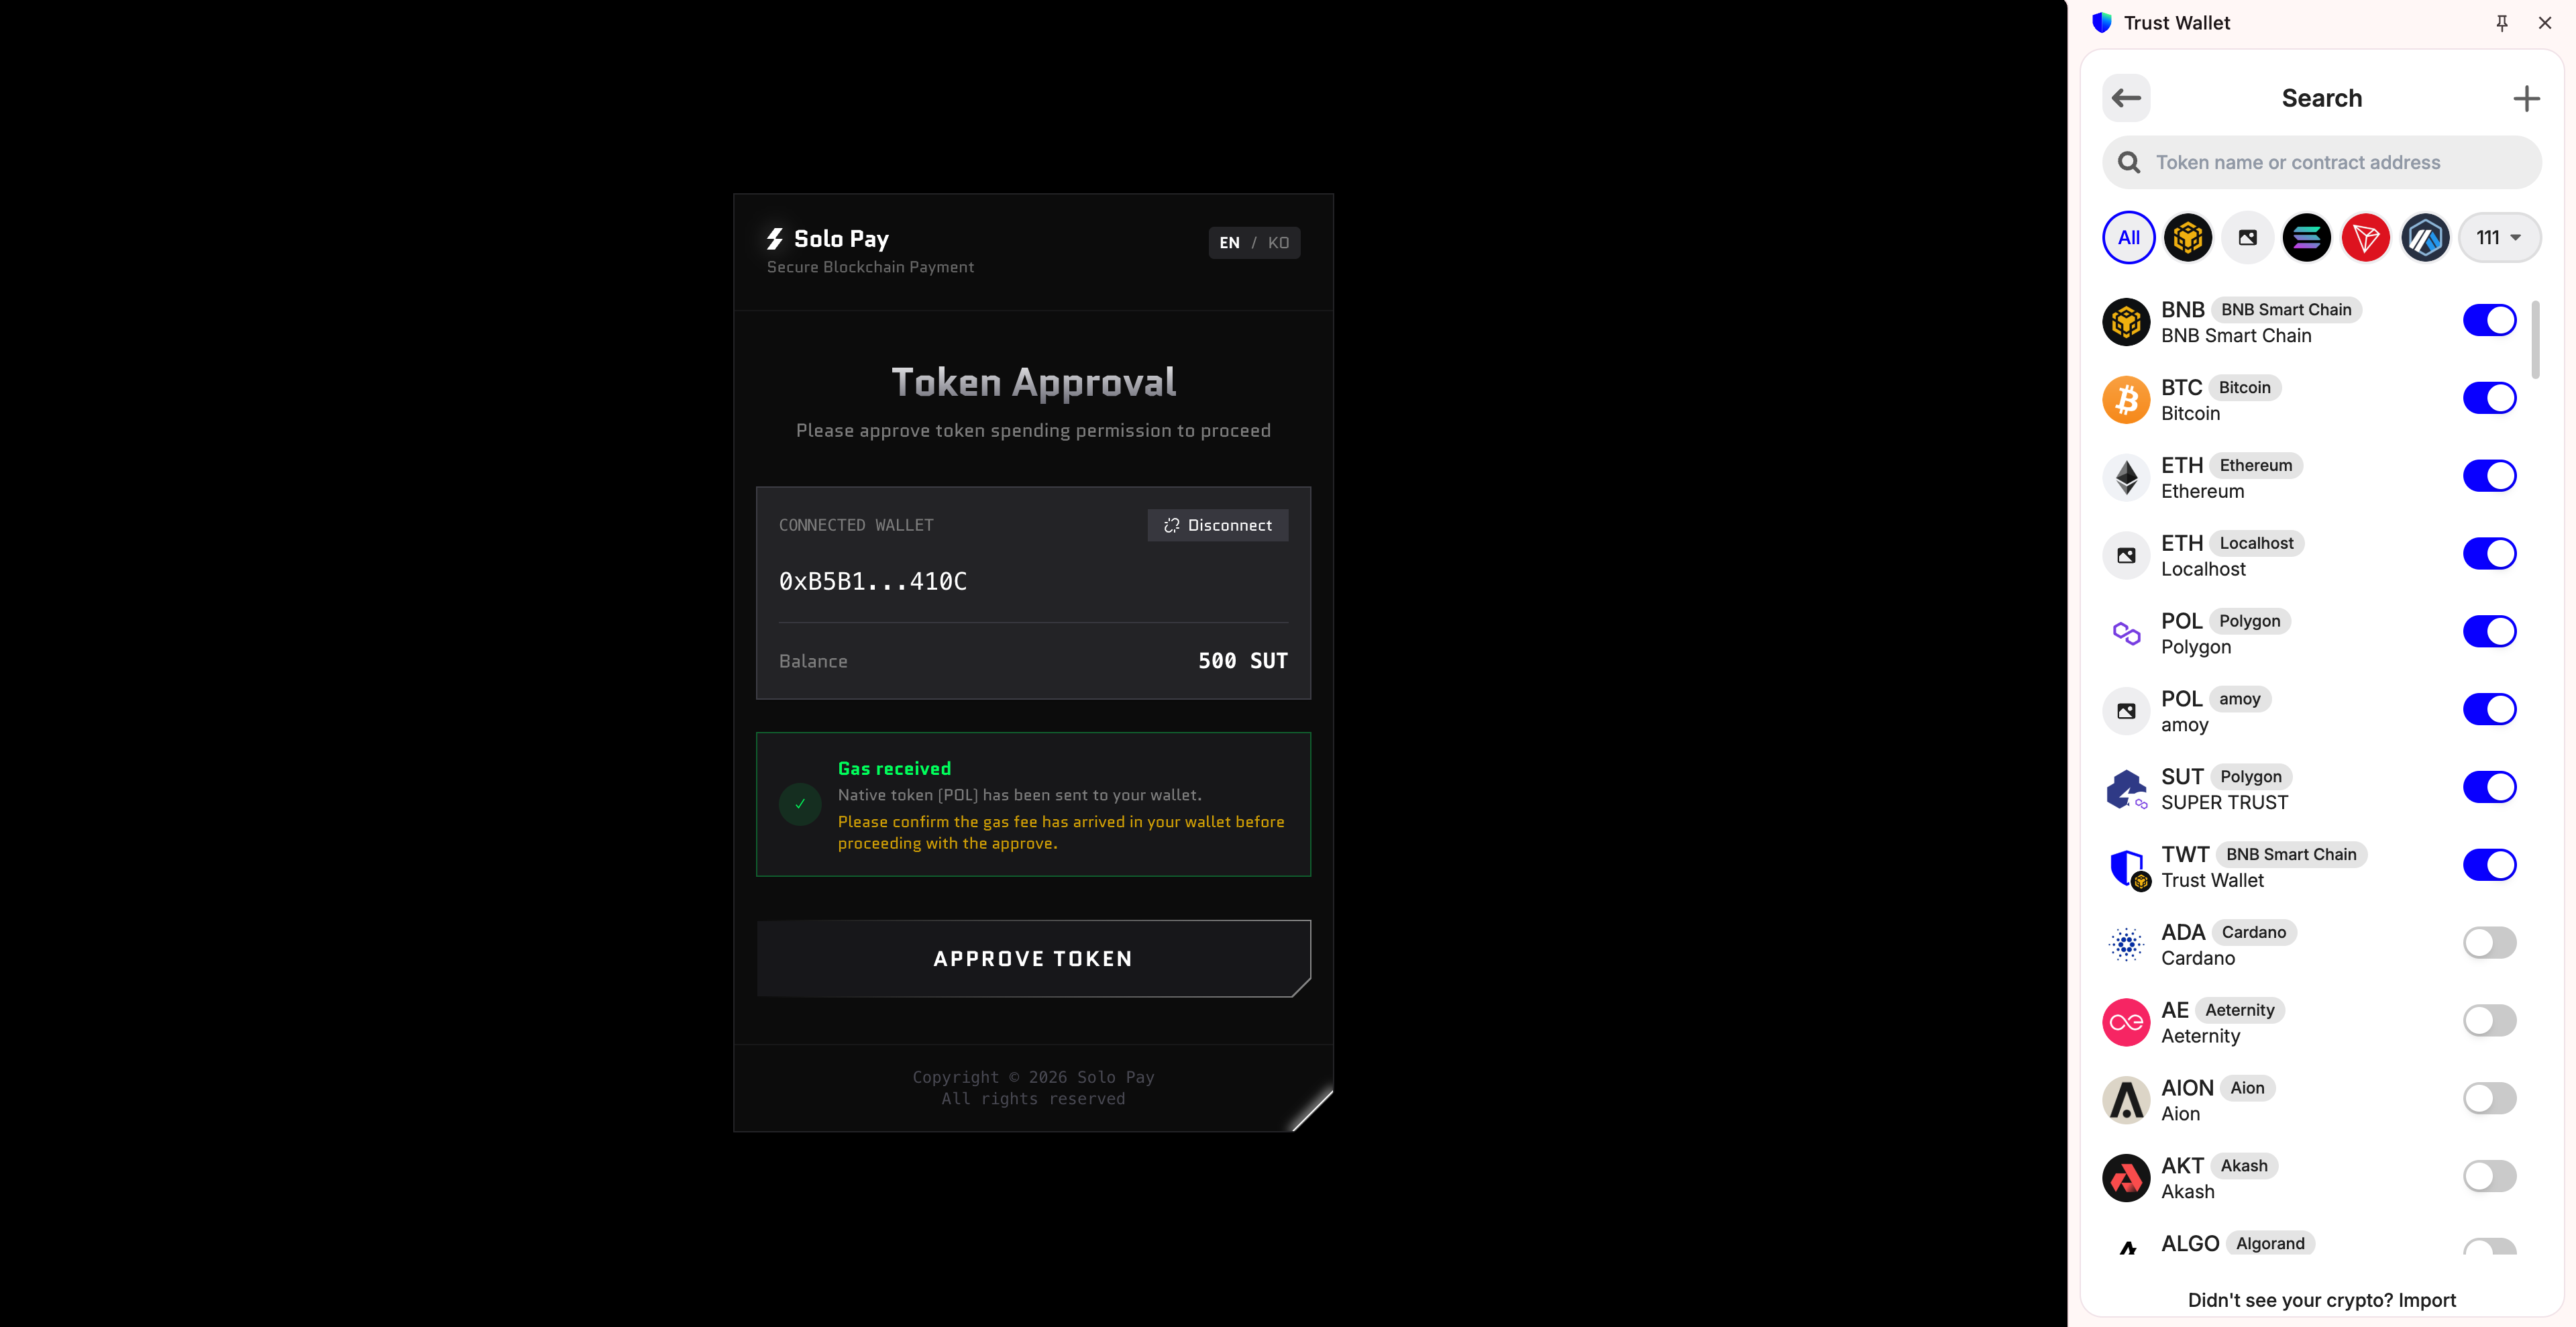
Once you receive the gas, a Gas received message will appear in the widget. Before proceeding, open Trust Wallet and click Manage crypto to check your token list.

Find and select POL from the token list to view its details.
Confirm that the POL balance has arrived in your wallet.
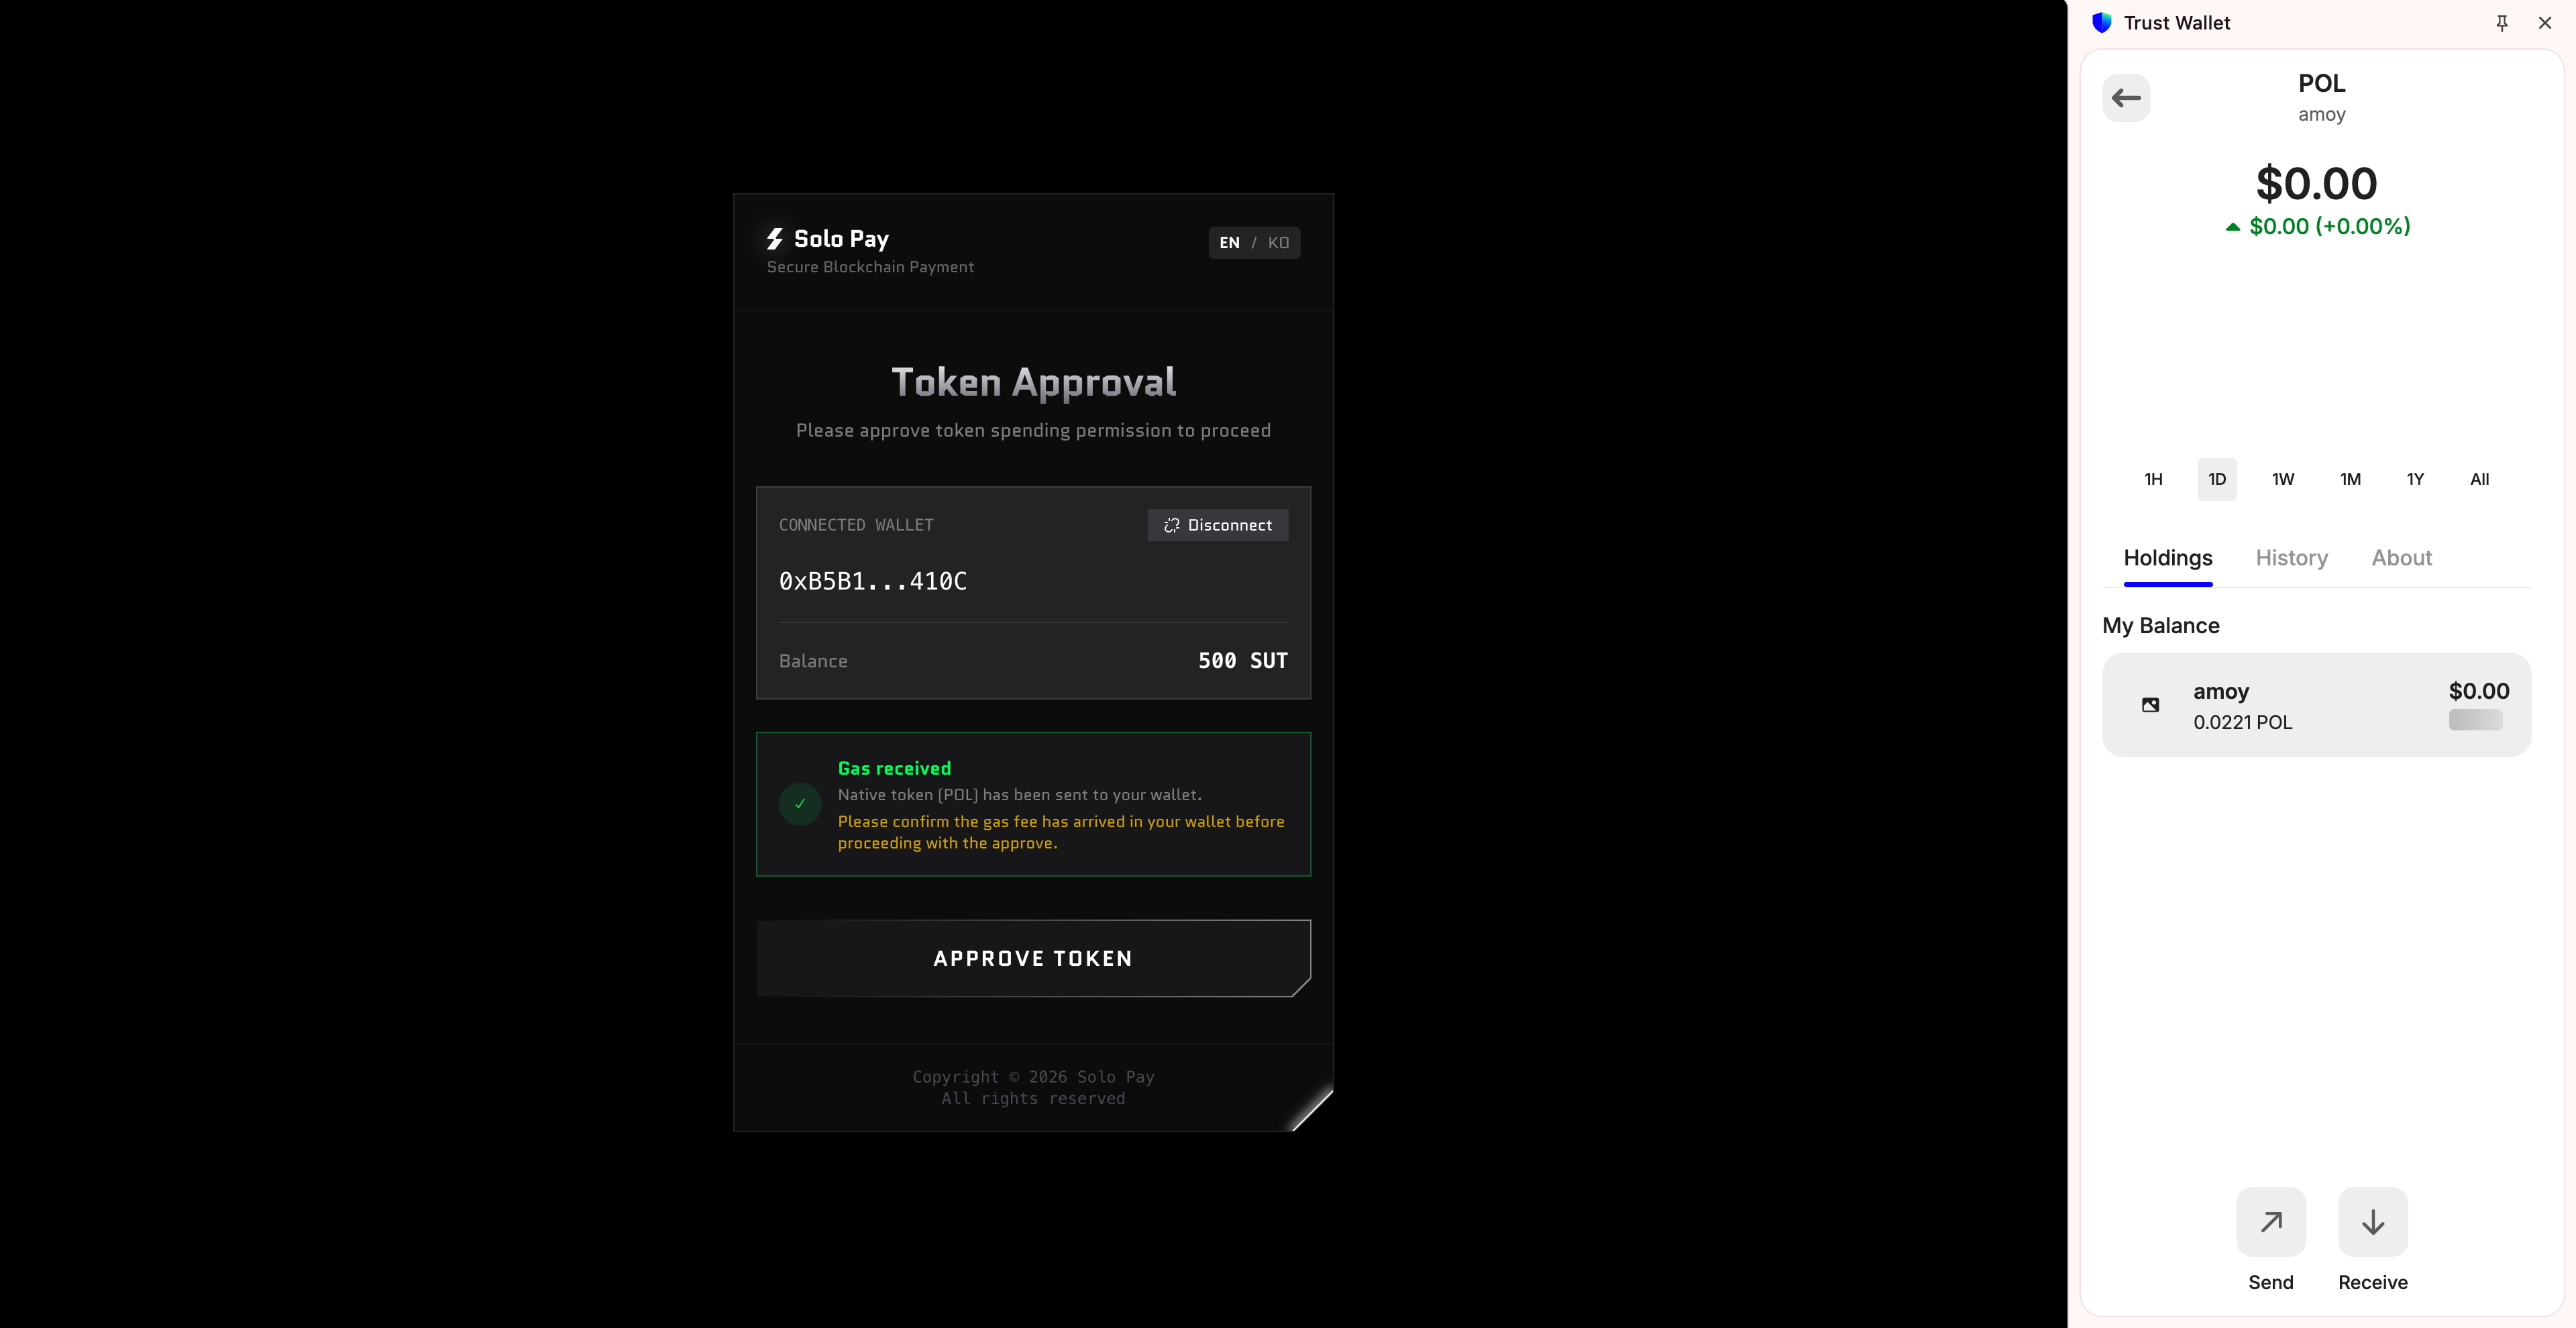
(For Trust Wallet, you must verify your balance before proceeding with the token approval.)
Step 4: Approve Token Usage
To approve the transaction of tokens to be used for payment, click APPROVE TOKEN in the widget.
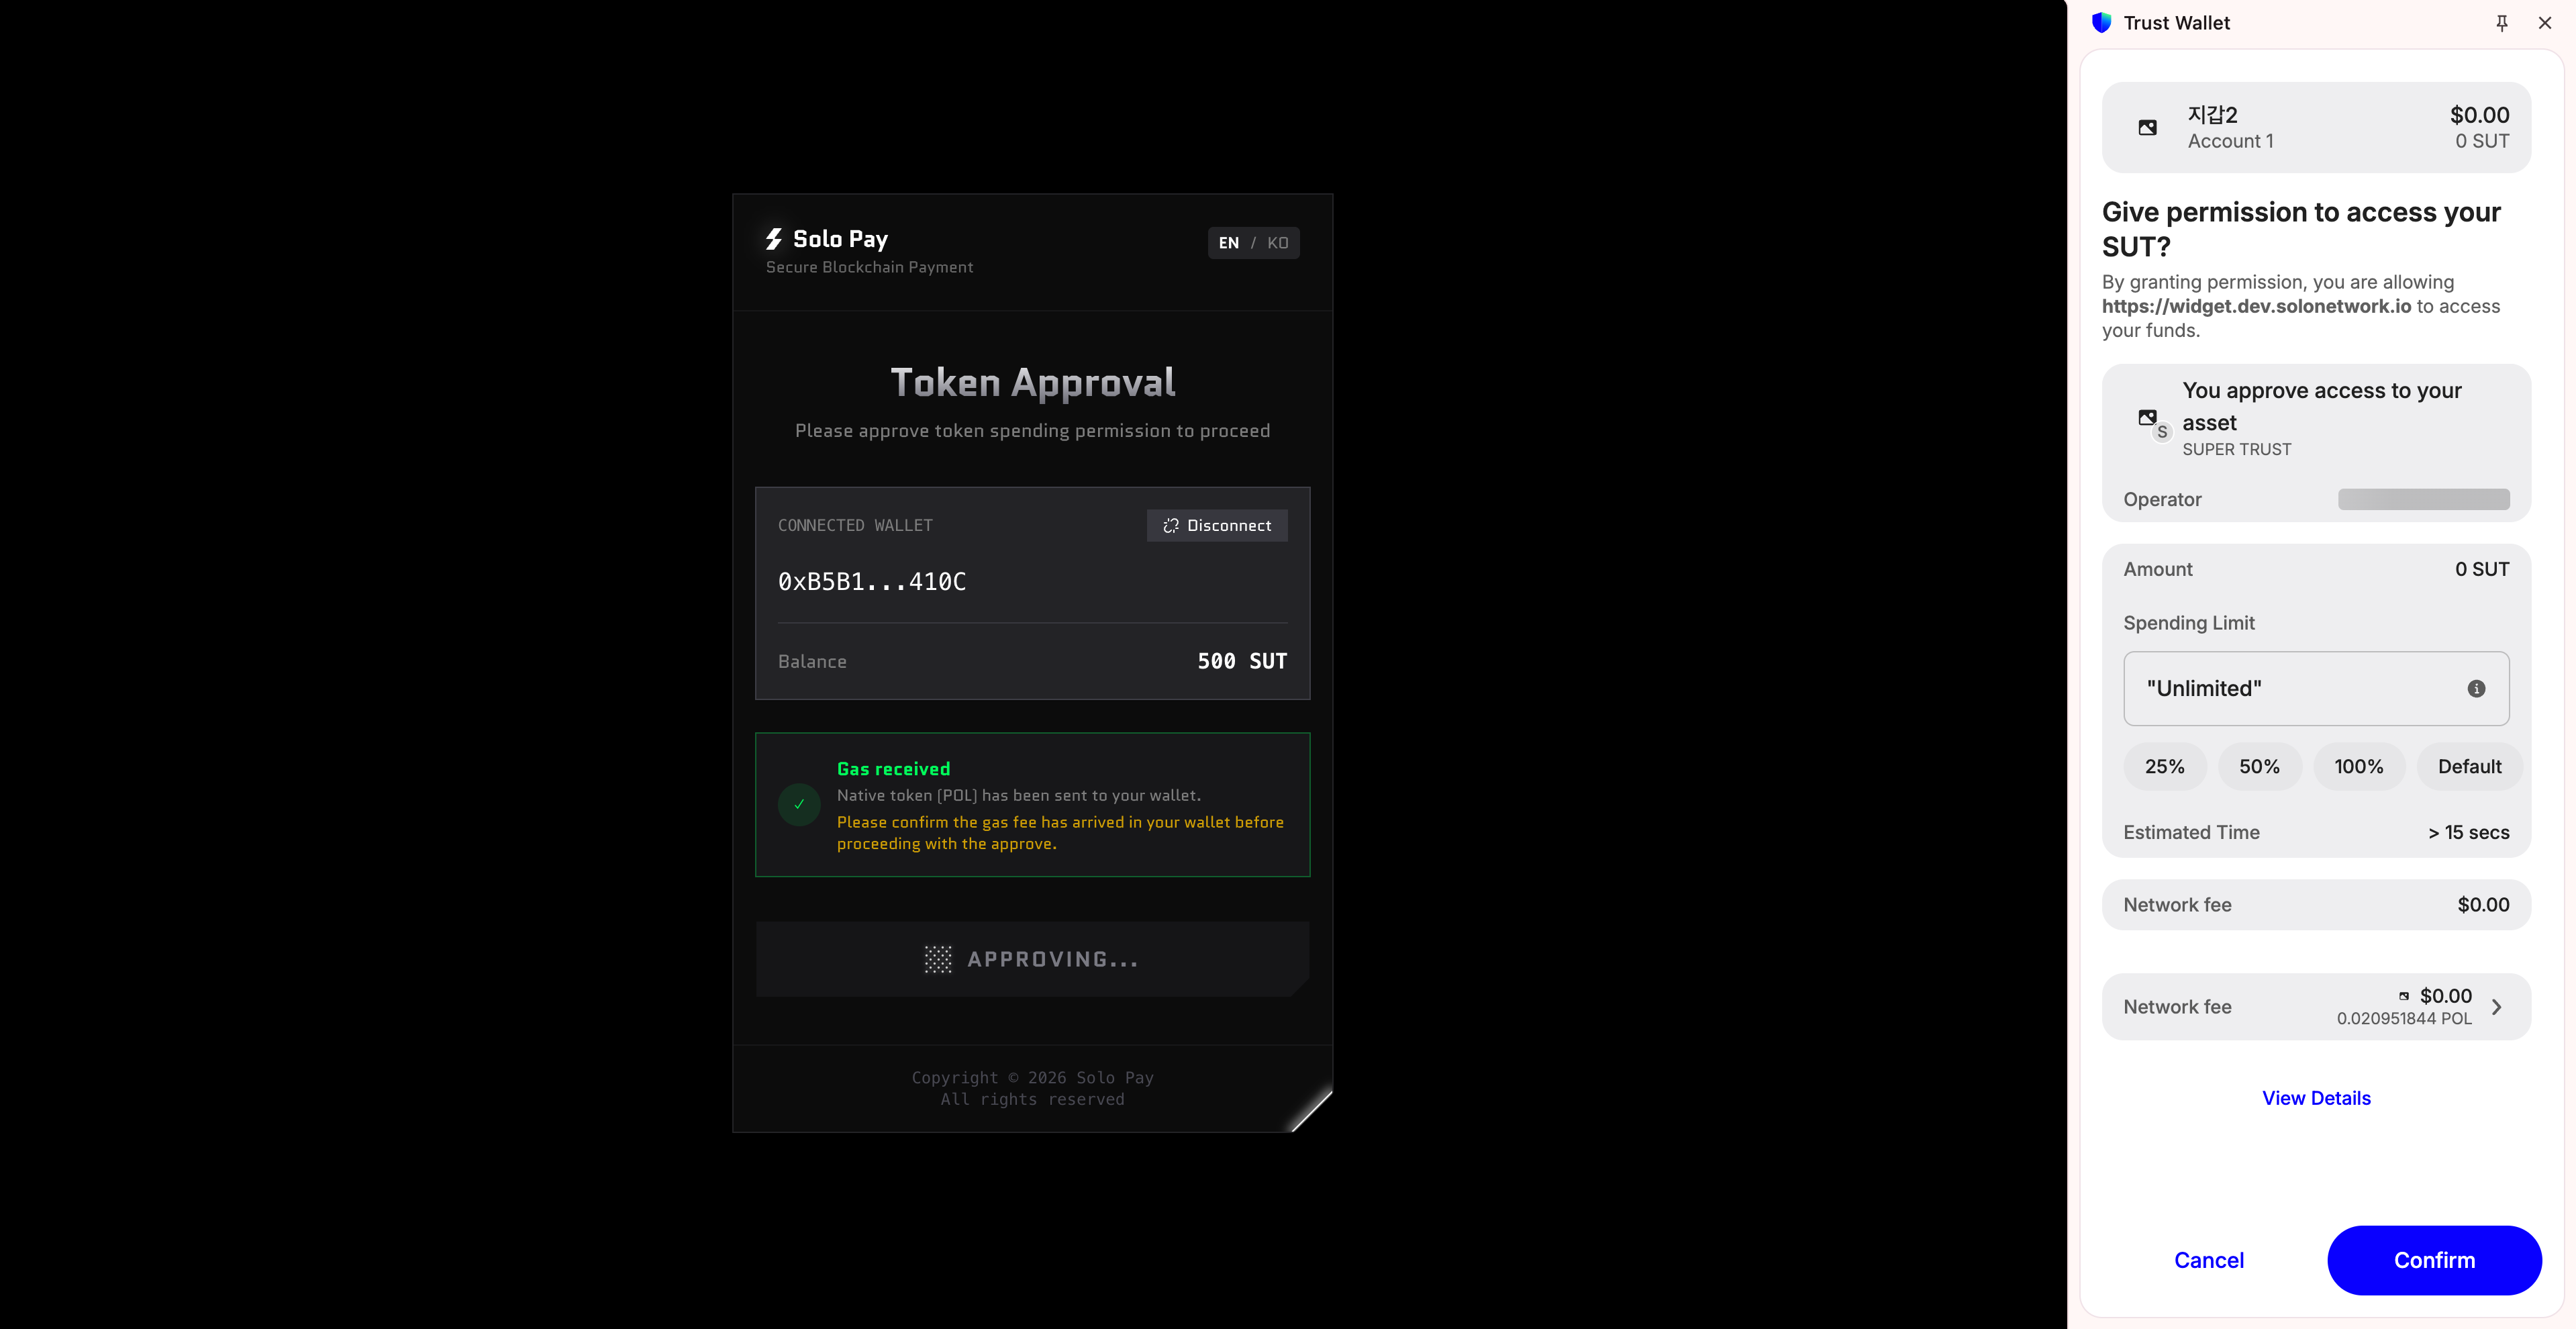
Step 5: Approval Transaction
A token approval transaction popup will appear. This is the process of authorizing SoloPay to process your tokens. Follow the on-screen instructions and click Confirm.
(If a security risk warning message appears, review the content and click Continue to proceed.) 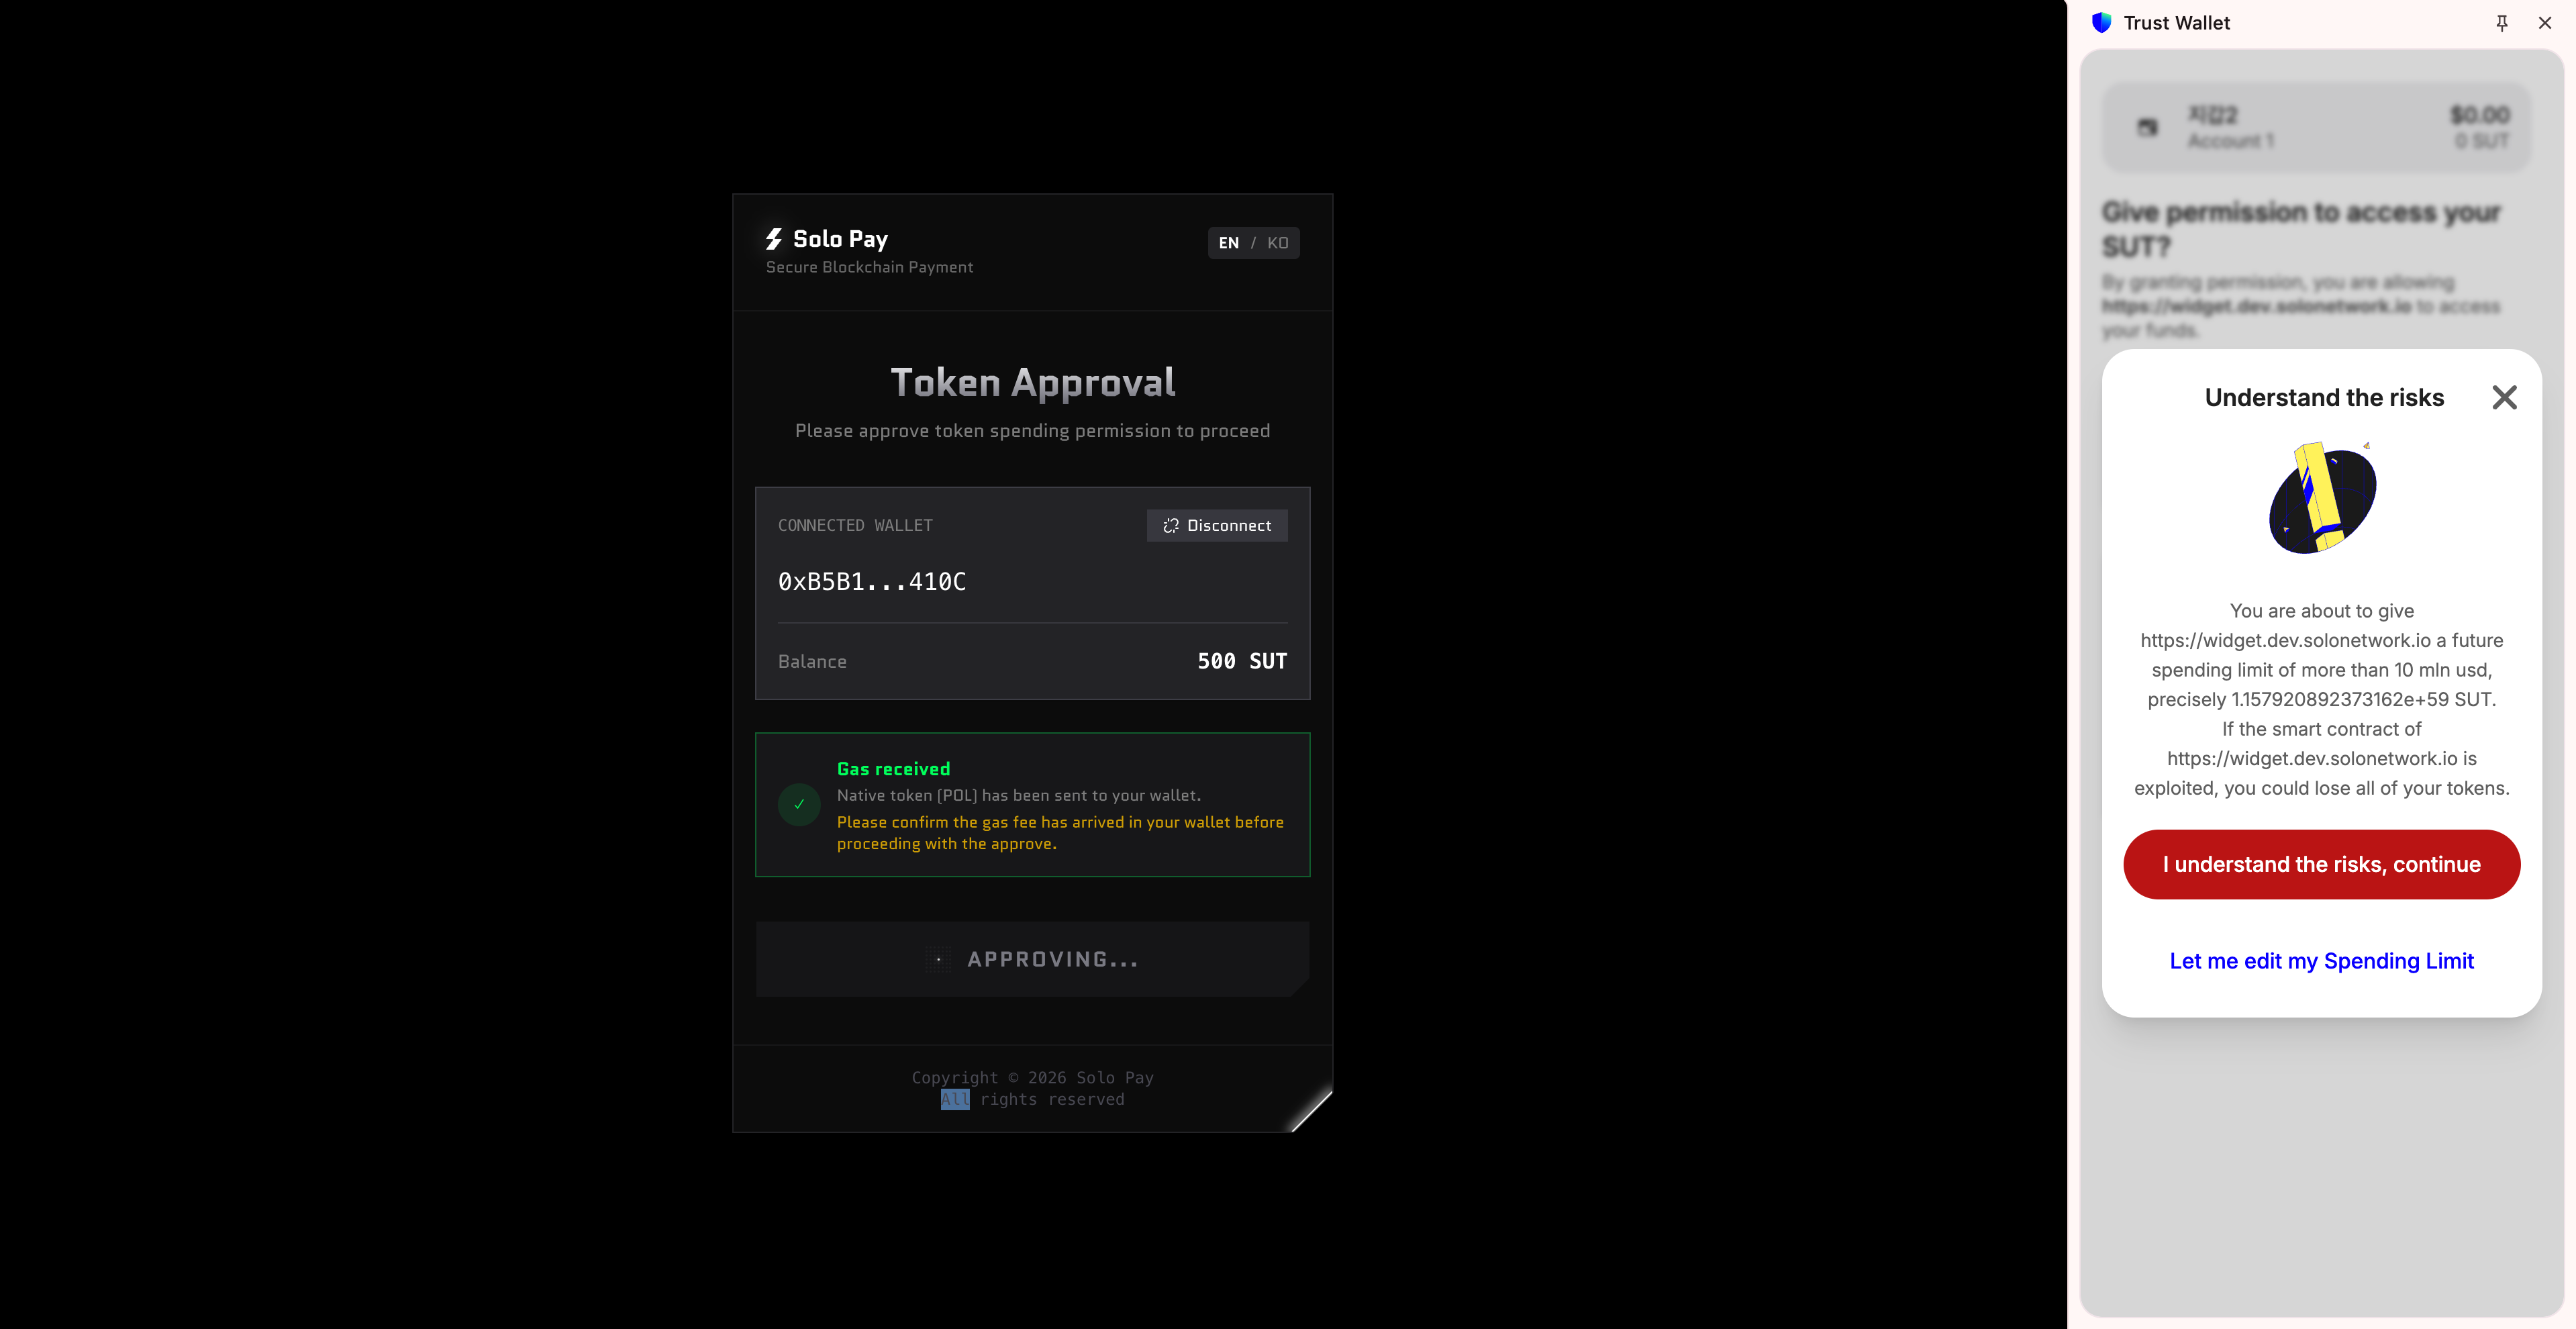
Step 6: Review Payment Details & Proceed
Once token approval is complete, you will proceed to the payment screen. Review the amount, network, and gas fee. The gas fee shows Free (Covered by Solo Pay). Click PAY NOW.
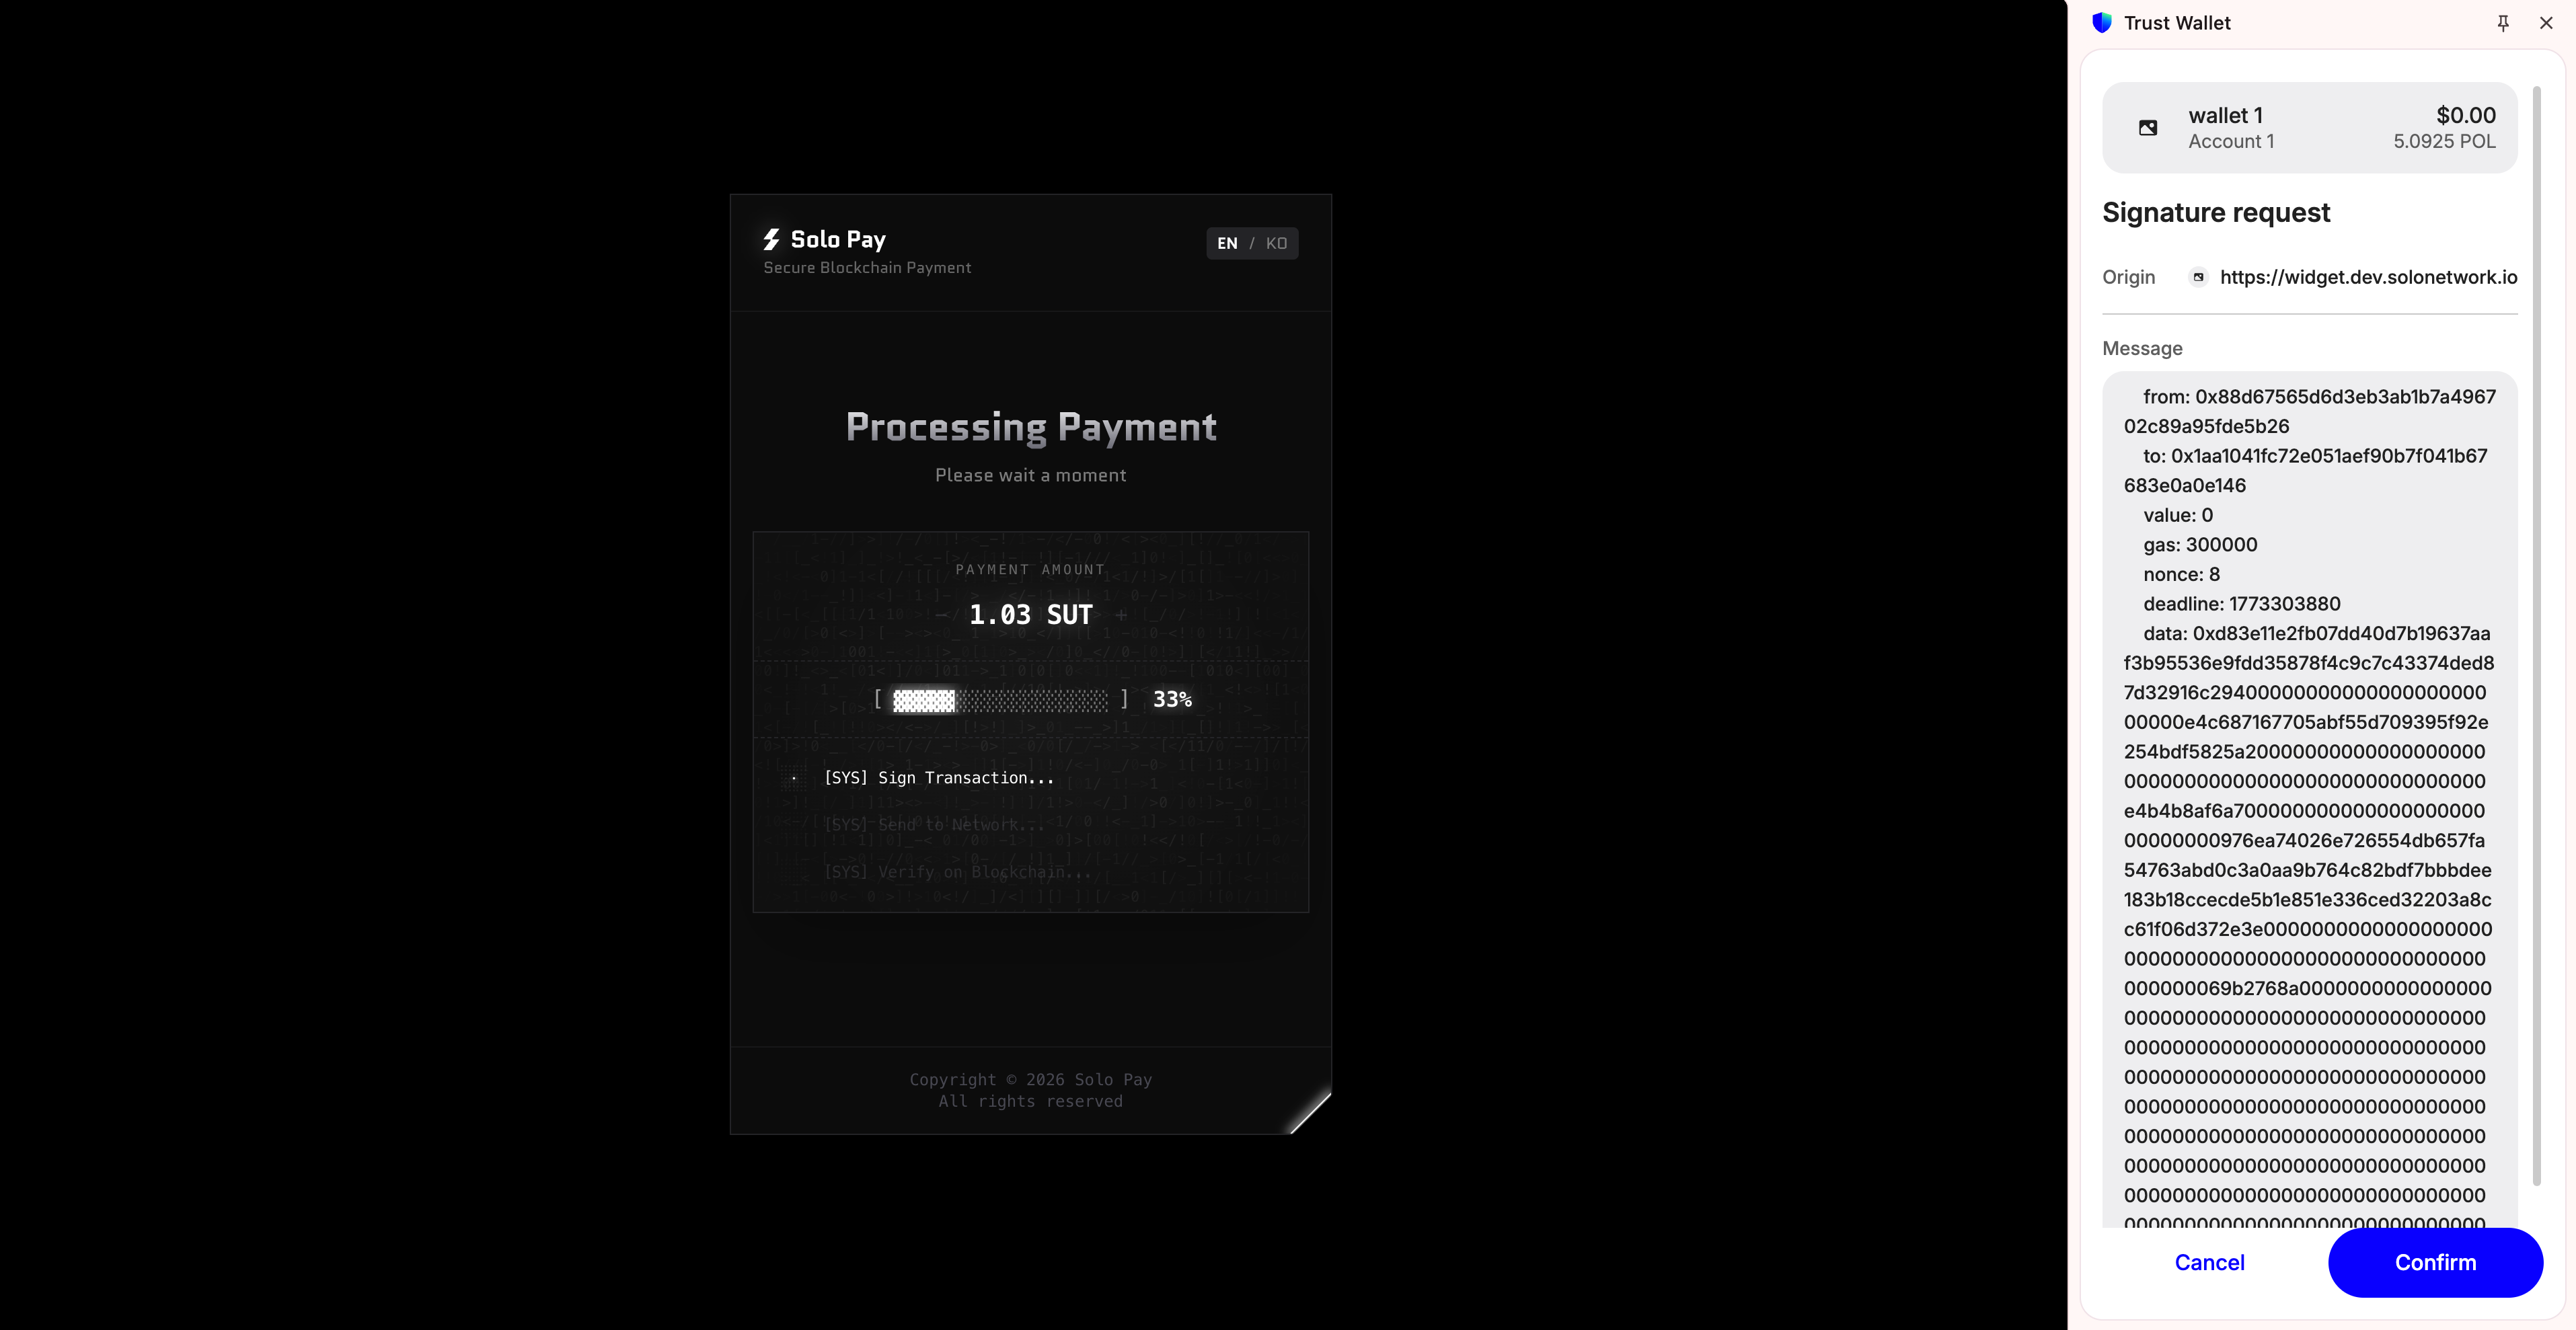
Step 7: Sign the Payment Request
A Signature request popup will appear. This is the final payment authorization signature. No gas fee is charged. Click Confirm.
Step 8: Payment Complete
When the Payment Completed screen appears, your payment is processed, and the funds are held securely. Click RETURN TO MERCHANT to return to the merchant page.